
Connecting to Claude
Claude adds MCP servers as connectors, and it's a one-time setup. Here's how to point it at your Socialpruf data and confirm the connection is live.
Connecting to Claude
Claude supports MCP servers as connectors. You'll add Socialpruf once, and it stays available in every conversation after that.
Before you start: Every Claude plan supports MCP connectors but the free Claude plan only allows you to maintain one custom connector at a time.
Step 1: Add the Socialpruf connector
- Click your profile in the bottom-left corner and open Settings.
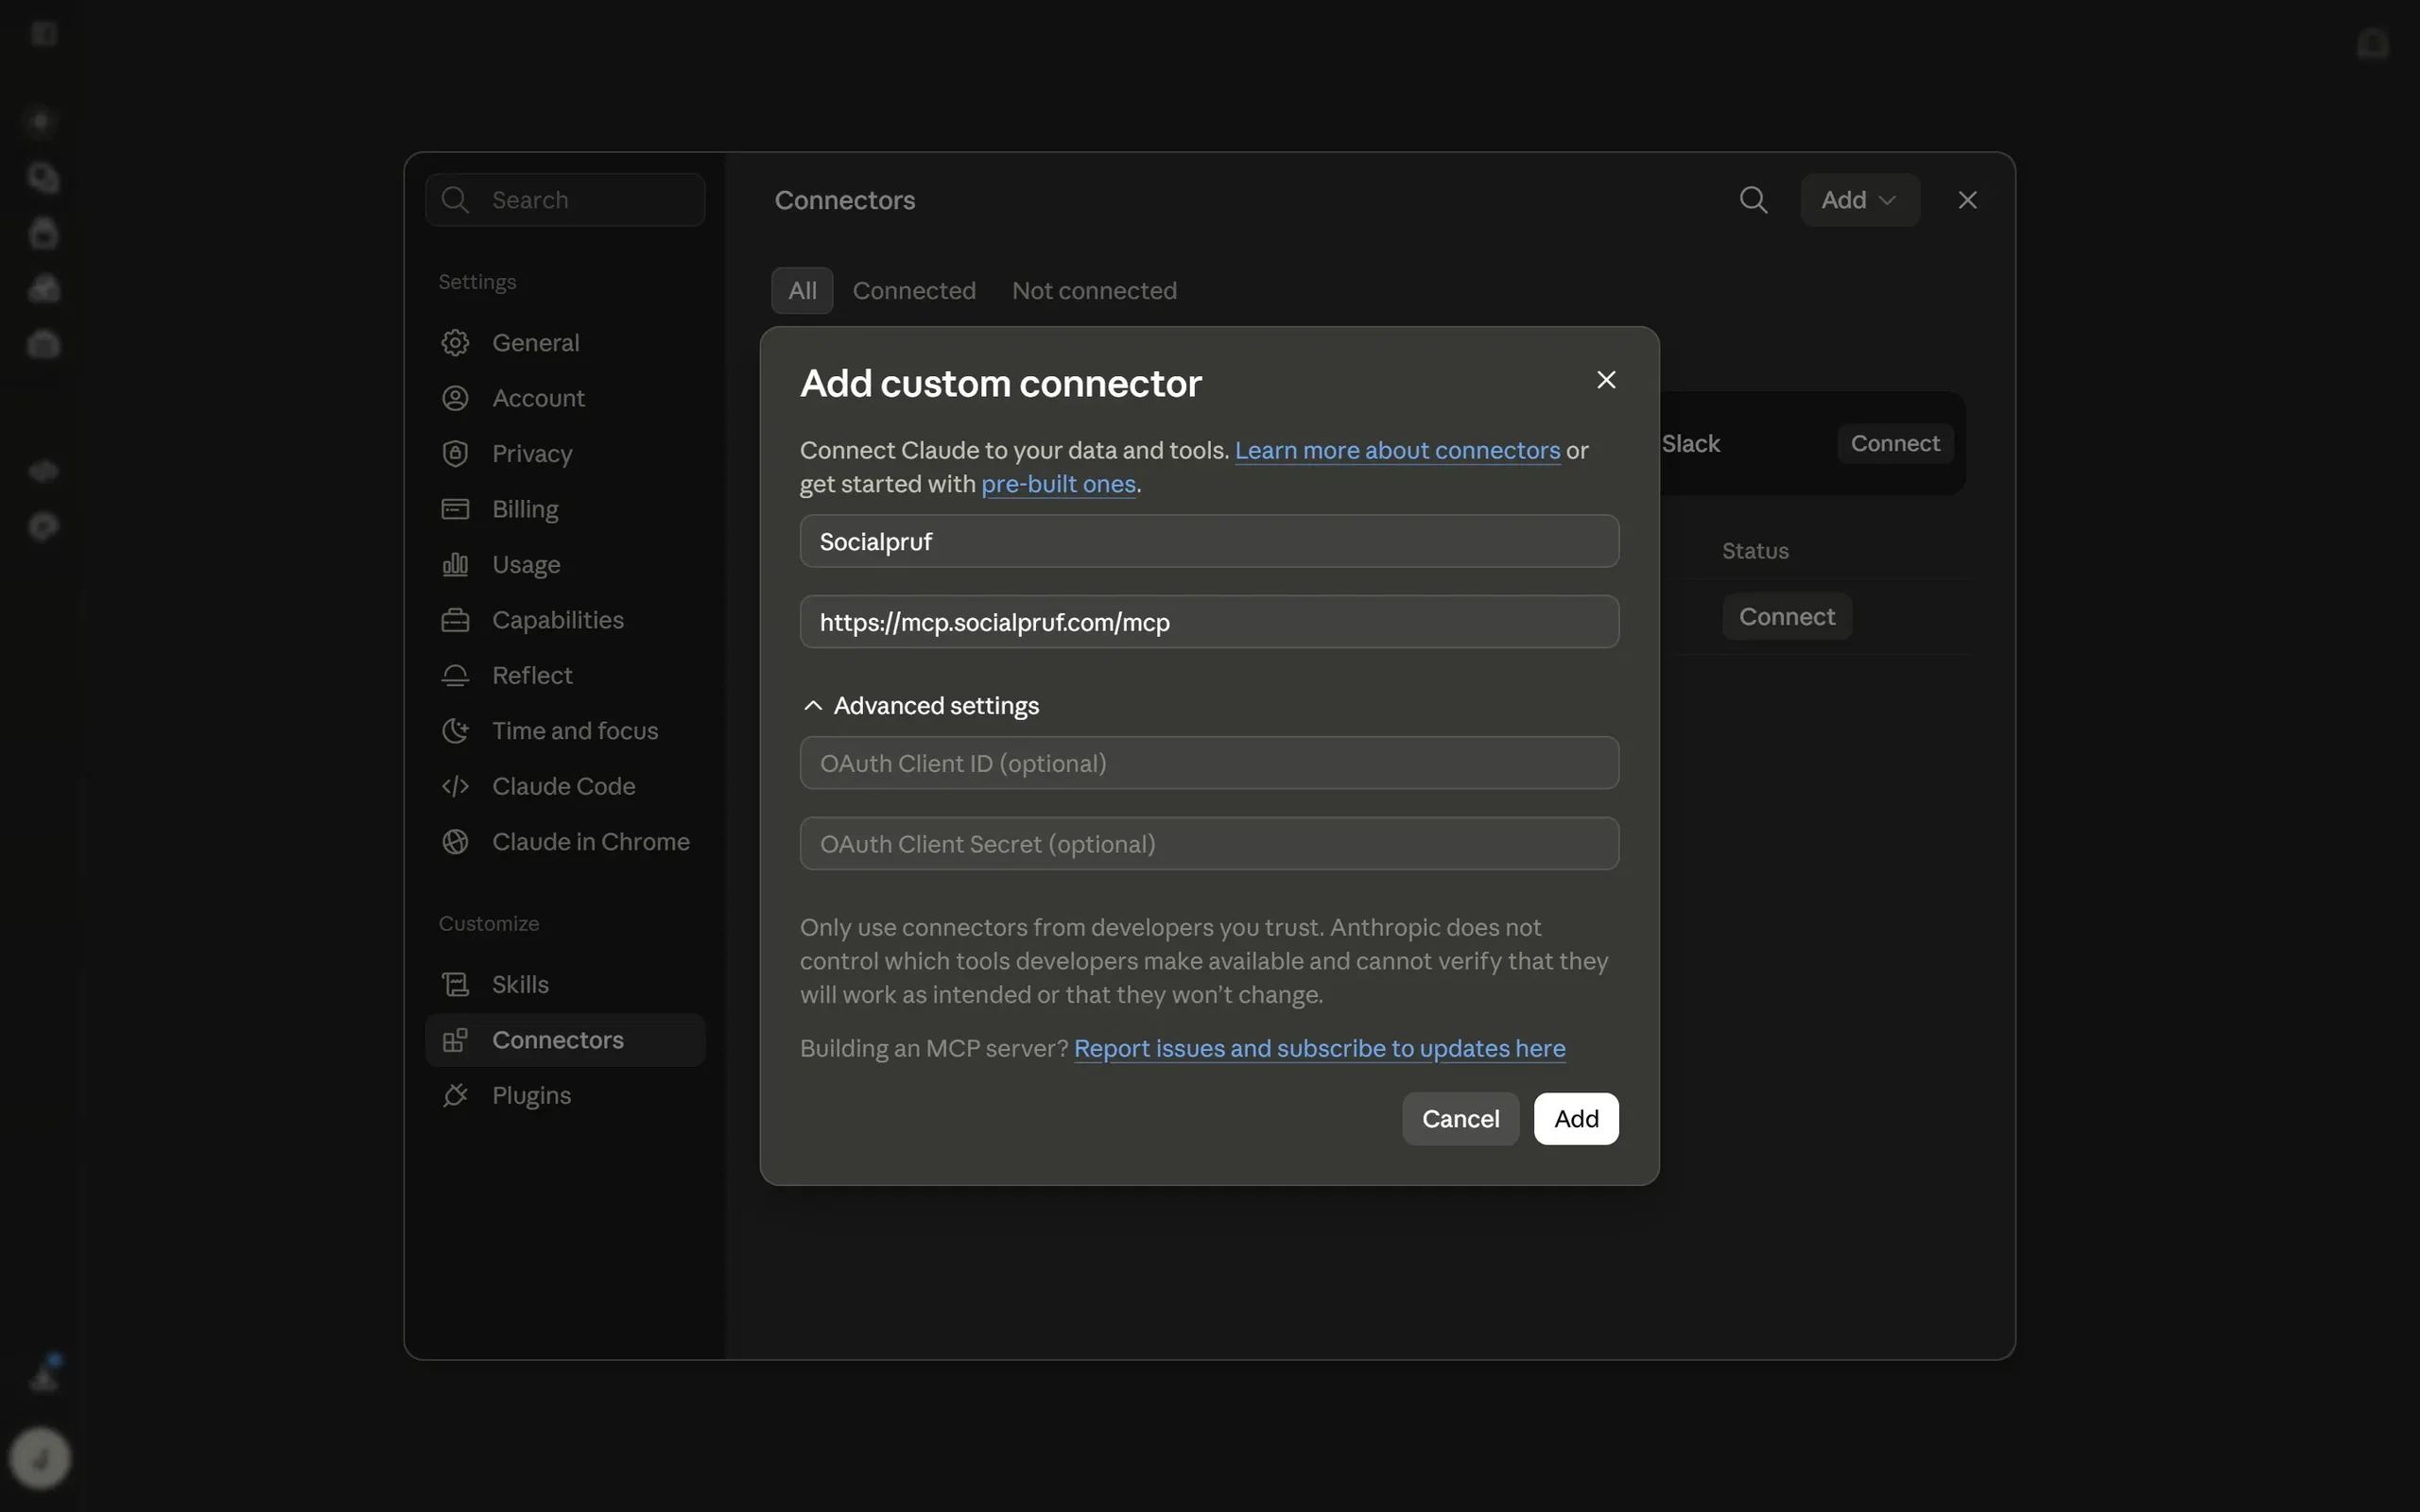
- Go to Connectors, then click the Add button, choose “Add custom connector”. If you're on the free plan and the button is unavailable, remove your existing custom connector first.
- In the modal, name the connector Socialpruf.
- Paste the server URL into the remote MCP server field:
https://mcp.socialpruf.com/mcp - Click Add.
With everything filled in, your screen should look like this:
Step 2: Sign in and authorize
You will be presented with a screen like this:
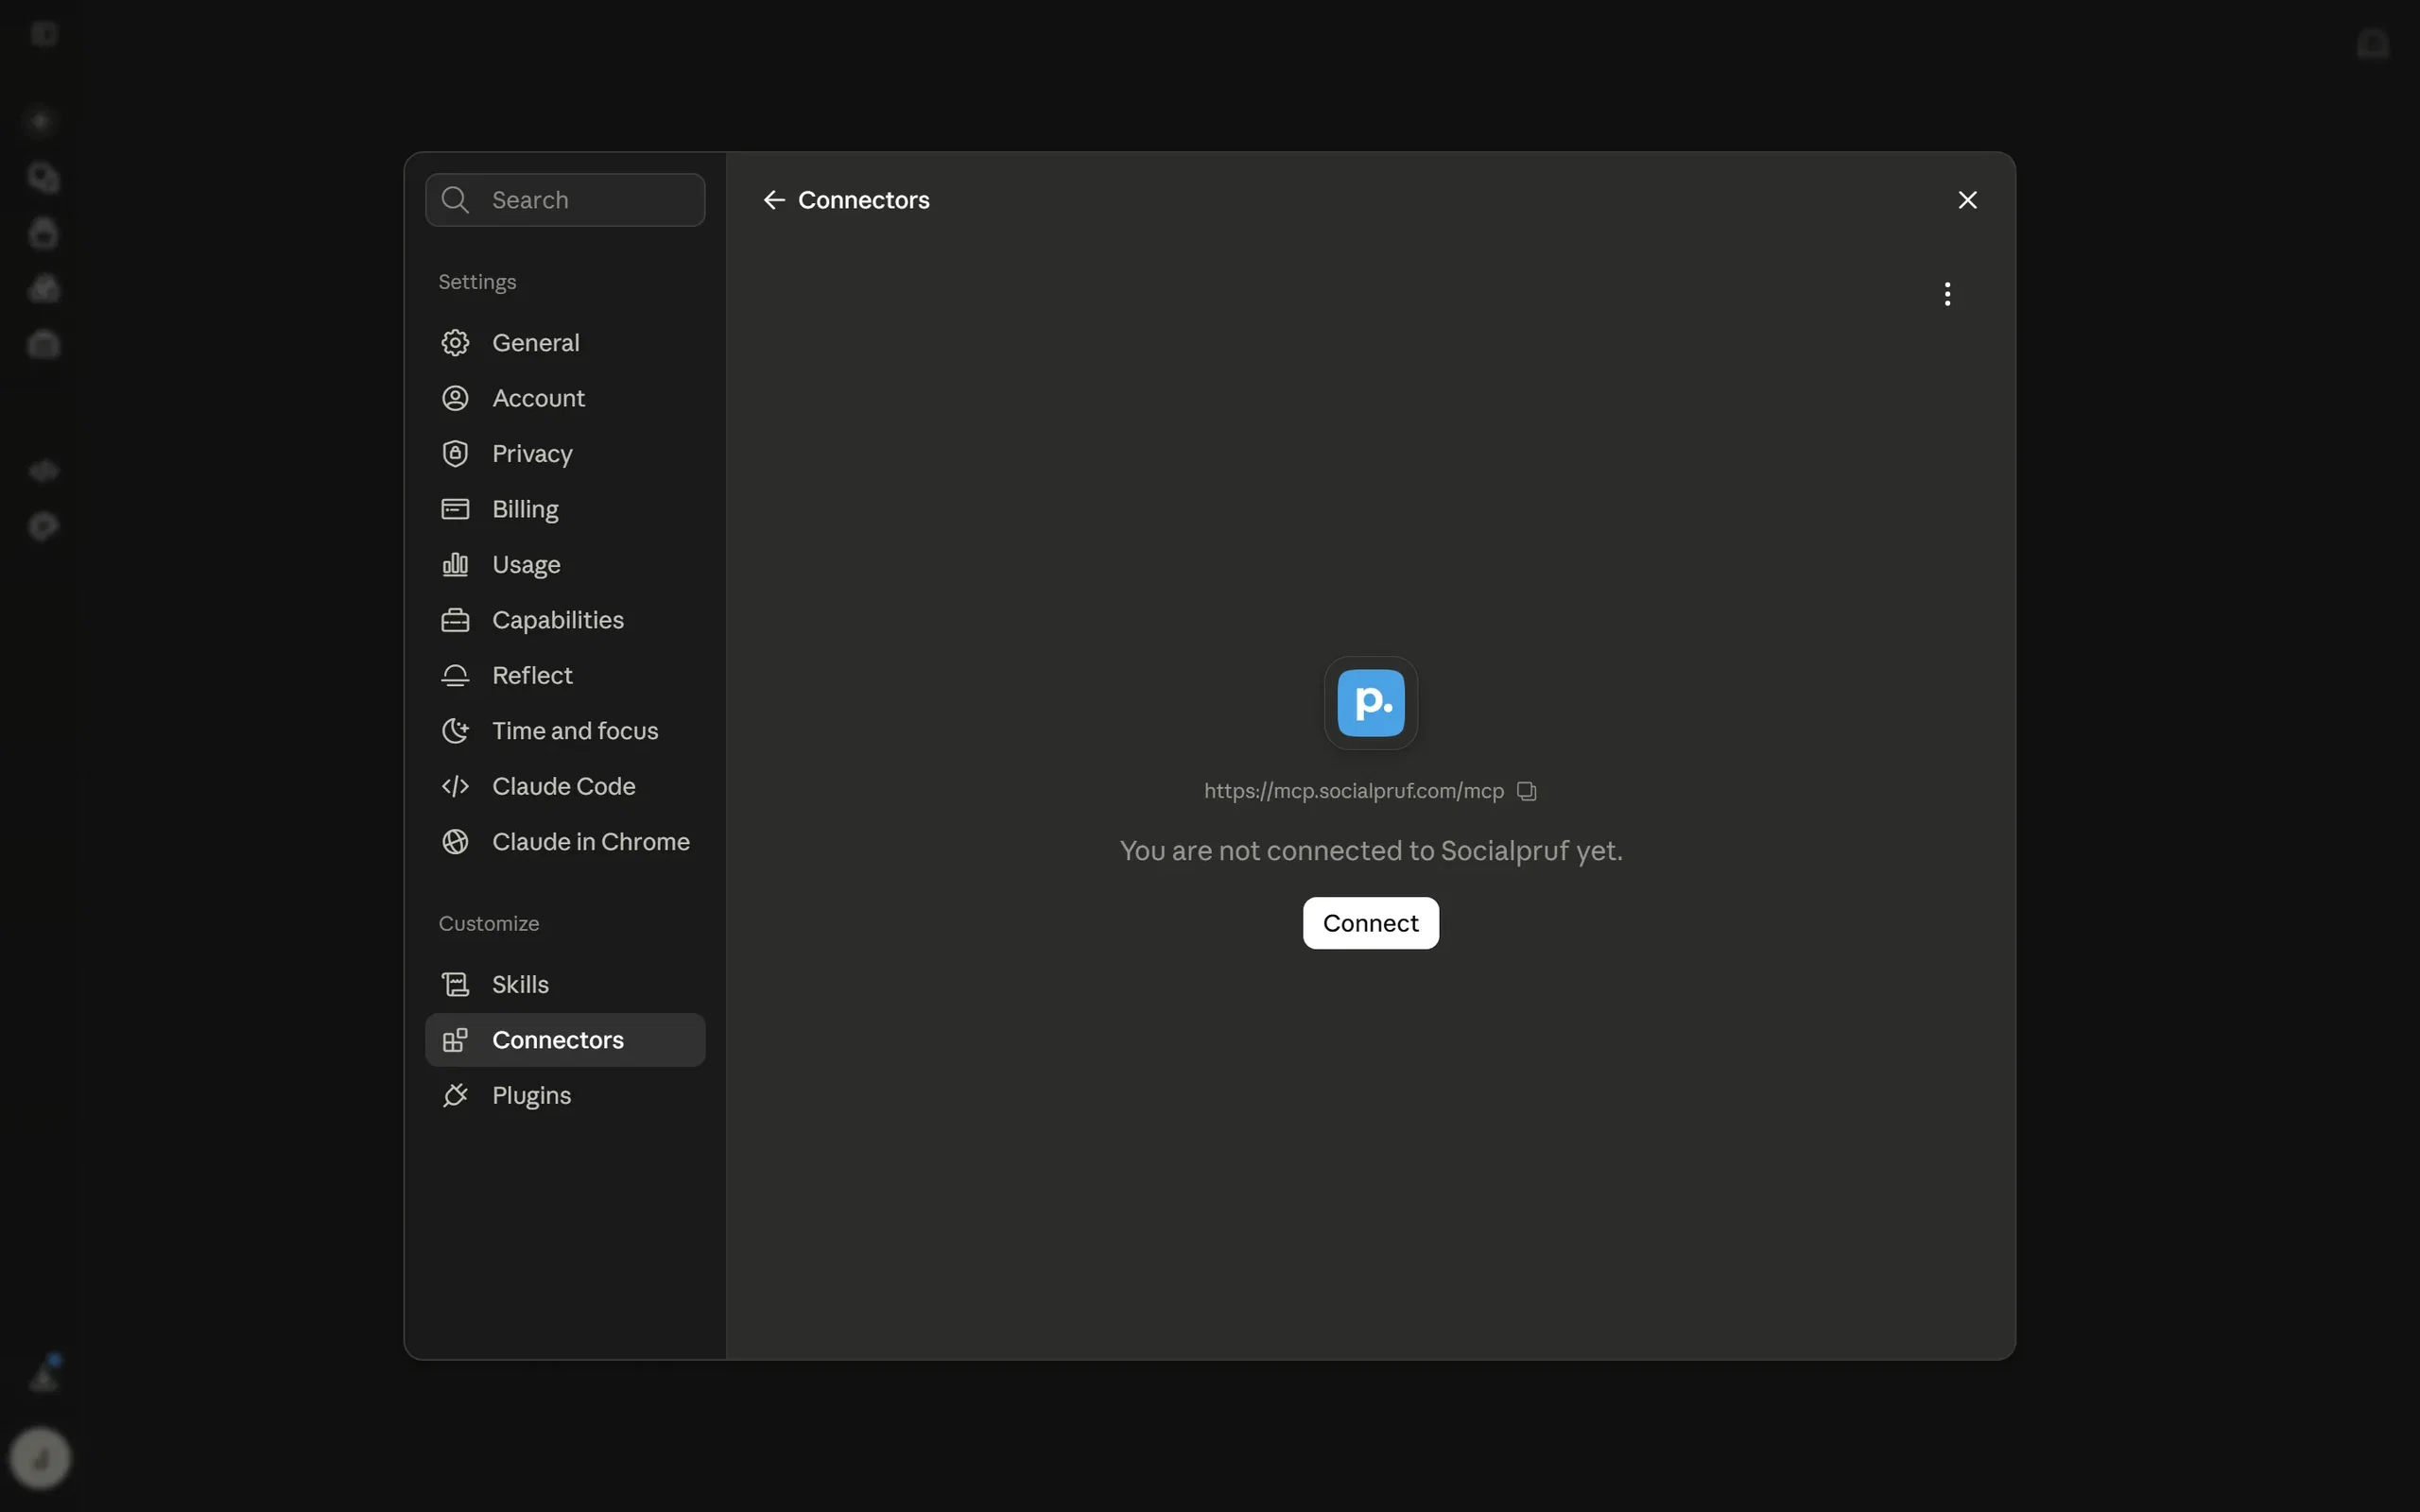
Click Connect next to Socialpruf. Claude will send you to Socialpruf to sign in, then to an authorization page. Approve it and you'll land back in Claude with the connector listed as connected.
To check it worked, start a new chat and ask something only your live data could answer, like “which of my accounts grew fastest last month?” Claude will ask permission to use the Socialpruf tools the first time; approve it and you're running.
If you hit an error
You may see: Error: Developer API is not enabled for your organization. If so, reach out to the Socialpruf team and they'll resolve it for you shortly.