
Connecting to ChatGPT
The ChatGPT flow mirrors Claude's, with a couple of wrinkles. Add the same server URL, turn it on in a conversation, and your data is live.
Connecting to ChatGPT
ChatGPT can connect to the same server, with one extra step up front: custom MCP tools live behind Developer Mode, so you'll switch that on before adding Socialpruf. It's a one-time setup, and the connector stays available in every conversation afterwards.
Before you start: you'll need a paid ChatGPT plan: Plus, Pro, Business, or Enterprise. Developer Mode isn't available on the free tier.
Step 1: Turn on Developer Mode
- Click your profile in the bottom-left corner and open Settings.
- Go to Security and login, scroll down to Developer Mode, and toggle it on.
Step 2: Add the Socialpruf tool
- Close Settings and select Plugins in the left nav bar.
- Click the + in the top-right corner to add a new tool. If you don't see the plus button, developer tools may not be enabled.
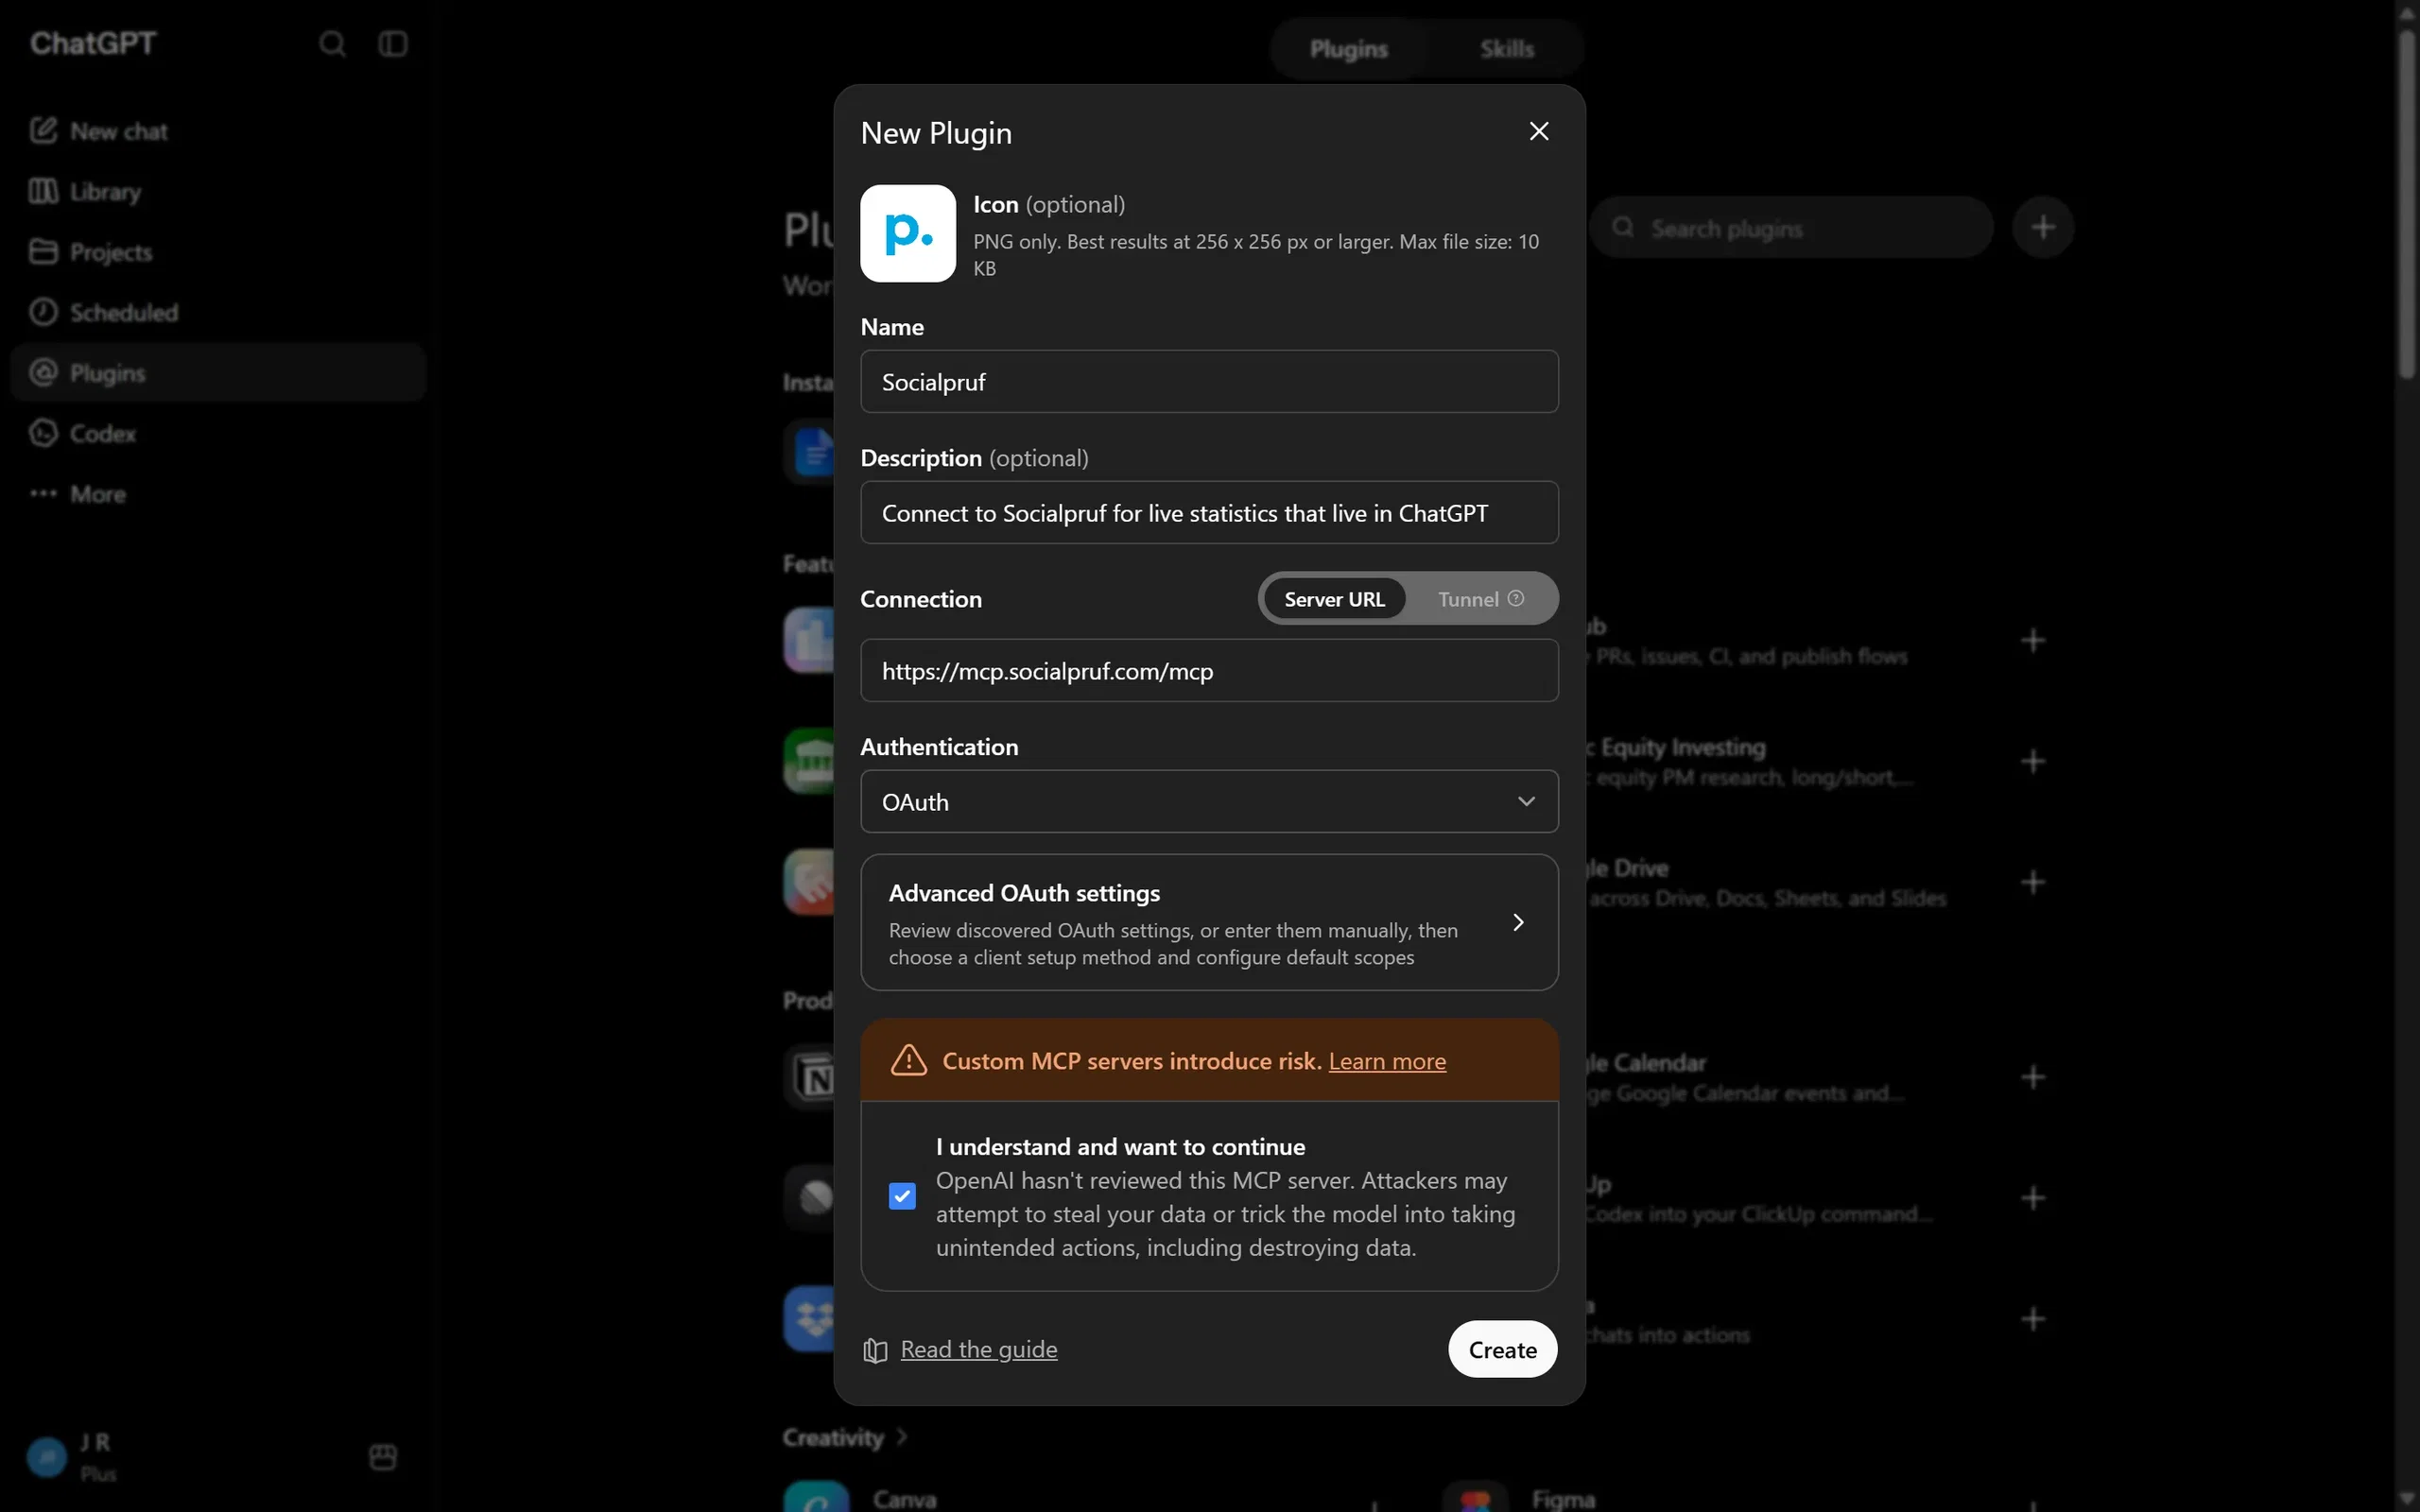
- In the modal, name the tool Socialpruf. A description and icon are optional; add them if you like a tidy list.
- Paste the server URL into the MCP server field:
https://mcp.socialpruf.com/mcp - Click Create.
With everything filled in, your screen should look like this:
Step 3: Sign in and authorize
ChatGPT will show a sign-in screen for the new tool:
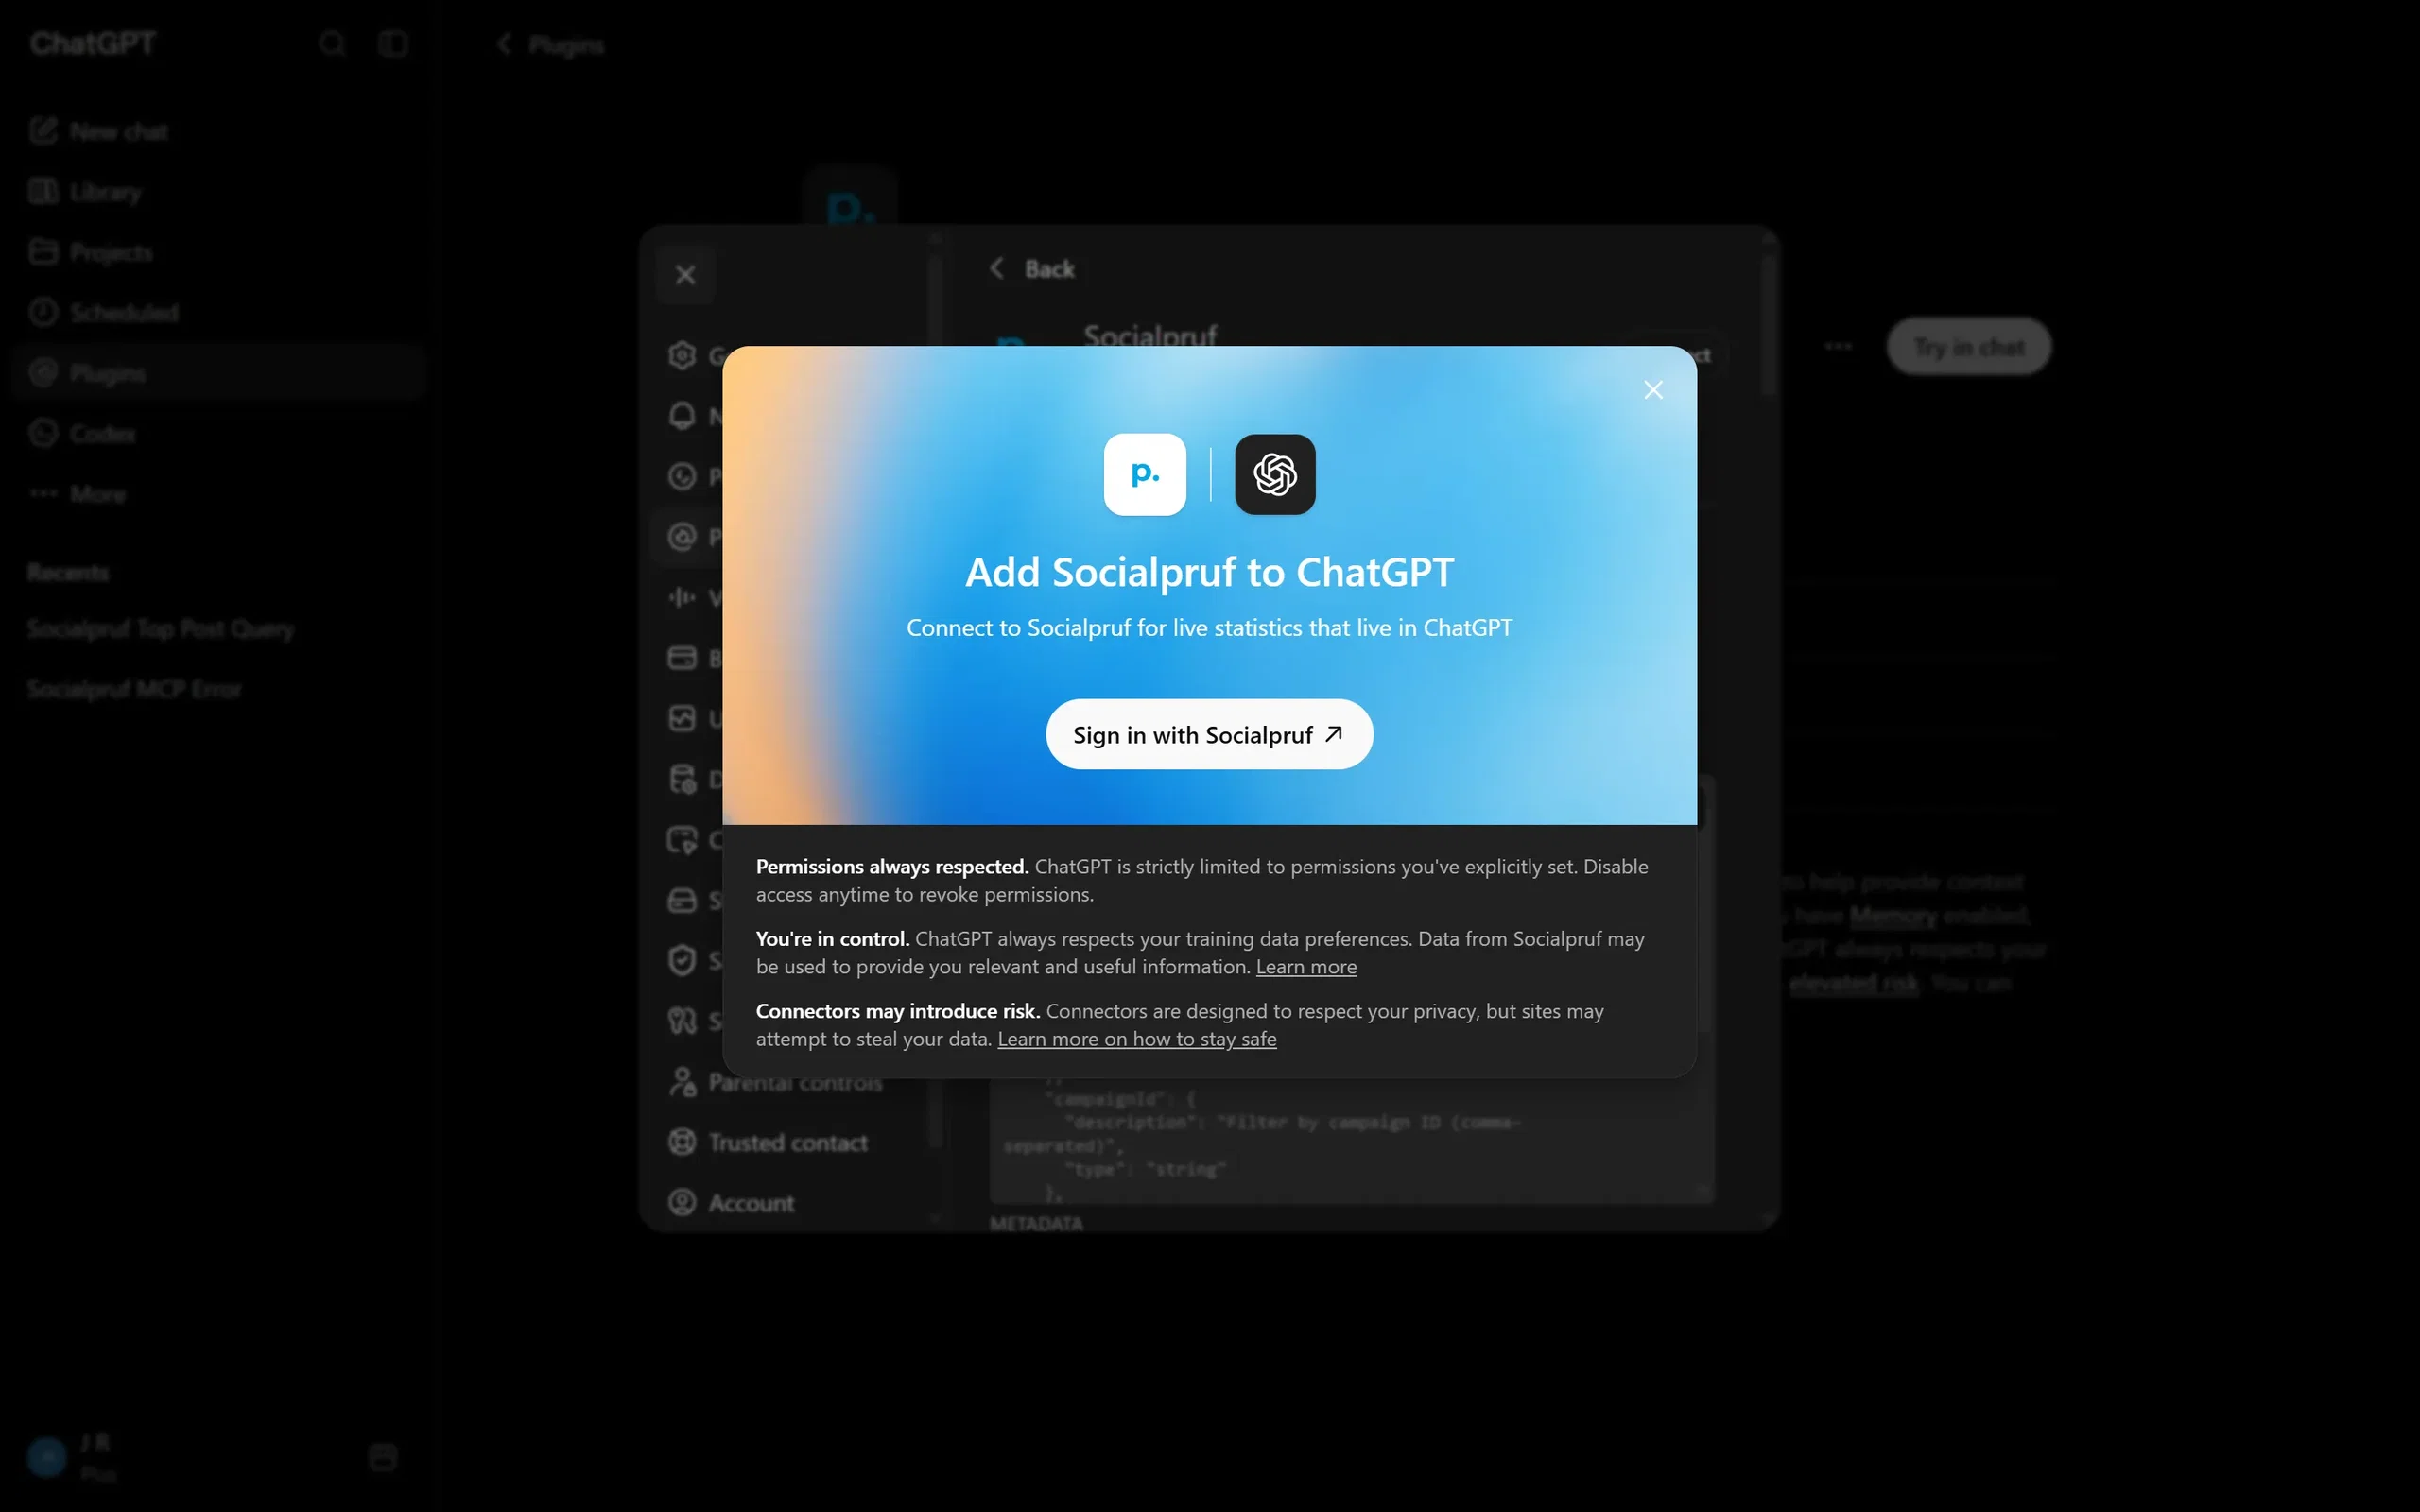
Click Sign in, log in to Socialpruf, and you'll land on an authorization page showing your organization. Approve it and you're connected; now start asking away.
If you hit an error
You may see: Error: Developer API is not enabled for your organization. If so, reach out to the Socialpruf team and they'll resolve it for you shortly.