NewGet @thestrongcook's full report

instagram analytics
Similar Accounts:
instagram analytics
Similar Accounts:
followers
256K
impressions
117M
likes
4.16M
comments
18.1K
posts
131
engagement
3.55%
emv
$3.41M
Average per post
897K
Key Metrics
Impressions
monthly
Distributions
Content
7.57M
171K
549
11mo ago

thestrongcook
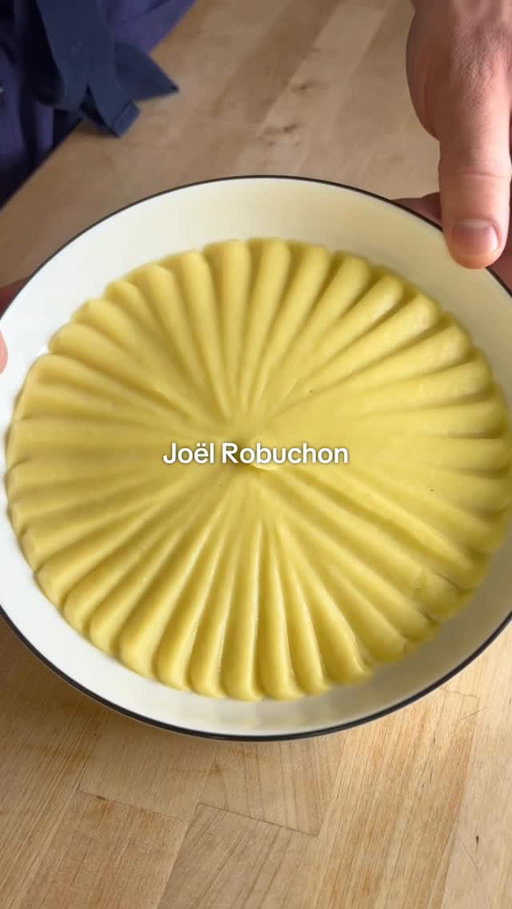
How to Make Joël Robuchon’s Mashed Potatoes 🥔🇫🇷 🥔🇫🇷
FULL RECIPE BELOW ⬇️
INGREDIENTS:
1.25kg ratte potato (or Yukon gold) (your yield should be 1kg after peeling)
250mL whole milk **
250g unsalted butter, diced
4-5 sprigs thyme
1 tsp black peppercorns
2 cloves garlic, gently smashed
Fine sea salt, to taste
** All of this milk likely won’t be needed. Some can be kept aside to re-heat the potatoes later.
INSTRUCTIONS:
1. In a large, heavy bottom pot, ideally large enough to fit all your potatoes in a single layer, cover your potatoes with cold water. Bring to a boil over high heat, then lower your heat to medium. Allow your potatoes to cook for 20-30 minutes, or until you can pierce your potatoes with a pairing knife with zero resistance.
2. While your potatoes are cooking, bring your milk to a boil with your thyme, garlic and black peppercorns. As soon as it comes to a boil, turn off the heat and allow the aromatics to steep while the milk stays hot.
3. When your potatoes are done cooking, strain them, and let them sit in the strainer for 5-10 minutes to allow steam to be released. Once they are cool enough to touch, but still hot, peel the potatoes & discard the skins.
4. Press your potatoes through a potato ricer into a large bowl. Strain the aromatics out of your milk, and pour half of the milk into the riced potatoes. Fold the milk gently into the potatoes until incorporated. Then, pass your potatoes once more through a fine mesh strainer into a large pot (this step is optional, but does result in THE smoothest potatoes).
5. Put the pot over low heat, and add a couple tsp more milk as needed until your potatoes are smooth. At this point, you can decide how smooth/luxurious you would like your potatoes. If you want them to be more of a "purée", add all of the butter and extra milk for the true Joel Robuchon Ratio. If you want more of a traditional mashed potato consistency, don’t add any more milk, and only add half the butter. Regardless of what you choose, at this point you can season your potatoes with salt to taste. Serve your potatoes as a side with any roast or braised meat, and enjoy!
#mashed #potatoes #michelin #homecooking #Recipe

5.84M
256K
827
5mo ago
thestrongcook
How to Cut the PERFECT Chives (pt. 2) 🔪🔪
This is a behind-the-scenes of my second attempt at getting a perfect 10 from @ratemychives!
I’ll be sharing my photo submission tomorrow, so be sure to follow allong to see the final result.
If you’re looking for tips on how to cut chives yourself, check out my recent video where I walk you through the process step-by-step ⬇️
https://www.instagram.com/reel/DWW6xGel-UL/?igsh=MWZ4dTBxcDBlczVpdw==
#chives #knifeskills #homecooking
5.08M
168K
590
12mo ago
thestrongcook
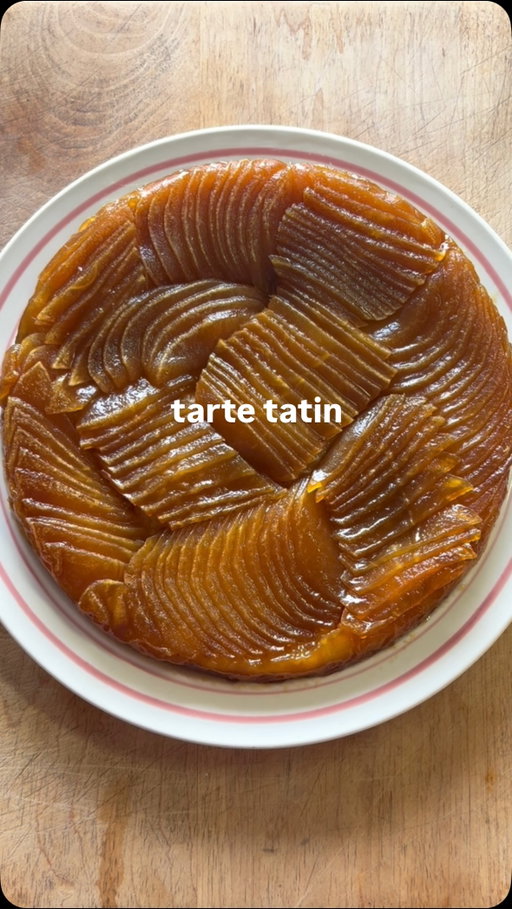
How to Make an Apple Tarte Tatin 🍎🍎🍎
NOTE: this is for a 9" cast iron skillet - measurements for a bigger/smaller pan will need to be scaled accordingly
INGREDIENTS:
4 large honeycrisp apples
1 large sheet frozen puff pastry (thawed)
2/3 cup granulated sugar
1 tbsp apple cider vinegar
1 tbsp water
3 tbsp cold unsalted butter
250 mL 35% whipping cream
1 tbsp icing sugar
1 tsp cinnamon
1 tsp vanilla extract
INSTRUCTIONS:
1. Peel your apples, and cut each apple into 3 equal segments, removing the stem and core. Place your peeled apple segments in a large container or bowl, and submerge them with hot water from your tap. (Tap water at its hottest setting, is typically between 50-60 degrees Celsius, which is what we’re aiming for - if not, adjust the temperature as needed!). Let your apples sit in the water for at least 10 minutes, or until we are done the next step.
2. While your apples are soaking, make your caramel! Using a 9" round cast-iron pan (you can also use another pot/pan to make your caramel, then transfer it to a 9" round baking dish after). Cover the bottom of your pan with an even layer of your granulated sugar, then drizzle your 1 tbsp vinegar and 1 tbsp water to cover the sugar (add more water if needed to cover the sugar). Turn your stove top to medium heat, and allow the sugar to come to a boil, before reducing into a caramel. What you are looking for with your caramel, is for a light brown colour to appear. Once you see this (likely just in one section of your pan, VERY CAREFULLY tilt your pan in a circular motion to make sure the sugar caramelizes evenly - but DO NOT stir or whisk your caramel at any point, or else it will crystallize. Once your sugar is evenly caramelized everywhere (now a thick, syrupy consistency), stop the caramelization by stirring in your cold butter. At this point it is okay to stir, and you will continue stirring for 2-3 minutes, or until the caramel is thick and emulsified (see video for a visual). Remove your caramel from the heat.
RECIPE CONTINUES IN THE COMMENTS ⬇️
#apple #tartetatin #homecooking #recipe
4.84M
185K
636
9mo ago
thestrongcook
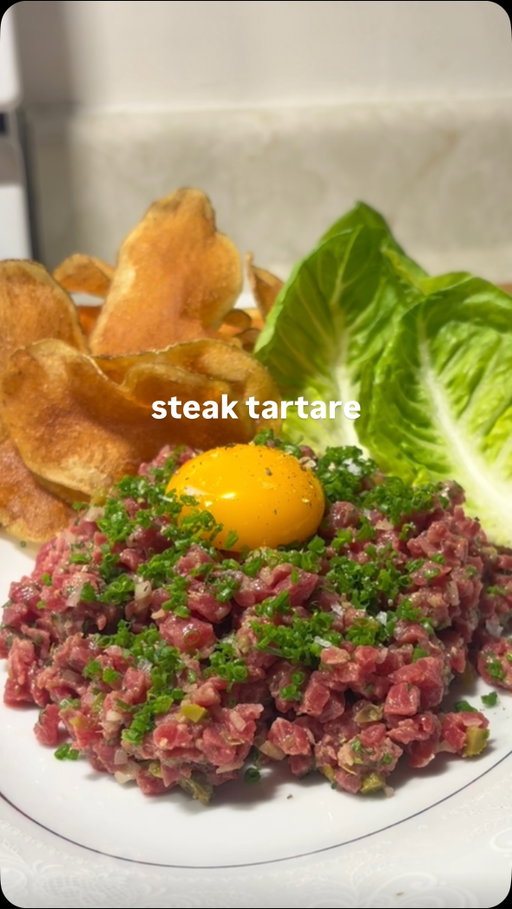
MY TOP 3 REELS OF THE YEAR - #2: How to Make Steak Tartare 🥩🥩
One of my favourite parts of creating content is exposing people to foods they wouldn’t normally eat, and it turns out A LOT of people haven’t tried beef tartare! There was a huge debate in the comments of the original video regarding whether or not beef tartare is delicious (spoiler… IT IS), and I’d love to keep promoting that narrative 🙌. This reel is without a doubt one of my favourites of 2025, and it helped define what kind of content I want to make going forward.
RECIPE BELOW ⬇️
INGREDIENTS:
- 200g cut of lean beef from a reputable butcher. Beef tenderloin for a more tender texture, eye of round or top round for a bit more chew.
- 1 shallot
- 4 gherkin pickles
- 2 tsp capers
- 2 brown anchovies
- 1/4 bunch parsley
- 1/4 bunch chives
- 1 tbsp Dijon mustard
- 1/2 lemon
- olive oil, tobasco, Worcestershire to taste
- salt and fresh cracked pepper to taste
- 1 large russet potato
- 1L canola oil (for frying)
- 1 head gem lettuce
- 1 egg yolk
INSTRUCTIONS:
TARTARE: 🥩
1) Thinly slice your beef approx. 1/2 cm thick, and lay on a sheet pan lined with parchment. Place in the freezer until beef is semi-frozen.
2) While waiting for your beef, finely chop your shallot, gherkins, capers, anchovies and parsley, add to a chilled mixing bowl. Finely chop chives and set aside.
3) When beef is semi-frozen, dice it into approx 1/2 cm dice, and mix with your other chopped ingredients.
4) Mix with Dijon and lemon juice, a generous drizzle of olive oil, as well as a few dashes of tobasco and Worcestershire. Season with salt and freshly cracked pepper. Taste your tartare and adjust seasoning.
5) Plate your tartare on a chilled plate, garnish with chives and your egg yolk. Serve with potato chips and lettuce leaves.
#steak #recipe #homecooking
4.36M
161K
431
6mo ago
thestrongcook
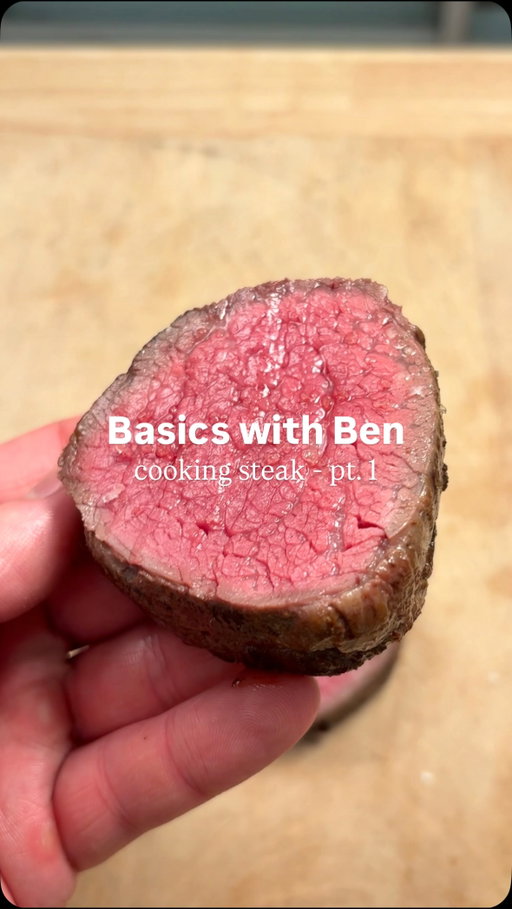
How to Cook Steak pt.1 🥩🥩 (Using a Cake Tester ) - BASICS WITH BEN
FULL INSTRUCTIONS BELOW ⬇️
DISCLAIMER: there is no one single way of cooking a steak - you will always need to use a mix of feel, intuition and visual cues when cooking a steak. At the end of the day, if your steak is perfectly cooked, that’s all that matters! HOWEVER - I swear by this method, and I’ve cooked thousands of steaks using a cake tester. And if you’re trying to up your steak-cooking game, this is a great tool to do so!
HOW IT WORKS:
Since a cake tester is made of metal, it conducts heat. Therefor, once it is inserted inside a piece of meat, it will immediately take on the same temperature. For those who don’t know, any "doneness" of a steak (i.e. medium rare, well done…) corresponds to a specific temperature. By knowing the internal temperature of a steak, you know how well it is cooked! And that’s what a cake tester helps you achieve.
In my opinion, what’s far more important than the "finished temperature" of a specific doneness, is the temperature in which you should pull the steak in order to achieve your final desired doneness. The reasoning behind this, is that a steak will rise by 5-10 degrees while resting, so the temperature in which you pull the steak is critical. When I’m using a cake tester, I’m always looking for the perfect "pull temperature", which is different depending on how you like your steak cooked.
In the case of a medium-rare steak (which is how I like most of my steaks cooked), it should be removed from the heat when it’s internal temperature is between 42 and 45 degrees Celsius, in order to reach a final temperature in the mid-50s. While these numbers may seem obscure, when you feel this temperature on a sensitive area of skin - either your inner wrist, or below your lower lip it’s is pretty easily recognizable.
INSTRUCTIONS CONTINUE IN THE COMMENTS ⬇️
#steak #steaks #caketester #homecooking #recipe
4.29M
177K
298
2mo ago
thestrongcook
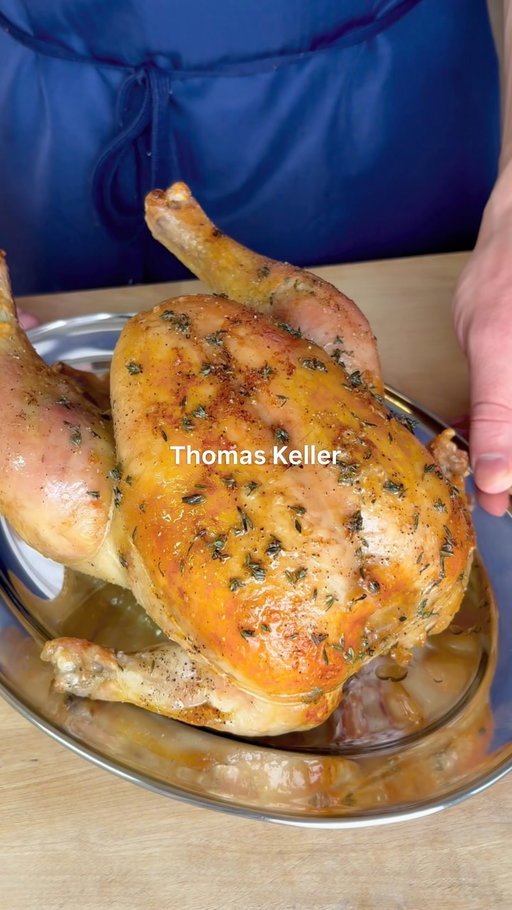
How to Make Thomas Keller’s Roast Chicken ⭐️⭐️⭐️
FULL RECIPE BELOW ⬇️
(feeds 4 people)
INGREDIENTS:
1 4-5 lb chicken
1.75L cold water
250g ice (~1 cup)
1/3 cup kosher salt + more to taste
2 tbsp granulated sugar
2 bay leaves
2 sprigs rosemary
1 tsp whole black peppercorns
1/2 lemon
1/4 lb + 1 tbsp butter
7-8 sprigs thyme
1 large carrot
2 Yukon gold potatoes
1 large leek
1 shallot
100mL white wine
1L chicken stock (no salt added)
Freshly cracked black pepper (to taste)
CHICKEN INSTRUCTIONS:
1. At least 48 hours before cooking, but ideally 3-4 days before, make the brine for your chicken. Add your salt, sugar, bay leaves, rosemary, and whole peppercorns to a small pot, and cover with 250mL of your water. Bring to a boil, just until the salt and sugar is fully dissolved. Transfer your brine base to a large non-reactive container. Whisk in your 250g of ice to cool down the mixture. Add your remaining 1.5L of cold water. Add the juice from your 1/2 lemon, and throw the lemon in as well. Place your chicken into the brine, ensuring it is fully submerged. You can do this by placing a small plate on top of the chicken to weigh it down. Leave your chicken in the brine, refrigerated, for 1 hour per lb of chicken. In our case, 4-5 hours.
2. When your chicken is finished brining, remove it from the brine and place it on a small tray with a wire rack. Pat your chicken dry, and make sure you drain out any liquid in the cavity. Leave your chicken to dry in the fridge, uncovered for at least 24 hours, but ideally 2-3 days before cooking.
3. 1 hour before cooking your chicken, remove it from the fridge to come up to room temperature. While doing so, truss your chicken. You will likely need about 6ft of butcher’s twine. I use the technique from Chef’s Steps on YouTube. It pulls the legs away from the breast, and allows the skin to get crispy everywhere. Here’s the link to the video 👇
🔗 https://youtu.be/G2leEwcDhXo?si=n6qLSr-x_FgXR6-y 🔗
RECIPE CONTINUES IN THE COMMENTS ⬇️
#roastchicken #roast #chicken #homecooking #recipe
4.16M
124K
741
1mo ago
thestrongcook
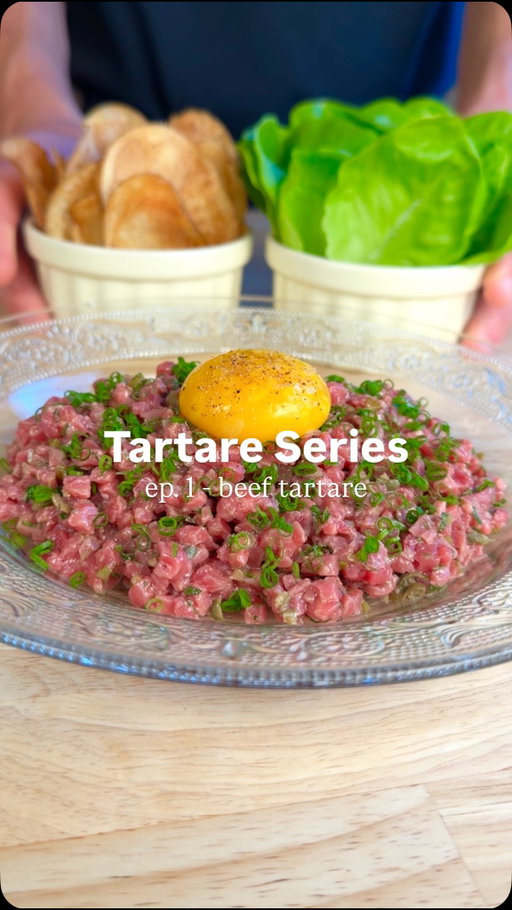
How to Make Steak Tartare 🥩 - THE TARTARE SERIES ep. 1
FULL RECIPE BELOW ⬇️
INGREDIENTS:
- 250g beef (SEE NOTES IN THE COMMENTS ON CHOOSING THE RIGHT CUT)
- 1/2 small shallot
- 1 tbsp chopped gherkin pickles
- 1 tbsp chopped capers
- 1 tbsp chopped parsley
- 1/4 bunch chives
- 1 tsp Dijon mustard
- 1 tbsp lemon
- 2 tbsp olive oil
- tobasco, Worcestershire to taste
- salt and fresh cracked pepper to taste
- 1 large russet potato
- 1L canola oil (for frying)
- 1 head gem lettuce
- 1 egg yolk
INSTRUCTIONS:
TARTARE: 🥩
1) Thinly slice your beef approx. 3 mm thick, and lay the strips on a sheet pan lined with parchment paper. Place the tray in the freezer until the beef is semi-frozen.
2) While waiting for your beef to freeze, finely chop your shallot, gherkins, capers, and parsley. Finely chop your chives and set aside.
3) When your beef is semi-frozen, dice it into approx. 3mm dice. While you are dicing, keep your beef on the frozen tray, as it will keep it cold.
4) In a large chilled bowl, mix your Dijon, lemon juice, and olive oil, along with a few dashes of tobasco and Worcestershire. Keep whisking until the dressing has emulsified. Add your beef to the bowl, along with your shallots, parsley, gherkins and capers. Season with salt and freshly cracked pepper. Taste your tartare and adjust the seasoning.
5) Plate your tartare on a chilled plate, garnish with chives and your egg yolk. Serve with potato chips and lettuce leaves.
RECIPE CONTINUES IN THE COMMENTS ⬇️
#steak #tartare #beef #recipe #homecooking
3.88M
192K
229
1mo ago
thestrongcook
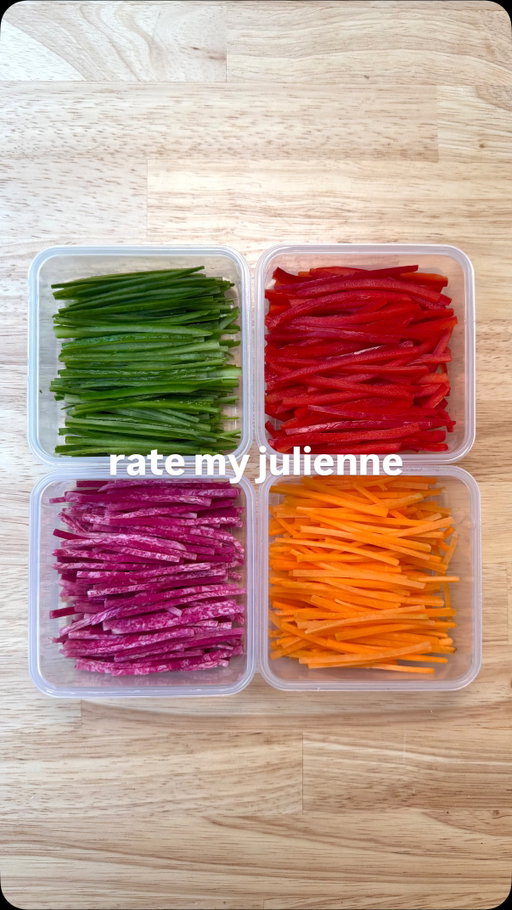
How to Julienne Vegetables 🌶️🥒🥕 KNIFE CUTS EVERY COOK SHOULD KNOW - ep.2
INSTRUCTIONS ⬇️
1. Start off by peeling your vegetables - in most cases, when dealing with root vegetables in particular, the peel will not be used. However, with softer vegetables like cucumber and bell peppers, the skin is essential!
2. Cut your vegetables into segments. Technically speaking, a Julienne is meant to be between 2 and 3 inches long. Cut your segments accordingly! From here, you can square off your segments to make sure they lay flat on all sides, and don’t have any irregular edges.
3. Cut your vegetables into sheets. You want your sheets to be an even 3mm thick. You can use a knife do do this, however, a mandolin is very useful as well! Just be VERY careful when using a mandolin, especially with root vegetables.
4. Once you have your vegetable "sheets" stack them in piles of 4-5 (any more, and your pile will likely shift around). Using a similar motion to a chiffonade, cut your sheets into thin batons that are as wide as the sheets are thick (you’re looking for 3mm x 3mm). Work slowly and methodically - the more focused you are, the more precise your cuts will be.
5. Serve your julienne in a salad or slaw of your choice, and enjoy!
#knifeskills #julienne #frenchcooking #homecooking #recipe
3.17M
229K
215
4mo ago
thestrongcook
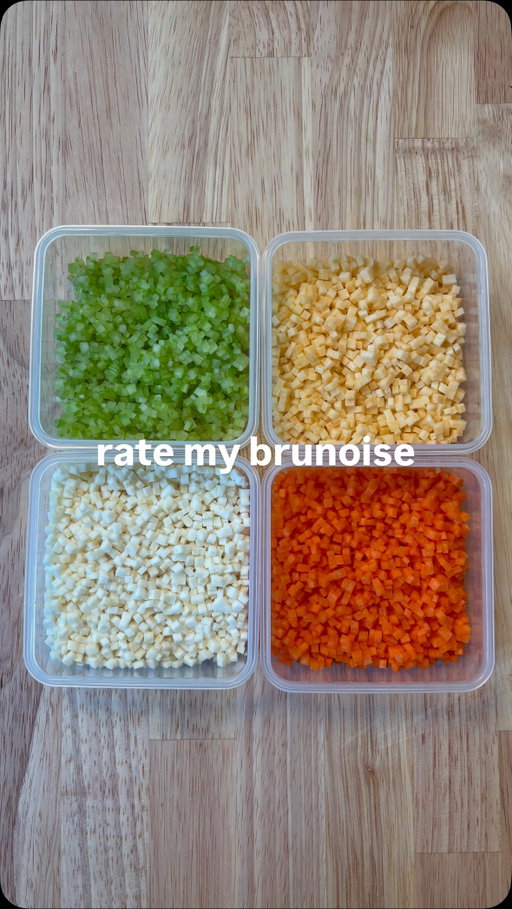
How to Chiffonade & Brunoise 🔪🔪 ft. @tumblerusa #tumblerpartner #knifesharpener
I’ve been loving my new Tumbler Pro knife sharpening set. Get yours via the link in my bio, using code THESTRONGCOOK for up to 25% off.
FULL INSTRUCTIONS BELOW ⬇️
CHIFFONADE:
👉 Why it’s important:
- Chiffonade is the perfect knife cut for larger, leafier herbs. Mint, basil and flat-leaf parsley are great examples of herbs that lend themselves well to chiffonade.
- The technique works well because it ensures each leaf is lined up to be cut evenly, and saves you time vs. chopping clusters of leaves randomly.
- When done properly, each piece is only cut once, which results in less bruising of your herbs overall.
- A nice chiffonade results in a fluffy pile of herbs that is easy to pinch and sprinkle into a dish. For those working in restaurants especially, this is a great feeling!
👉 How to do it:
1) Pick the leaves off the herb you are using, being sure to remove any wilted or damaged leaves, as well as any stems.
2) Make stacks of 5-8 leaves, and roll the leaves tightly onto themselves. Have your knife pressed against the knuckle of your middle finger, and your other fingers tucked behind (holding the herbs). Let your middle finger guide your knife as it moves across the herbs, slicing in a consistent rocking motion. You want your slices to be thin and even.
BRUNOISE INSTRUCTIONS CONTINUE IN THE COMMENTS ⬇️
#brunoise #chiffonade #knifeskills
3.08M
116K
476
5mo ago
thestrongcook
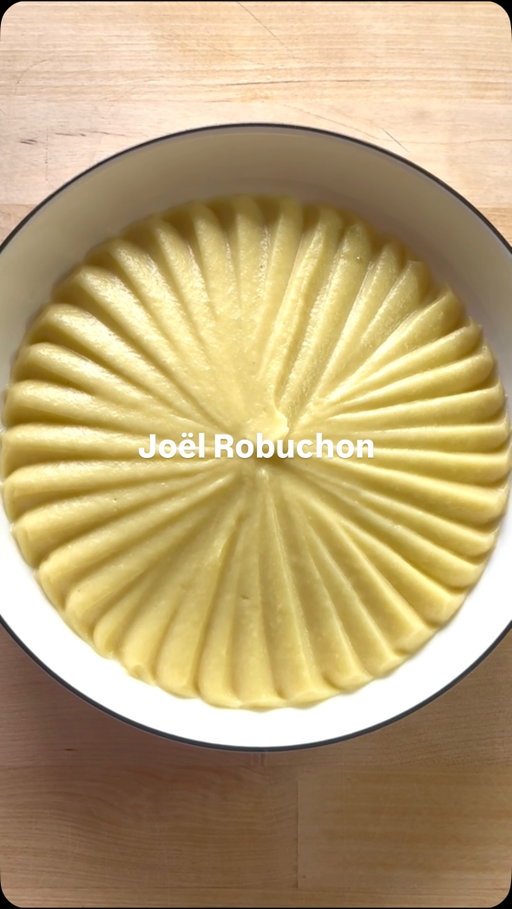
How to Make Joël Robuchon’s Famous Mashed Potatoes 🥔🇫🇷 -@thestrongcook CLASSICS
FULL RECIPE BELOW ⬇️
INGREDIENTS:
1.25kg la Ratte potato (or Yukon Gold) (your yield should be ~1kg after peeling)
250mL whole milk **
250g unsalted butter, diced
4-5 sprigs thyme
1 tsp black peppercorns
2 cloves garlic, gently smashed
Fine sea salt, to taste
** All of this milk likely won’t be needed. Some can be kept aside to re-heat the potatoes later.
INSTRUCTIONS:
1. In a large, heavy bottom pot, ideally large enough to fit all your potatoes in a single layer, cover your potatoes with cold water. Bring to a boil over high heat, then lower your heat to medium. Allow your potatoes to cook for 20-30 minutes, or until you can pierce your potatoes with a pairing knife with zero resistance.
2. While your potatoes are cooking, bring your milk to a boil with your thyme, garlic and black peppercorns. As soon as it comes to a boil, turn off the heat and allow the aromatics to steep while the milk stays hot.
3. When your potatoes are done cooking, strain them, and let them sit in the strainer for 5-10 minutes to allow steam to be released. Once they are cool enough to touch, but still hot, peel the potatoes & discard the skins.
4. Press your potatoes through a potato ricer into a large bowl. Strain the aromatics out of your milk, and pour half of the milk into the riced potatoes. Fold the milk gently into the potatoes until incorporated. Then, pass your potatoes once more through a fine mesh strainer into a large pot (this step is optional, but does result in THE smoothest potatoes).
RECIPE CONTINUES IN THE COMMENTS ⬇️
#mashed #potatoes #michelin #homecooking recipe

2.89M
52.8K
474
2mo ago
thestrongcook
Welcome to… SPANISH CLASSICS 🇪🇸🥘🍅
In this series, I’ll be sharing my take on some of Spain’s most famous dishes.
From paella to patatas bravas, you’ll have all the dishes you need to host your next Spanish-themed dinner party.
With each episode, I’ll be sharing a full detailed recipe, so you’re not going to want to miss out!
Be sure to drop a follow - the first episode is out tomorrow ✌️
#spain #tapas #spanishfood #homecooking #recipe
2.77M
85.9K
317
11mo ago
thestrongcook
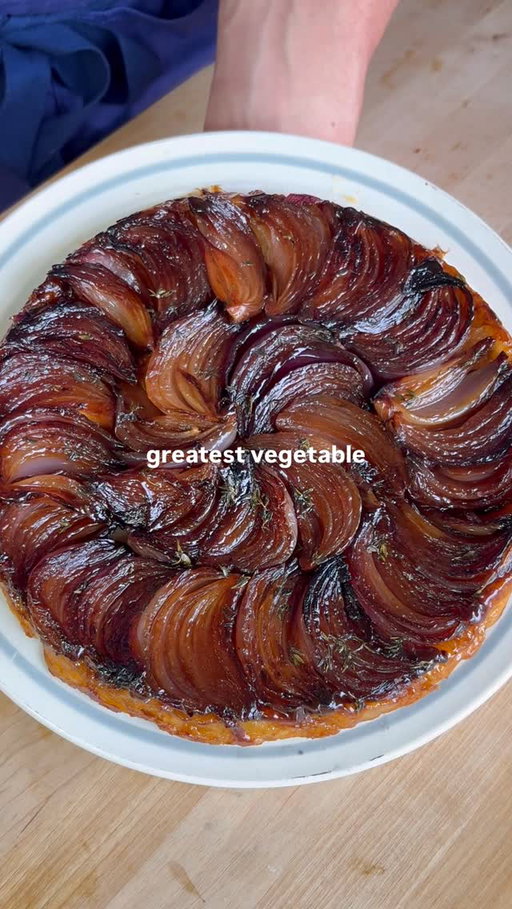
How to Make an Onion Tarte Tatin 🧅🧅
RECIPE ⬇️
NOTE: this is for a 9" cast iron pan - measurements for a bigger/smaller pan will need to be scaled.
INGREDIENTS:
6 small red onions
8-10 sprigs of thyme
1/4 lb of butter
2 tbsp granulated sugar
1 tbsp sherry vinegar
1 10" x 10" sheet puff pastry
1/2 bunch chives
1 lemon
250mL crème fraîche
1/4 bunch parsley leaves
Salt and pepper to taste
Fleur de sel
INSTRUCTIONS
1. Pre-heat your oven to 400 degrees F.
2. Remove the skin from your red onions, and trim the root to remove just the dried/frilly part of the root on the exterior of the onion, keeping the interior of the root intact (it will help keep your onions together, and will eventually fully soften). Divide each onion into 6 equal wedges.
3. In your cast iron skillet, or another heavy-bottom pan, heat 3 tbsp of butter over medium-high heat. Once it begins to foam, add your onions with one of the cut sides down. Season generously with salt. Lower the heat to medium, and allow the onions to cook until nicely golden brown. Then flip the onions onto the other cut side, and cook until that side is brown as well. Remove your onions from the pan and transfer to a tray or plate.
4. If you used your cast iron pan to sear your onions, quickly rinse it clean and wipe it dry. Once the pan has cooled down, spread your sugar around the pan in an even layer. Drizzle your sherry vinegar around the sugar. Place your pan over medium heat, and allow the sugar to caramelized (do not stir - just tilt your pan if needed to allow the sugar to caramelize evenly). When the sugar is light brown in colour (almost all the moisture will appear to have evaporated, and the caramel will be a syrupy consistency), turn the heat to low. Add 3 tbsp butter to the pan, and stir over low heat for 90sec-2min, trying to keep the glaze as emulsified as possible.
5. Turn off the heat and set your pan to the side momentarily. Pick the leaves from your thyme, and sprinkle it around your caramel. CAREFULLY place your onions around the pan in a spiral, being sure to keep the onions as close together as possible.
RECIPE CONTINUES IN THE COMMENTS ⬇️
#onion #tartetatin #homecooking #recipe
2.65M
68.8K
227
8mo ago
thestrongcook
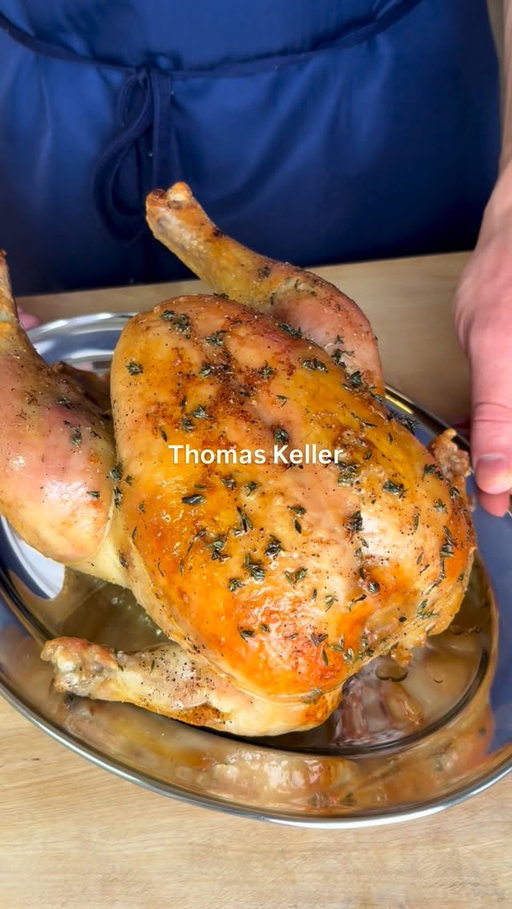
How to Make Thomas Keller’s Roast Chicken ⭐️⭐️⭐️
FULL RECIPE BELOW ⬇️
INGREDIENTS:
1 4-5 lb chicken
1.75L cold water
250g ice (~1 cup)
1/3 cup kosher salt + more to taste
2 tbsp granulated sugar
2 bay leaves
2 sprigs rosemary
1 tsp whole black peppercorns
1/2 lemon
1/4 lb + 1 tbsp butter
7-8 sprigs thyme
1 large carrot
2 Yukon gold potatoes
1 large leek
1 shallot
100mL white wine
1L chicken stock (no salt added)
Freshly cracked black pepper (to taste)
CHICKEN INSTRUCTIONS:
1. At least 48 hours before cooking, but ideally 3-4 days before cooking, make the brine for your chicken. Add your salt, sugar, bay leaves, rosemary, and whole peppercorns to a small pot, and cover with 250mL of your water. Bring to a boil, just until the salt and sugar is fully dissolved. Transfer your brine base to a large non-reactive container. Whisk in your 250g of ice to cool down the mixture. Add your remaining 1.5L of cold water. Add the juice from your 1/2 lemon, and throw the lemon in as well. Place your chicken into the brine, ensuring it is fully submerged. You can do this by placing a small plate on top of the chicken to weigh it down. Leave your chicken in the brine, refrigerated, for 1 hour per lb of chicken. In our case, 4-5 hours depending on the size of the chicken.
2. When your chicken is finished brining, remove it from the brine and place it on a small tray with a wire rack. Pat your chicken dry, and make sure you drain out any liquid in the cavity. Leave your chicken to dry in the fridge, uncovered for at least 24 hours, but ideally 2-3 days before cooking.
3. 1 hour before cooking your chicken, remove it from the fridge to come up to room temperature. While doing so, truss your chicken. You will likely need about 6ft of butcher’s twine. I use the technique from Chef’s Steps on YouTube. It pulls the legs away from the breast, and allows the skin to get crispy everywhere. Here’s the link to the video:
🔗 https://youtu.be/G2leEwcDhXo?si=n6qLSr-x_FgXR6-y 🔗
RECIPE CONTINUES IN THE COMMENTS ⬇️
#roastchicken #roast #chicken #homecooking #recipe
2.63M
103K
210
6d ago
thestrongcook
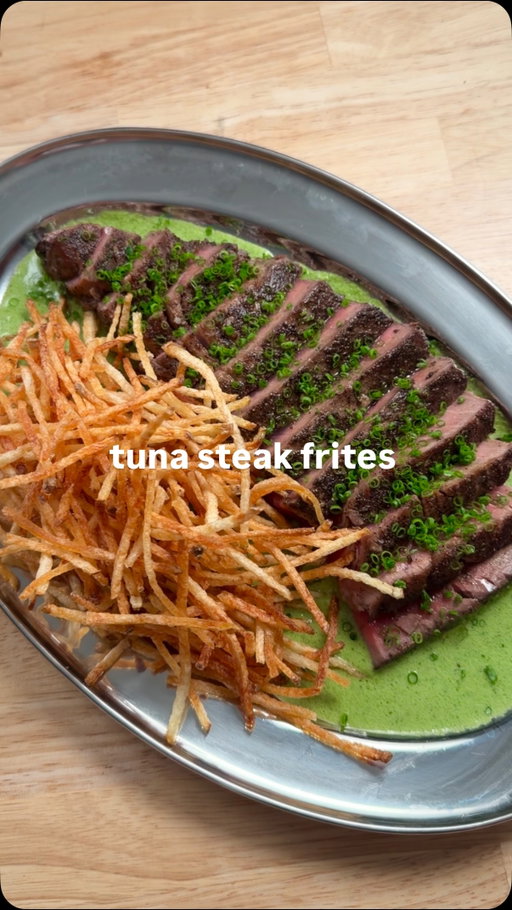
How to Make Tuna Steak Frites 🐟🍟
INGREDIENTS:
450g tuna steak - at least 1" thick
2 large russet potatoes
1L neutral oil (for frying)
3/4 cup clarified butter (1 cup cold)
2 tbsp cold butter
2 cups parsley leaves
1/2 cup green onions, chopped
1/2 cup tarragon leaves
1 large shallot
1 tbsp capers
3 anchovies (in oil)
1 tbsp white wine vinegar
1/4 cup white fish or chicken stock
8-10 dashes Worcestershire sauce
1 tbsp Dijon
1 egg yolk
1.5 tbsp ground black pepper
Fine sea salt
Fleur de sel
INSTRUCTIONS:
1. Clarify your butter. Thinly slice your shallot, and sauté it over low heat in 1-2 tsp of your clarified butter, until translucent. Add your capers and anchovies and continue to sauté to soften both. The anchovies should be able to break apart, and your shallots should be translucent.
2. Add your sautéed shallots, capers and anchovies to a blender along with your Dijon, egg yolk, vinegar & Worcestershire. Add your fresh herbs & warm fish stock, and blend. Slowly add 2/3 of your clarified butter to the blender as it’s running. The sauce should have the consistency of a thin hollandaise. Transfer the sauce to a small pot to keep it warm, and gently stir in the remaining 1/3 of your clarified butter - you want the sauce to appear split! Season with salt to taste.
RECIPE CONTINUES IN THE COMMENTS ⬇️
#tuna #steak #steakfrites #homecooking #recipe
2.63M
97.9K
405
9mo ago
thestrongcook
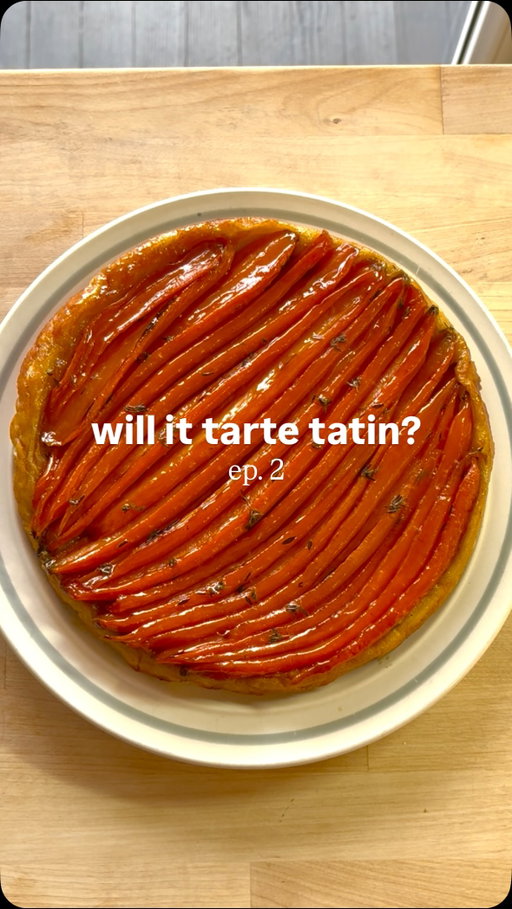
Will it Tarte Tatin? - ep. 2: Carrot 🥕🥕🥕
FULL RECIPE BELOW ⬇️
NOTE: this recipe is for a 9" cast iron pan - measurements for a bigger/smaller pan will need to be scaled accordingly.
INGREDIENTS:
3 bunches medium carrots (or about 15 carrots total)
1/2 bunch thyme
3 tbsp honey
1.5 tbsp apple cider vinegar
3 tbsp butter
1 sheet butter puff pastry
2 tbsp olive oil
Freshly cracked black pepper (to taste)
Fine sea/kosher salt (to taste)
Flaky salt/Fleur de sel (to finish)
-
Confit duck legs + meat based sauce/gravy of your choice (optional)
Feta + toasted almonds (optional - vegetarian)
INSTRUCTIONS:
1. Pre-heat your oven to 500 degrees F (if using an electric oven), if using a convection oven, 450F should be fine. Place a large sheet pan in the oven for 5 minutes once the oven is pre-heated, to pre-heat the tray.
2. Peel & cut your carrots in half. Carefully remove your pre-heated tray, and drizzle it with olive oil. Place your carrots cut-side down, and drizzle them once more with olive oil. Season them with fine salt. Place them in the oven for 10 minutes, then flip your carrots, and put them back in the oven for another 5-10 minutes. You want your carrots to be nicely blistered/roasted (hence the hot oven + pre-heated tray), but not burnt. You also want your carrots NOT to be fully cooked, as they will continue cooking when you bake your tarte. At this point you can lower the temperature of your oven to 425 degrees F.
3. In your cast iron skillet, or another heavy-bottom pan, Drizzle your honey and apple cider vinegar around the pan. Place your pan over medium heat, and allow the honey to caramelize (do not stir - just tilt your pan if needed to allow the sugars to caramelize evenly). When the honey is light brown in colour (almost all the moisture will appear to have evaporated, and the caramel will be a syrupy consistency), turn the heat to low. Add 3 tbsp butter to the pan, and stir over low heat for 90sec-2min, trying to keep the glaze as emulsified as possible. If you see your glaze splitting - add a 1/2 tsp of cold water and continue to stir to bring it back together.
RECIPE CONTINUES IN THE COMMENTS ⬇️
#carrot #tartetatin #homecooking #recipe
2.61M
97.4K
231
4d ago
thestrongcook
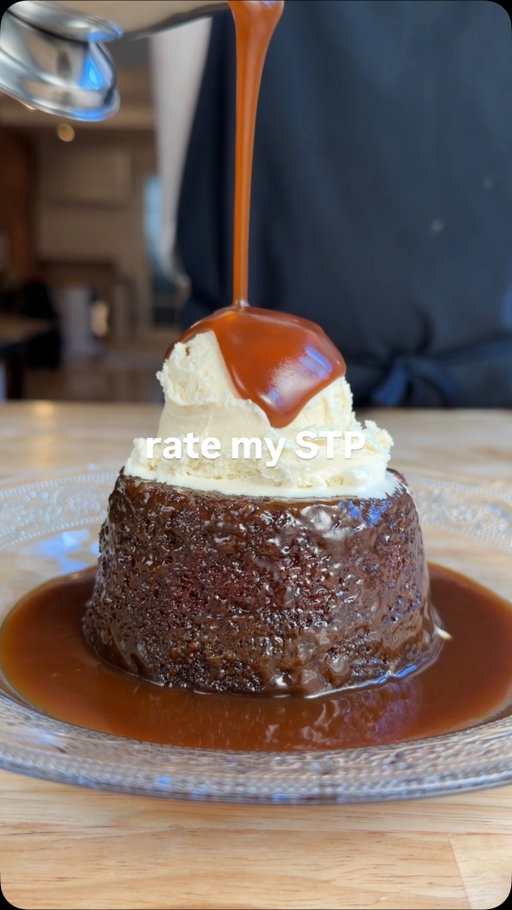
How to Make Sticky Toffee Pudding 🇬🇧🍨
FULL RECIPE BELOW ⬇️
(serves 6 people)
INGREDIENTS:
Pudding ⬇️
225g pitted dates (~250g unpitted)
1 + 3/4 cups AP flour
1/2 cup boiling water
2 teabags earl grey
1/2 cup milk, at room temperature
2/3 cup + 1 tbsp unsalted butter, softened
2/3 cup brown sugar
2 eggs, at room temperature
2 tbsp molasses
2 tsp vanilla extract
1 tsp baking soda
1.5 tsp baking powder
1 tsp fine salt
Toffee Sauce ⬇️
1 cup brown sugar
1 cup heavy cream
1/2 cup unsalted butter
2 tsp molasses
To Finish ⬇️
Flaky salt (to taste)
1 pint vanilla ice cream
INSTRUCTIONS:
1. Pre-heat your oven to 350 degrees Fahrenheit.
2. Bring your water to a boil. If you’d like to try some date-earl gray tea as well, add an extra cup of boiling water (it was actually quite delicious!)
3. Remove the pits from your dates if you haven’t already. Roughly chop your dates, and add them to a heat-proof container. Pour the boiling water over your dates, and add your tea bags. Let the tea steep for 5 minutes, then remove your tea bags. Remove your tea to drink if you added some extra, leaving only a 1/2 cup of hot water to submerge the dates. Add your 1 tbsp of baking soda, and mix it in with the dates (the mixture should start to foam). Let sit for another 5 minutes.
4. While still warm, blend your date mixture with an immersion blender, and set aside to cool to room temperature. In a large mixing bowl, add 2/3 cup of softened butter. Mix with a hand mixer until the butter is smooth & spread around the bottom of the bowl. Add your brown sugar, and mix once more until the butter & sugar are homogeneous, and have increased in volume (~2 minutes). Each time you mix in a new ingredient, be sure to scrape down the sides of the bowl. One at a time, add your eggs and mix them in on low speed (don’t mix too aggressively!) Wait until the first egg is well incorporated before adding the second one. Add your milk, molasses, and vanilla extract to the bowl, and mix once more to combine.
RECIPE CONTINUES IN THE COMMENTS ⬇️
#stickytoffeepudding #stp #dessert #homecooking #recipe

2.51M
64.1K
263
10mo ago
thestrongcook
How to Make Jacques Pépin’s Classic French Omelette 🥚🇫🇷🥚🇫🇷
INGREDIENTS:
4 large eggs (for a 24 cm pan)
2 tbsp butter
1/4 bunch chives
fine kosher/sea salt
INSTRUCTIONS:
1. Crack your eggs into a small bowl, and whisk your eggs vigorously with a fork. When the eggs are well mixed and homogeneous, strain them through a fine mesh strainer into another container.
2. Finely chop your chives - should yield about 1 tbsp of chopped chives. Season your eggs with a good pinch of salt, and a pinch of chives.
3. In a non-stick pan, heat your butter over medium-high heat. When the butter is fully melted, and starts to foam up, add your eggs to your pan. Immediately turn your heat down to medium-low.
4. With a rubber spatula, vigorously scramble your eggs, moving your spatula in a circular motion around the pan. Simultaneously shake your pan, which will allow you to agitate your eggs even more effectively. You are looking for many very small curds to form.
5. Once the eggs have started to set, and the edges of your eggs are cooked, leave your omelette without touching it, to continue cooking 1-2 more minutes.
6. Once the eggs are 3/4 of the way cooked, and the top of your egg is slightly wet to the touch, you can start rolling your omelette.
RECIPE CONTINUES IN THE COMMENTS ⬇️
#classic #french #omelette #homecooking #recipe

2.42M
132K
295
4mo ago
thestrongcook
How to Make Gordon Ramsay’s Scrambled Eggs ⭐️⭐️⭐️ - BREAKFAST WITH BEN
FULL RECIPE BELOW ⬇️
NOTE: For an in-depth look at Gordon’s recipe, check out any of his videos. He has multiple across platforms, and he’ll be able to explain his recipe better than I can.
- MY RECIPE -
INGREDIENTS:
4 large eggs
1 tbsp unsalted butter
Fine sea salt (to taste)
1/4 bunch chives
1. Start by finely cutting your chives as thinly as possible.
2. Pre-heat a good non-stick pan over medium heat for 1-2 minutes. In the meantime time, crack your eggs into a bowl and beat them with a fork until homogeneous. If you want to go the extra mile, pass your eggs through a fine mesh strainer to ensure they are extra smooth.
3. Add your butter to the pan, and once it is completely melted and starts to foam, add your eggs. Immediately turn the heat down to medium-low. Start stirring your eggs with a spatula, but not "risotto-style" like Gordon does - you want your egg to form nice small curds in the pan as you stir. The best motion to use is a "figure 8" pattern, where you bring the egg from the outside edge of the pan (where the egg cooks faster), towards the inside of the pan. While doing this, move your pan on and of the heat to control the temperature of the pan. You do not want your eggs catching or scorching.
4. What I’m looking for when cooking scrambled eggs is the point where the eggs have just started to set (they do not run around the pan when you tilt it), but they are still wet to the touch. This is when you should season your eggs with salt (and pepper if you’d like), and serve immediately. Even if your eggs seem slightly undercooked, residual heat will continue to cook them, so it is best to serve them at this point.
5. Garnish with your chopped chives, and enjoy!
#scrambled #egg #scrambledegg #homecooking #recipe

2.17M
74.4K
255
3mo ago
thestrongcook
How to Make Jacques Pépin’s Classic French Omelette 🥚🇫🇷 - BREAKFAST WITH BEN
FULL RECIPE BELOW ⬇️
INGREDIENTS:
4 large eggs (for a 24 cm pan)
2 tbsp butter
1/4 bunch chives
fine kosher/sea salt
INSTRUCTIONS:
1. Crack your eggs into a small bowl, and whisk your eggs vigorously with a fork. When the eggs are well mixed and homogeneous, strain them through a fine mesh strainer into another container.
2. Finely chop your chives - should yield about 1 tbsp of chopped chives. Season your eggs with a good pinch of salt, and a pinch of chives.
3. In a non-stick pan, heat your butter over medium-high heat. When the butter is fully melted, and starts to foam up, add your eggs to your pan. Immediately turn your heat down to medium-low.
4. With a rubber spatula, vigorously scramble your eggs, moving your spatula in a circular motion around the pan. Simultaneously shake your pan, which will allow you to agitate your eggs even more effectively. You are looking for many very small curds to form.
5. Once the eggs have started to set, and the edges of your eggs are cooked, leave your omelette without touching it, to continue cooking 1-2 more minutes.
6. Once the eggs are 3/4 of the way cooked, and the top of your egg is slightly wet to the touch, you can start rolling your omelette.
RECIPE CONTINUES IN THE COMMENTS ⬇️
#classic #french #omelette #homecooking #recipe
2.14M
62.4K
98
5mo ago
thestrongcook
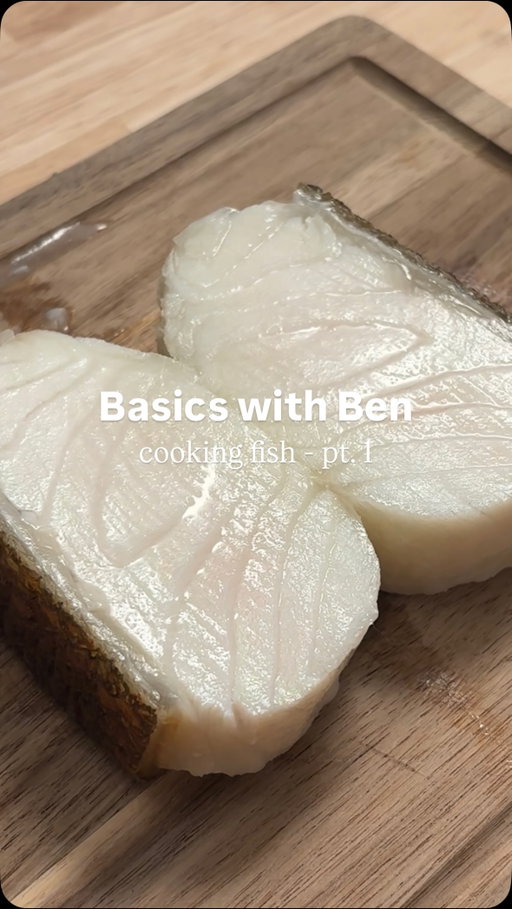
How to Cook Fish pt.1 🐟🐠 (Using a Cake Tester) - BASICS WITH BEN
There are a number of different ways to cook fish (pan searing, poaching, confit, broiled), but regardless of which method you use, you need to know WHEN the fish is done! Regardless of how you’re cooking your fish, a cake tester will help you achieve the perfect doneness.
As I mentioned in the video, the best way to check if a fish is done, is to insert your cake tester against the grain of the fish, and when you are met with ZERO resistance, your fish is done. You are then going to check the temperature by feel, which should be pleasantly warm to the touch (39-42 degrees Celsius - a little warmer than body temp). However, there are a few caveats to note;
1. You must insert your cake tester directly into the middle of your fish, directly through the thickest part of your filet. Especially for thicker portions of fish, this is important to make sure the fish is cooked all the way through.
2. You need to check your fish semi-often, and identify the SOONEST POINT that the cake tester meets zero resistance. If your fish is 10 degrees overcooked, the cake tester will also meet zero resistance, but the temperature will be too high at that point. Because of this, it important to keep a close eye, and once again, confirm with the temperature of the fish, as soon as the cake tester pierces cleanly.
3. There are some fish that require higher cooking temperatures. While they aren’t as common, skate, swordfish, and some other varieties will require a temperature hotter than “warm”. Know the fish you are cooking, and prepare accordingly! The cake tester will still be a useful tool, just with a different target temperature. For most common fish however (salmon, halibut, cod…) this method is ideal!
4. For the perfect flaky fish, be sure to rest your fish before eating it! Fish doesn’t require as long a rest as steak, but 4-5 minutes will go a long way in ensuring the ideal texture.
5. Also like a steak, tempering your fish for 15-20 minutes before cooking will also allow it to cook more evenly!
#cooking #fish #caketester #homecooking #recipe
Ben Maxwell (@thestrongcook) Instagram Stats & Analytics
Ben Maxwell (@thestrongcook) has 256K Instagram followers with a 3.55% engagement rate over the past 12 months. Across 131 posts, Ben Maxwell received 4.16M total likes and 117M impressions, averaging 31.7K likes per post. This page tracks Ben Maxwell's performance metrics, top content, and engagement trends — updated daily. To benchmark @thestrongcook against other accounts, use Socialpruf's Instagram competitor analysis tool.
Ben Maxwell (@thestrongcook) Instagram Analytics FAQ
How many Instagram followers does Ben Maxwell have?+
Ben Maxwell (@thestrongcook) has 256K Instagram followers as of October 2026.
What is Ben Maxwell's Instagram engagement rate?+
Ben Maxwell's Instagram engagement rate is 3.55% over the last 12 months, based on 131 posts.
How many likes does Ben Maxwell get on Instagram?+
Ben Maxwell received 4.16M total likes across 131 posts in the last 12 months, averaging 31.7K likes per post.
How many Instagram impressions does Ben Maxwell get?+
Ben Maxwell's Instagram content generated 117M total impressions over the last 12 months.
Can I compare Ben Maxwell with other Instagram accounts?+
Yes. Add @thestrongcook to a competitor set with Socialpruf's Instagram competitor analysis tool and benchmark it side by side with any other public accounts on views, engagement rate and follower growth, with history back to each account's first post.