NewGet @thestrongcook's full report

tiktok analytics
Similar Accounts:
tiktok analytics
Similar Accounts:
followers
113K
impressions
53.0M
likes
3.26M
comments
10.4K
posts
117
engagement
6.16%
emv
$1.89M
Average per post
453K
Key Metrics
Impressions
monthly
Distributions
Content
7.18M
7.63K
43
7mo ago

thestrongcook
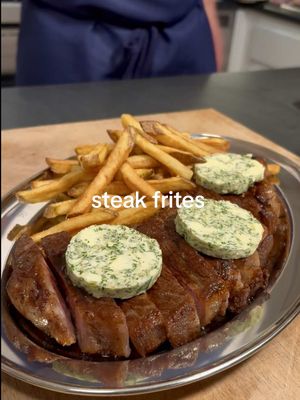
How to Make Steak Frites w/ Compound Butter - BTS ft. @lorealparis Men Expert Derma Power #ad FULL RECIPE BELOW ⬇️ (serves 2 people) INGREDIENTS: 1x 450g striploin steak - at least 1" thick 1/2 lb + 2 tbsp unsalted butter 1L neutral, high-smoke point oil 3 + 3 cloves garlic 1 large shallot 1 sprig thyme 3 large russet potatoes 1/2 bunch tarragon (1/2 cup picked leaves) 1/4 bunch parsley (1/2 cup picked leaves) 1/2 bunch chives 1/4 cup olive oil Fine sea salt Freshly cracked pepper (to taste) FRIES 🍟 1) Partially peel your potatoes (leave some skin on), and cut them into 1/4” batons. Transfer your potatoes to a large container full of ice cold water, and change the water a couple of times to remove excess starch from the potatoes. Leave them for 15 minutes before draining. 2) Fill a heavy bottom pot half-way with neutral, high smoke-point oil. Preheat to 300 degrees Fahrenheit. Pat your potatoes dry with paper towel, and fry them for 4-6 minutes, or until the fries are a very pale blonde colour, and cooked through. 3) Transfer your fries to a large sheet tray to cool down, removing as much excess oil as possible with paper towel. 4) Leave your fries to dry in the fridge for at least one hour, uncovered. 5) When ready to serve, fry your fries for a second time at 350F degrees for 2 minutes, or until golden brown. Season with sea salt. STEAK 🥩 1) Season your steak generously with fine salt. For best results, leave your steak uncovered in the fridge overnight. 2) In a large, heavy-bottom pan, sear your steak on both sides over high heat in neutral oil. Put a small weight on the steak during this step to ensure an even sear. ~2 minutes on each side. 3) Lower heat to medium and continue to cook steak for another 2 minutes on each side. (Make sure temperature does not go above 35C/95F at this stage). 4) Add 2 tbsp butter to the pan, along with a sprig of thyme, 3 cloves of garlic, and the trims from your chopped shallots. Baste your steak until the steak develops a nice crust, and reaches an internal temperature of 42C/108F-45C/113F. 5) Rest your steak for 10 minutes before slicing, temperature will continue to carry-over to a nice medium. COMPOUND BUTTER 🧈 1) Cut your 1/2 lb of butter into equal-sized cubes, and leave it at room temperature to soften for at least 2 hours. 2) Finely chop your shallot and 3 cloves of garlic. Transfer both to a small pot, and cover with just enough olive oil to submerge your shallot and garlic. Place the pot over low heat, and allow everything to confit for 20-30 minutes. You want your shallots and garlic to be completely translucent, and fully cooked through. Allow everything to cool down to room temperature. 3) Finely chop your chives, parsley and tarragon leaves. Add to a mixing bowl with your softened butter. Strain out your shallots and garlic from their oil, and add to your mixing bowl. Mix everything well to combine. 4) Lay out a large sheet of plastic wrap on a clean, solid work surface. Add your butter in the middle of the plastic wrap, and roll it tightly into a log. Continue rolling your butter "log" to tighten it and further compact the butter. Transfer it to the fridge for at least one hour, or to the freezer for 20-30 minutes to set. 5) When ready to serve, slice your butter into 1/2cm discs, and leave them at room temperature for 15-20 minutes before adding to your steak. #menexpert #steakfrites #homecooking #Recipe

4.96M
459K
541
5mo ago
thestrongcook
How to Cut the PERFECT Chives (pt. 2) 🔪🔪 This is a behind-the-scenes of my second attempt at getting a perfect 10 from @ratemychives! I’ll be sharing my photo submission tomorrow on IG, so be sure to follow along @thestrongcook to see the final result. If you’re looking for tips on how to cut chives yourself, check out my recent video where I walk you through the process step-by-step ⬇️ https://www.tiktok.com/@/video/7621654334249438482?_r=1&_d=secCgYIASAHKAESPgo8YdOIH8su54KrSxc2rlcdWtzOwyFqxk%2BZ8ZvTX8DoY2i1IdHJzD3dbSH3xTSypBfLFeVO6DvXHgKmOUpWGgA%3D&u_code=dmgi16ed39beb1&share_item_id=7621654334249438482×tamp=1777836114&utm_campaign=client_share&utm_source=short_fallback&share_app_id=1233 #chives #knifeskills #homecooking
3.79M
269K
1.37K
1mo ago
thestrongcook
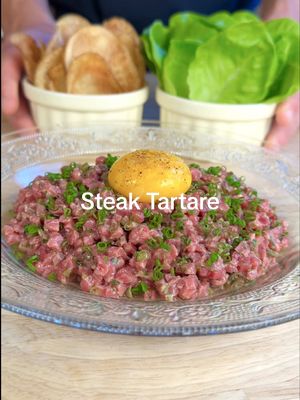
How to Make Steak Tartare 🥩 - THE TARTARE SERIES ep. 1 FULL RECIPE BELOW ⬇️ INGREDIENTS: - 250g beef (SEE NOTES BELOW ON CHOOSING THE RIGHT CUT) - 1/2 small shallot - 1 tbsp chopped gherkin pickles - 1 tbsp chopped capers - 1 tbsp chopped parsley - 1/4 bunch chives - 1 tsp Dijon mustard - 1 tbsp lemon - 2 tbsp olive oil - tobasco, Worcestershire to taste - salt and fresh cracked pepper to taste - 1 large russet potato - 1L canola oil (for frying) - 1 head gem lettuce - 1 egg yolk NOTES ON CHOOSING THE RIGHT CUT: - I recommend going to your local butcher, and asking which cut they recommend for tartare. A reputable butcher is one that receives whole animals, or primal cuts that they break down themselves. - DO NOT use pre-ground beef for tartare. Ground beef has much more surface area that can be exposed to bacteria, and can also get contaminated through the grinding process. Make sure you buy a whole cut of beef, and cut/grind it yourself. - Buy your beef the same day you intend to make tartare, and make sure your beef stays cold! I recommend bringing a cooler bag with ice packs to the butcher. - If there is harmful bacteria on a cut of beef (although the risk is very low if you follow the above steps), it will live on the outside of the cut. If you want to be EXTRA safe when eating tartare, you can quickly sear the outside of your steak in a hot pan, and cut off the seared portion. I personally don’t do this, but this could give some people some extra piece of mind. - You are looking for a cut that is lean, with no excess fat or marbling. Tenderloin will be more tender, and on the more expensive side. Cuts like the top round, inside round etc, will be more chewy, but also less expensive. I used top round for the tartare in this video. INSTRUCTIONS: TARTARE: 🥩 1) Thinly slice your beef approx. 3 mm thick, and lay the strips on a sheet pan lined with parchment paper. Place the tray in the freezer until beef is semi-frozen. 2) While waiting for your beef to freeze, finely chop your shallot, gherkins, capers, and parsley. Finely chop your chives and set aside. 3) When your beef is semi-frozen, dice it into approx. 3mm dice. While you are dicing, keep your beef on the frozen tray, as it will keep it cold. 4) In a large chilled bowl, mix your Dijon, lemon juice, and olive oil, along with a few dashes of tobasco and Worcestershire. Keep whisking until the dressing has emulsified. Add your beef to the bowl, along with your shallots, parsley, gherkins and capers. Season with salt and freshly cracked pepper. Taste your tartare and adjust seasoning. 5) Plate your tartare on a chilled plate, garnish with chives and your egg yolk. Serve with potato chips and lettuce leaves. POTATO CHIPS 🥔 1) Preheat a pot of canola oil to 300 degrees Fahrenheit. 2) Thinly slice your potatoes lengthwise on a mandolin approx 1mm thick, being sure to keep the thickness as constant as possible. Soak your chips in cold water, changing the water 3-4 times until clear. 3) Remove your chips from the water, and pat them dry with paper towel. 4) Working in small batches, fry your potato chips, stirring often, ensuring your chips stay submerged as best as possible (you might have to press them down with a slotted spoon or strainer). 5) When your chips are just slightly golden (do not wait until they are brown - as they will taste bitter), remove them from the oil, and season them with fine sea salt. Place them on a tray lined with paper towel for oil to drain easily off chips. #steak #tartare #beef #Recipe #homecooking
2.58M
154K
386
11mo ago
thestrongcook
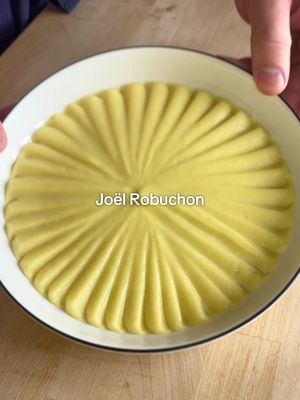
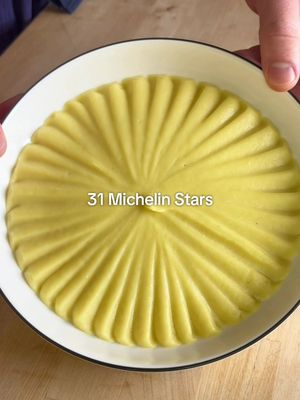
How to Make Joël Robuchon’s Mashed Potatoes 🥔🇫🇷 🥔🇫🇷 FULL RECIPE BELOW ⬇️ INGREDIENTS: 1.25kg ratte potato (or Yukon gold) (your yield should be 1kg after peeling) 250mL whole milk ** 250g unsalted butter, diced 4-5 sprigs thyme 1 tsp black peppercorns 2 cloves garlic, gently smashed Fine sea salt, to taste ** all of this milk likely won’t be needed. Some can be kept aside to re-heat the potatoes later. INSTRUCTIONS: 1. In a large, heavy bottom pot, ideally large enough to fit all your potatoes in a single layer, cover your potatoes with cold water. Bring to a boil over high heat, then lower your heat to medium. Allow your potatoes to cook for 20-30 minutes, or until you can pierce your potatoes with a pairing knife with zero resistance. 2. While your potatoes are cooking, bring your milk to a boil with your thyme, garlic and black peppercorns. As soon as it comes to a boil, turn off the heat and allow the aromatics to steep while the milk stays hot. 3. When your potatoes are done cooking, strain them, and let them sit in the strainer for 5-10 minutes to allow steam to be released. Once they are cool enough to touch, but still hot, peel the potatoes & discard the skins. 4. Press your potatoes through a potato ricer into a large bowl. Strain the aromatics out of your milk, and pour half of the milk into the riced potatoes. Fold the milk gently into the potatoes until incorporated. Then, pass your potatoes once more through a fine mesh strainer into a large pot (this step is optional, but does result in THE smoothest potatoes). 5. Put the pot over low heat, and add a couple tsp more milk as needed until your potatoes are smooth. At this point, you can decide how smooth/luxurious you would like your potatoes. If you want them to be more of a "purée", add all of the butter and extra milk for the true Joel Robuchon Ratio. If you want more of a traditional mashed potato consistency, don’t add any milk, and only add half the butter. Regardless of what you choose, at this point you can season your potatoes with salt to taste. Serve your potatoes as a side with any roast or braised meat, and enjoy! #mashed #potatoes #michelin #homecooking #Recipe

1.98M
120K
214
10mo ago
thestrongcook
How to Make Jacques Pépin’s Classic French Omelette 🥚🇫🇷🥚🇫🇷 INGREDIENTS: 4 large eggs (for a 24 cm pan) 2 tbsp butter 1/4 bunch chives fine kosher/sea salt INSTRUCTIONS: 1. Crack your eggs into a small bowl, and whisk your eggs vigorously with a fork. When the eggs are well mixed and homogeneous, strain them through a fine mesh strainer into another container. 2. Finely chop your chives - should yield about 1 tbsp of chopped chives. Season your eggs with a good pinch of salt, and a pinch of chives. 3. In a non-stick pan, heat your butter over medium-high heat. When the butter is fully melted, and starts to foam up, add your eggs to your pan. Immediately turn your heat down to medium-low. 4. With a rubber spatula, vigorously scramble your eggs, moving your spatula in a circular motion around the pan. Simultaneously shake your pan, which will allow you to agitate your eggs even more effectively. You are looking for many very small curds to form. 5. Once the eggs have started to set, and the edges of your eggs are cooked, leave your omelette without touching it, to continue cooking 1-2 more minutes. 6. Once the eggs are 3/4 of the way cooked, and the top of your egg is slightly wet to the touch, you can start rolling your omelette. 7. With the handle of the pan pointed towards you, start working your spatula under the eggs on the half of the pan closest to you, folding it over into a half-football shape. Once this is done, start working the omelette down towards the opposite end of the pan, either by nudging it with your spatula, or by bumping the pan with the handle (like chef Pépin does). Gravity is also helpful during this step. As you do this, the un-folded part of the omelette opposite to the handle should start working its way up the wall of the pan, and eventually start to fold over to create the other half of your "football". Use your spatula (or your hand) to shape the omelette if needed. 8. Get a warm plate ready. Push your omelette right to the edge of the pan opposite the handle, and in one swift motion, flip it onto your plate. Your omelette will likely lose its shape during this transfer, so using spoons, a clean towel (or your hands), re-shape it. Rub with a small knob of butter, top with a chive baton and enjoy! #classic #french #omelette #homecooking #Recipe
1.94M
131K
363
8mo ago
thestrongcook
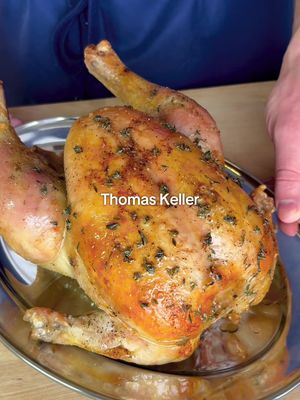
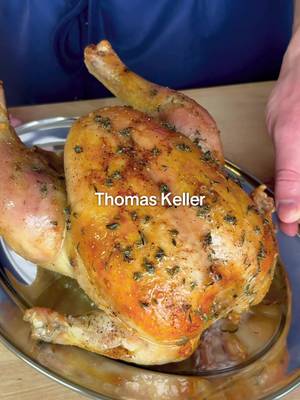
How to Make Thomas Keller’s Roast Chicken ⭐️⭐️⭐️ FULL RECIPE BELOW ⬇️ INGREDIENTS: 1 4-5 lb chicken 1.75L cold water 250g ice (~1 cup) 1/3 cup kosher salt + more to taste 2 tbsp granulated sugar 2 bay leaves 2 sprigs rosemary 1 tsp whole black peppercorns 1/2 lemon 1/4 lb + 1 tbsp butter 7-8 sprigs thyme 1 large carrot 2 Yukon gold potatoes 1 large leek 1 shallot 100mL white wine 1L chicken stock (no salt added) Freshly cracked black pepper (to taste) CHICKEN INSTRUCTIONS: 1. At least 48 hours before cooking, but ideally 3-4 days before cooking, make the brine for your chicken. Add your salt, sugar, bay leaves, rosemary, and whole peppercorns to a small pot, and cover with 250mL of your water. Bring to a boil, just until the salt and sugar is fully dissolved. Transfer your brine base to a large non-reactive container. Whisk in your 250g of ice to cool down the mixture. Add your remaining 1.5L of cold water. Add the juice from your 1/2 lemon, and throw the lemon in as well. Place your chicken into the brine, ensuring it is fully submerged. You can do this by placing a small plate on top of the chicken to weigh it down. Leave your chicken in the brine, refrigerated, for 1 hour per lb of chicken. In our case, 4-5 hours depending on the size of the chicken. 2. When your chicken is finished brining, remove it from the brine and place it on a small tray with a wire rack. Pat your chicken dry, and make sure you drain out any liquid in the cavity. Leave your chicken to dry in the fridge, uncovered for at least 24 hours, but ideally 2-3 days before cooking. 3. 1 hour before cooking your chicken, remove it from the fridge to come up to room temperature. While doing so, truss your chicken. You will likely need about 6ft of butcher’s twine. I use the technique from Chef’s Steps on YouTube. It pulls the legs away from the breast, and allows the skin to get crispy everywhere. Here’s the link to the video: https://www.youtube.com/watch?si=n6qLSr-x_FgXR6-y&v=G2leEwcDhXo&feature=youtu.be 4. While your chicken is tempering, work on your vegetable garnishes. My vegetable & leek recipes are down below ⬇️. You will take all of your vegetable trimmings and scatter them underneath your wire rack, under your chicken, tossed with a small amount of olive oil. This will help develop flavour for your sauce later on. 5. Pre-heat your oven to 450 degrees Fahrenheit. Clarify your 1/4 lb of butter. You can do this by microwaving it until just melted, then skimming off the white "foam" that floats to the top (the milk solids). The butter does not need to be perfectly clarified. Brush your chicken generously with the clarified butter. At this point, season your chicken with only kosher salt. Place your chicken in the oven, and bake for ~30 minutes, or until the skin reaches your desired level of crispiness. Once the skin is where you want it, remove your chicken from the oven and turn the heat on your oven down to 350 degrees Fahrenheit. Very carefully brush a little more clarified butter onto your chicken. Sprinkle picked thyme leaves onto your chicken, as well as a generous amount of freshly cracked pepper. At this point, your chicken will likely be ~50C/122F at the thickest point of the breast. Place the chicken back into the oven at the new, lower temperature, until it reaches an internal temperature of 64C/147F - this will likely take another 15-20 minutes, if not longer. You can now remove your chicken from the oven, and allow it to rest for 25-30 minutes before carving. It will reach a final internal temperature of 74C/165F at the thickest point of the breast + deepest thigh joint. RECIPE CONTINUES IN THE COMMENTS ⬇️ #roast #chicken #roastchicken #homecooking #Recipe
1.47M
97.5K
284
2mo ago
thestrongcook
How to Make Thomas Keller’s Roast Chicken ⭐️⭐️⭐️ FULL RECIPE BELOW ⬇️ INGREDIENTS: 1 4-5 lb chicken 1.75L cups cold water 250g ice (~1 cup) 1/3 cup kosher salt + more to taste 2 tbsp granulated sugar 2 bay leaves 2 sprigs rosemary 1 tsp whole black peppercorns 1/2 lemon 1/4 lb + 1 tbsp butter 7-8 sprigs thyme 1 large carrot 2 Yukon gold potatoes 1 large leek 1 shallot 100mL white wine 1L chicken stock (no salt added) Freshly cracked black pepper (to taste) CHICKEN INSTRUCTIONS: 1. At least 48 hours before cooking, but ideally 3-4 days before cooking, make the brine for your chicken. Add your salt, sugar, bay leaves, rosemary, and whole peppercorns to a small pot, and cover with 250mL of your water. Bring to a boil, just until the salt and sugar is fully dissolved. Transfer your brine base to a large non-reactive container. Whisk in your 250g of ice to cool down the mixture. Add your remaining 1.5L of cold water. Add the juice from your 1/2 lemon, and throw the lemon in as well. Place your chicken into the brine, ensuring it is fully submerged. You can do this by placing a small plate on top of the chicken to weigh it down. Leave your chicken in the brine, refrigerated, for 1 hour per lb of chicken. In our case, 4-5 hours depending on the size of the chicken. 2. When your chicken is finished brining, remove it from the brine and place it on a small tray with a wire rack. Pat your chicken dry, and make sure you drain out any liquid in the cavity. Leave your chicken to dry in the fridge, uncovered for at least 24 hours, but ideally 2-3 days before cooking. 3. 1 hour before cooking your chicken, remove it from the fridge to come up to room temperature. While doing so, truss your chicken. You will likely need about 6ft of butcher’s twine. I use the technique from Chef’s Steps on YouTube. It pulls the legs away from the breast, and allows the skin to get crispy everywhere. Here’s the link to the video: https://www.youtube.com/watch?si=n6qLSr-x_FgXR6-y&v=G2leEwcDhXo&feature=youtu.be 4. While your chicken is tempering, work on your vegetable garnishes. My vegetable & leek recipes are down below ⬇️. You will take all of your vegetable trimmings and scatter them underneath your wire rack, under your chicken, tossed with a small amount of olive oil. This will help develop flavour for your sauce later on. 5. Pre-heat your oven to 450 degrees Fahrenheit. Clarify your 1/4 lb of butter. You can do this by microwaving it until just melted, then skimming off the white "foam" that floats to the top (the milk solids). The butter does not need to be perfectly clarified. Brush your chicken generously with the clarified butter. At this point, season your chicken with only kosher salt. Place your chicken in the oven, and bake for ~30 minutes, or until the skin reaches your desired level of crispiness. Once the skin is where you want it, remove your chicken from the oven and turn the heat on your oven down to 350 degrees Fahrenheit. Very carefully brush a little more clarified butter onto your chicken. Sprinkle picked thyme leaves onto your chicken, as well as a generous amount of freshly cracked pepper. At this point, your chicken will likely be ~50C/122F at the thickest point of the breast. Place the chicken back into the oven at the new, lower temperature, until it reaches an internal temperature of 64C/147F - this will likely take another 15-20 minutes, if not longer. You can now remove your chicken from the oven, and allow it to rest for 25-30 minutes before carving. It will reach a final internal temperature of 74C/165F at the thickest point of the breast + deepest thigh joint. RECIPE CONTINUES IN THE COMMENTS ⬇️ #roastchicken #roast #chicken #homecooking #Recipe

1.45M
112K
122
2mo ago
thestrongcook
MY TOP 3 DISHES FROM THE BEAR 🐻🧑🏻🍳 #2 - Sydney’s Omelette 🥚🍳 FULL RECIPE BELOW ⬇️ INGREDIENTS: 4 large eggs 3 tsp butter (in 3 cubes) Pinch of fine sea/kosher salt 1 x shallot & chive Boursin, in a piping bag 1/4 bunch chives 1 handful sour cream & onion chips INSTRUCTIONS: 1. Crack your eggs into a fine mesh strainer placed over a bowl. Whisk your eggs with a fork until fully smooth. The eggs will naturally start to fall through the holes in the strainer. Use a spatula to push the egg through the strainer if needed. Season your eggs with salt. 2. Heat a good quality, 24cm non-stick pan over medium-high heat. Add 2 tsp butter, and once it’s fully melted, add your eggs. 3. As soon as your eggs hit the pan, turn the heat down to low, and scramble vigorously. I like to gently shake my pan, while making a smaller circular motion with my spatula, moving counter-clockwise around the pan while doing so (this might sound complicated - but the video will help demonstrate!). 4. Once the eggs have started to set, and the edges of your eggs are cooked, leave your omelette without touching it, to continue cooking 1-2 more minutes. Release the very outer edge of the omelette from the walls of the pan, so it doesn’t dry out. Once the eggs are 3/4 of the way cooked, and the top of your omelette is slightly wet to the touch (see video), you can add your Boursin. Turn off the heat on your pan, and pipe the Boursin in a straight line about 1/4 of the way into the eggs, closest to you. 5. With a plate ready, starting from the handle, make 2-3 quarter folds on your omelette, and jerk your pan so that the unfolded part sits on the rim of the pan (opposite the handle). Then, in one motion, “flop” the omelette onto the plate, finishing the last fold. If your omelette is not immediately beautiful - not to worry! You can shape it with your fingers or a paper towel. 6. Brush your omelette with your remaining 1 tsp of butter, garnish with chives & chips, and enjoy! #thebear #omelette #Recipe #homecooking

1.32M
112K
274
2mo ago
thestrongcook
SPANISH CLASSICS 🇪🇸 ep. 1 - Croquetas de Jamòn FULL RECIPE BELOW ⬇️ INGREDIENTS: 150g Serrano ham trims 150g country ham trims 150g sliced Serrano ham (optional) 1/ large onion 2 large cloves garlic 4 cups whole-fat milk 1/4 cup olive oil 1/4 cup butter 1/2 cup AP flour + more for dredging 227g (1 box) panko breadcrumbs 4 large eggs 1L canola oil Fine salt (to taste) Ground white pepper (to taste) INSTRUCTIONS: INSTRUCTIONS: 1. Finely chop your Serrano and country ham trims. As mentioned in the video - you can also use other leftover cooked or cured proteins instead of ham. Peel & finely chop your onion. 2. Heat a large, heavy-bottom pan over medium heat. Add your olive oil and butter. Add your onion, and sauté for 1 minute, or until translucent. Peel, and grate your garlic cloves directly into the pot. Sauté for another 30 seconds. Add your diced ham. Sauté for 1-2 minutes. Sprinkle your flour around the pot. Stir to distribute the flour, and cook for another minute or so. Slowly start adding in your milk, 1 cup at a time, waiting until the milk has thickened before adding more. Once all your milk has been added, continue cooking down your bechamel, stirring often, until the mix has thickened. You are looking for your bechamel to be quite thick (see video for reference), so it is not too liquid when shaped into a croqueta! Season your mix to taste with salt and white pepper. 3. Line a small tray with parchment paper, and spread out your Croquetas mix on the tray. This will allow the mix to cool faster, and help portion the croquetas later on. Transfer the mix to the fridge for at least 3-4 hours, or to the freezer for 60-90 minutes. 4. When ready to portion, invert your croqueta mix onto another large sheet of parchment paper. Portion it into 16 equal pieces. Working quickly, roll your croquetas into small balls between your palms, about the size of a golf ball. Place each croqueta back onto a new tray lined with parchment paper. For best results, transfer the tray to the freezer for 20-30 minutes to help set the croquetas, and make them easier to work with. 5. Prepare your breading set-up, with 3 separate trays of flour, beaten eggs, and panko. Dredge each croqueta first in the flour, then into the egg, then into the breadcrumbs. For best results, place each croqueta back into the egg mix, before giving it a second round of breading in the breadcrumbs. This will ensure the most even coating possible. Place all your finished croquetas back onto a tray lined with parchment paper, and once again, transfer them back into the freezer to set. If not serving same-day, keep your croquetas in the freezer until you are ready to serve them. You can fry them directly from frozen when you are ready. 6. Pre-heat your canola oil to 350 degrees Fahrenheit in a large heavy-bottom (or a deep fryer, if you have one). Fry your croquetas for 2-3 minutes, working in batches of 5-6, until the exterior is golden brown. You also want to ensure your croquetas have an internal temperature of 50-55 degrees Celsius. If frying from frozen, this might not be the case. If needed, finish your croquetas in the oven to ensure the filling has softened and warmed through. 7. Serve immediately with a small dollop of aioli, and a slice of fresh ham (optional), and enjoy!

1.31M
1.87K
15
10mo ago
thestrongcook
3 Tips for Creating the Perfect Charcuterie Board 🎄🎉🎁 1) Use high-quality deli meats! My go-to’s are the amazing specialty deli meats from Mastro and San Daniele. They’ve been making charcuterie for over 4 decades, and use only the finest ingredients with authentic Italian traditions. The taste of their products is truly unmatched! 2) Make some fresh focaccia! The best way to build the perfect bite, is to start with some warm bread. Making focaccia is a lot easier than most people think, and I have a great same-day recipe that anyone can make. Check it out at the bottom of this caption! ⬇️ 3) Include lots of fresh fruits! Most people like to include fruits on their charcuterie platter for decoration, but their flavour is what will take your charcuterie board to the next level! We all love the saltiness of a good salami or prosciutto, and the sweetness of an apple or fig will create the perfect pairing. SAME-DAY FOCACCIA RECIPE ⬇️ INGREDIENTS: 2 cups bread flour 1 cup warm water 1/4 cup Olive Oil 1 tsp instant yeast 1 tsp honey 1 tsp fine sea salt INSTRUCTIONS: 1) In a large bowl, whisk together water, salt, honey, yeast and 1 tbsp of olive oil, then incorporate your flour to form a "shaggy", slightly wet dough. Scrape down the sides of the bowl to form a ball. Cover the bowl with a damp towel and leave it at room temperature for 25-30 minutes. 2) Uncover your dough. Lightly coat your hands with olive oil, and grab it from one side. Pull the dough, stretching it up, and over into itself. Repeat this "stretch and fold" three more times, for a total of 4 folds. Cover your dough again and leave it for 25-30 minutes. 3) Repeat the stretch and fold process once more, completing 4 full stretch and folds. Cover your dough once more, but now set your oven to 425 degrees F. If your stovetop has a "warm spot" above your oven, place your covered bowl there for 25-30 minutes, or until your dough roughly doubles in size. 4) Prepare a 9"x9" baking dish lined with parchment and very generously coat the bottom and sides of the parchment with olive oil. Flip your dough directly into the middle of your pan. Do only TWO more gentle stretch and folds at 12 o’clock and 6 o’clock (mostly "fold"… not a lot of "stretch"), then flip your dough to have the nice side facing up. Stretch the dough to reach each corner of the pan. Cover your dough with a piece of parchment coated with olive oil, and let proof for 30 minutes in a warm place. 5) Remove the parchment paper covering your dough, and drizzle olive oil around the surface of the dough. Use your fingers to create dimples in the dough. Sprinkle flaky salt around the surface of your dough. 6) Bake for 25-30 minutes or until the focaccia is nicely golden brown. Let bread rest for 30 minutes before slicing. #MastroFestive #Mastro #SanDaniele #ad @sharemastro
1.18M
90.7K
92
8mo ago
thestrongcook
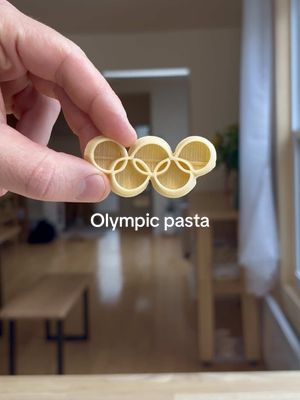
How to Make Chicken & Pasta Milanese 🇮🇹🥇ft. @Olympics pasta noodles FULL RECIPE BELOW ⬇️ (feeds 2 people) INGREDIENTS: 1 large boneless, skinless chicken breast 1/2 cup AP flour 1/2 cup fine Italian breadcrumbs 2 large eggs 1 cup light olive oil 1 tbsp extra virgin olive oil 200g pasta of your choice 1 large shallot 3 cloves garlic 1/3 container saffron 1/4 cup hot water 100 mL white wine 200 mL chicken stock 1/4 lb butter, diced 1 piece Parmesan cheese (to grate fresh) 1/4 bunch parsley Fine sea/kosher salt (to taste) Freshly cracked black pepper (to taste) INSTRUCTIONS: CHICKEN MILANESE: 1. Cut your chicken breast in half lengthwise, and pound out both pieces between two pieces of parchment until they’re 1/2 cm thick. Season the cutlets with salt. 2. Set up three trays, one each with flour, beaten eggs, and breadcrumbs. Bread each cutlet, going flour, then into the egg, then into the breadcrumbs, getting a good dredge on each step, but also shaking off any excess before moving to the next tray. 3. Pre-heat your 1 cup of light olive oil in a medium heavy-bottom pan over medium-high heat. You want the oil to reach 180C/350F before adding your cutlets. Immediately turn the heat on your pan down to medium once the cutlets hit the oil, and continue to shallow fry for 3-4 minutes, flipping your cutlets often to ensure even colouration. Once your cutlets are golden brown, and have reached an internal temperature of 72C/162F, remove them from the pan and season them with a pinch of salt + pepper. 4. Garnish your chicken with some chopped parsley and freshly grated parmesan cheese. PASTA ALLA MILANESE: 1. Bring a pot of heavily-salted water to a boil. Finely chop your shallots and garlic. Finely grind your saffron and bloom it by pouring 1/4 cup of hot water over the saffron and letting it steep. Drop your pasta in your boiling water, and allow it to cook until al dente. 2. In a separate pan, sauté your shallots and garlic in 1 tbsp EVOO until translucent. Add your white wine, and let it reduce until a syrupy consistency. Add your saffron/hot water mix, and your chicken stock. Reduce the liquid in the pan by half. Turn the heat to low, and start emulsifying in your cold butter, 3-4 cubes at a time. I find a whisk is helpful with this step. Keep adding butter until your sauce can coat the back of a spoon. 3. Add your pasta to the sauce, along with a generous grating of Parmesan. Also add a small ladle of your pasta water to help bring the sauce together. Stir and toss your pasta as the sauce reduces once more. You can finish your pasta with chopped parsley if you’d like, or serve it as-is! Enjoy! #olympic #rings #pasta #homecooking #Recipe

1.09M
58.9K
209
4mo ago
thestrongcook
How to Make Gordon Ramsay’s Scrambled Eggs ⭐️⭐️⭐️ FULL RECIPE BELOW ⬇️ NOTE: For an in-depth look at Gordon’s recipe, check out any of his videos. He has multiple across platforms, and he’ll be able to explain his recipe better than I can. - MY RECIPE - INGREDIENTS: 4 large eggs 1 tbsp unsalted butter Fine sea salt (to taste) 1/4 bunch chives 1. Start by finely cutting your chives as thinly as possible. 2. Pre-heat a good non-stick pan over medium heat for 1-2 minutes. In the meantime time, crack your eggs into a bowl and beat them with a fork until homogeneous. If you want to go the extra mile, pass your eggs through a fine mesh strainer to ensure they are extra smooth. 3. Add your butter to the pan, and once it is completely melted and starts to foam, add your eggs. Immediately turn the heat down to medium-low. Start stirring your eggs with a spatula, but not "risotto-style" like Gordon does - you want your egg to form nice small curds in the pan as you stir. The best motion to use is a "figure 8" pattern, where you bring the egg from the outside edge of the pan (where the egg cooks faster), towards the inside of the pan. While doing this, move your pan on and of the heat to control the temperature of the pan. You do not want your eggs catching or scorching. 4. What I’m looking for when cooking scrambled eggs is the point where the eggs have just started to set (they do not run around the pan when you tilt it), but they are still wet to the touch. This is when you should season your eggs with salt (and pepper if you’d like), and serve immediately. Even if your eggs seem slightly undercooked, residual heat will continue to cook them, so it is best to serve them at this point. 5. Garnish with your chopped chives, and enjoy! #scrambledeggs #eggs #gordonramsay #homecooking #Recipe

1.01M
77.9K
307
1mo ago
thestrongcook
Welcome to… my Tartare Series! 🥩🐟 Over the next 3 episodes, I’ll be sharing my three favourite tartare recipes. From beef to beetroot, there will be a tartare for everyone 🙌 With each episode, I’ll be sharing a full detailed recipe + tips for selecting the right ingredients. Be sure to drop a follow - the first episode is out tomorrow ✌️ #tartare #series #homecooking #Recipe
906K
55.0K
100
2mo ago
thestrongcook
How to Make Joël Robuchon’s Mashed Potatoes ⭐️⭐️⭐️ FULL RECIPE BELOW ⬇️ Ingredients: 1.25kg ratte potato (or Yukon gold) (your yield should be 1kg after peeling) 250mL whole milk 250g unsalted butter, diced 4-5 sprigs thyme 1 tsp black peppercorns 2 cloves garlic, gently smashed Fine sea salt, to taste INSTRUCTIONS: 1. In a large, heavy bottom pot, ideally large enough to fit all your potatoes in a single layer, cover your potatoes with cold water. Bring to a boil over high heat, then lower your heat to medium. Allow your potatoes to cook for 20-30 minutes, or until you can pierce your potatoes with a pairing knife with zero resistance. 2. While your potatoes are cooking, bring your milk to a boil with your thyme, garlic and black peppercorns. As soon as it comes to a boil, turn off the heat and allow the aromatics to steep while the milk stays hot. 3. When your potatoes are done cooking, strain them, and let them sit in the strainer for 5-10 minutes to allow steam to be released. Once they are cool enough to touch, but still hot, peel the potatoes & discard the skins. 4. Press your potatoes through a potato ricer into a large bowl. Strain the aromatics out of your milk, and pour half of the milk into the riced potatoes. Fold the milk gently into the potatoes until incorporated. Then, pass your potatoes once more through a fine mesh strainer into a large pot (this step is optional, but does result in THE smoothest potatoes). 5. Put the pot over low heat, and add more milk as needed until your potatoes are smooth. At this point, you can decide how smooth/luxurious you would like your potatoes. If you want them to be more of a "purée", add all of the butter and remaining milk for the true Joel Robuchon Ratio. If you want more of a traditional mashed potato consistency, add less milk, and half the butter. Regardless of what you choose, at this point you can season your potatoes with salt to taste. Serve your potatoes as a side with any roast or braised meat, and enjoy! #mashedpotatoes #michelin #potato #homecooking #Recipe
884K
85.9K
152
1mo ago
thestrongcook
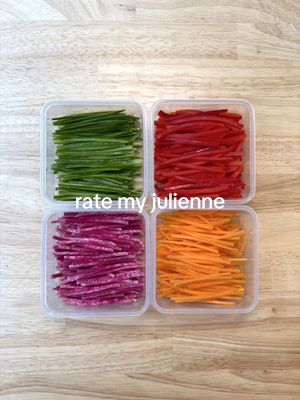
How to Julienne Vegetables 🌶️🥒🥕 KNIFE SKILLS YOU SHOULD KNOW - ep.2 INSTRUCTIONS ⬇️ 1. Start off by peeling your vegetables - in most cases, when dealing with root vegetables in particular, the peel will not be used. However, with softer vegetables like cucumber and bell peppers, the skin is essential! 2. Cut your vegetables into segments. Technically speaking, a Julienne is meant to be between 2 and 3 inches long. Cut your segments accordingly! From here, you can square off your segments to make sure they lay flat on all sides, and don’t have any irregular edges. 3. Cut your vegetables into sheets. You want your sheets to be an even 3mm thick. You can use a knife do do this, however, a mandolin is very useful as well! Just be VERY careful when using a mandolin, especially with root vegetables. 4. Once you have your vegetable "sheets" stack them in piles of 4-5 (any more, and your pile will likely shift around). Using a similar motion to a chiffonade, cut your sheets into thin batons that are as wide as the sheets are thick (you’re looking for 3mm x 3mm). Work slowly and methodically - the more focused you are, the more precise your cuts will be. 5. Serve your julienne in a salad or slaw of your choice, and enjoy! #knifeskills #julienne #frenchcooking #homecooking #Recipe

867K
67.6K
455
2mo ago
thestrongcook
Welcome to… SPANISH CLASSICS 🇪🇸🥘🍅 In this series, I’ll be sharing my take on some of Spain’s most famous dishes. From paella to patatas bravas, you’ll have all the dishes you need to host your next Spanish-themed dinner party. With each episode, I’ll be sharing a full detailed recipe, so you’re not going to want to miss out! Be sure to drop a follow - the first episode is out tomorrow ✌️ #spain #tapas #spanishfood #homecooking #Recipe
779K
60.8K
203
5mo ago
thestrongcook
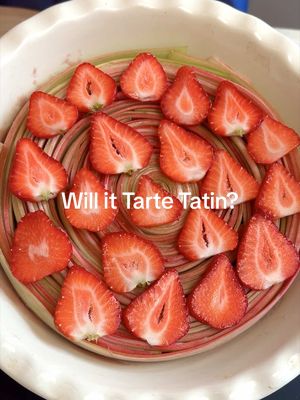
How to Make Strawberry Rhubarb Crisp 🍓🌱 - Will it Tarte Tatin ep. 9 - RHUBARB INGREDIENTS: 2 cups strawberries (halved) 2 cups rhubarb (cut into 1 cm segments) 1/3 cup granulated sugar 1/4 cup strawberry jam 1.25 cups flour 1 cup instant oats 3/4 cup softened butter 3/4 cup brown sugar INSTRUCTIONS: 1. Pre-heat your oven at 375 degrees Fahrenheit. 2. Chop your strawberries and rhubarb into roughly the same size pieces. Toss both in your granulated sugar. 3. In a large pan, heat your strawberry jam until liquified. Remove from the heat, and mix in your strawberries and rhubarb. Divide your fruit mix between 4 small ramekins or gratin dishes (oven safe). 4. Mix your softened butter, flour, brown sugar and oats, until it has the texture of damp sand. It is okay for there to be small clumps! This will result in a better final texture. 5. Spread your crumble mixture around the top of your fruit, piling on as much as possible, pressing it down gently. You will have a lot of crumble - but try your best to get it all on your fruit! The strawberry/rhubarb mixture will shrink/reduce while baking, so you need much more than you think! 6. Transfer your baking dishes onto a baking tray (this is VERY necessary, as liquid will spill over while baking), and bake for 30-45 minutes, or until any visible liquid has reduced to a thick, syrupy consistency, and your crumble is golden brown. 7. Let rest for 10-15 minutes before serving for best results. Serve with a generous scoop of vanilla ice cream, and enjoy! #strawberry #rhubarb #crisp #homecooking #Recipe
661K
38.6K
179
12mo ago
thestrongcook
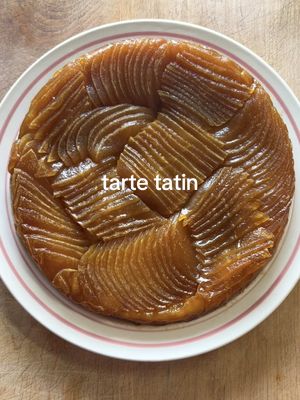
How to Make an Apple Tarte Tatin 🍎🍎🍎 NOTE: this is for a 9" cast iron skillet - measurements for a bigger/smaller pan will need to be scaled accordingly INGREDIENTS: 4 large honeycrisp apples 1 large sheet frozen puff pastry (thawed) 2/3 cup granulated sugar 1 tbsp apple cider vinegar 1 tbsp water 3 tbsp cold unsalted butter 250 mL 35% whipping cream 1 tbsp icing sugar 1 tsp cinnamon 1 tsp vanilla extract INSTRUCTIONS: 1. Peel your apples, and cut each apple into 3 equal segments, removing the stem and core. Place your peeled apple segments in a large container or bowl, and submerge them with hot water from your tap. (Tap water at its hottest setting, is typically between 50-60 degrees Celsius, which is what we’re aiming for - if not, adjust the temperature as needed!). Let your apples sit in the water for at least 10 minutes, or until we are done the next step. 2. While your apples are soaking, make your caramel! Using a 9" round cast-iron pan (you can also use another pot/pan to make your caramel, then transfer it to a 9" round baking dish after). Cover the bottom of your pan with an even layer of your granulated sugar, then drizzle your 1 tbsp vinegar and 1 tbsp water to cover the sugar (add more water if needed to cover the sugar). Turn your stove top to medium heat, and allow the sugar to come to a boil, before reducing into a caramel. What you are looking for with your caramel, is for a light brown colour to appear. Once you see this (likely just in one section of your pan, VERY CAREFULLY tilt your pan in a circular motion to make sure the sugar caramelizes evenly - but DO NOT stir or whisk your caramel at any point, or else it will crystallize. Once your sugar is evenly caramelized everywhere (now a thick, syrupy consistency), stop the caramelization by stirring in your cold butter. At this point it is okay to stir, and you will continue stirring for 2-3 minutes, or until the caramel is thick and emulsified (see video for a visual). Remove your caramel from the heat. 3. Remove your apples from the warm water, and if you would like (this is completely optional), thinly slice your apples. From here, VERY CAREFULLY place your apples into your caramel, with whatever you consider to be the "presentation side" face-down in the caramel. 4. If you haven’t already, pre-heat your oven to 400 degrees Fahrenheit. Cut your puff pastry dough into a circle, *slightly* larger than the surface area of your pan. Place the pastry directly on the apples, tucking any excess dough around the edges of your apples. Poke holes in your dough using a fork, and then bake in the oven for 20-35 minutes (based on the exact heat of your oven this will vary). You will be looking for a nice golden brown crust, and for the caramel to be thick when you look around the edge of your tart (no liquid pooling when you look around the edge) 5. Remove the tart from the oven, and allow it to cool, in the pan, for 60-90 minutes. Once your pan is warm, but cool enough to handle with your bear hands, flip your tart onto a plate, cutting board, or better yet - a tray with a rack. 6. For your whipped cream, whip your cream, vanilla, icing sugar, and cinnamon until stiff peaks form. Slice your tart and garnish it with a generous dollop of your whipped cream. Enjoy! #apple #tartetatin #cooking #homecooking #Recipe
629K
57.3K
139
3mo ago
thestrongcook
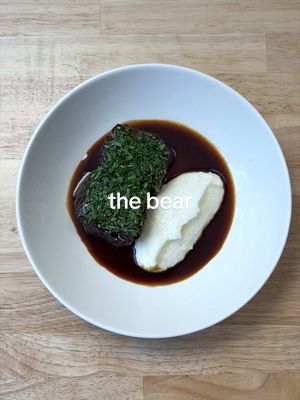
How to Make Coca Cola-Braised Short Ribs (from the Bear) 🐻 FULL RECIPE BELOW ⬇️ (feeds 4 people as a small main course) INGREDIENTS: 800g boneless beef short ribs 355mL bottle Coca Cola 1L beef stock 1 onion 1 large carrot 1 tbsp tomato paste 2-3 tbsp fish sauce 2 tbsp neutral oil 1/2 bunch parsley 3-4 sprigs thyme 1/2 cup white polenta 1 cup milk 1 cup water 50g fresh Parmesan (to grate) 2 tbsp cold butter Fine sea/kosher salt (to taste) INSTRUCTIONS: 1. Ideally 24 hours before cooking, cut your short ribs into 4 equal portions, and dry them out on a wire rack in the fridge overnight. 2. Pre-heat your oven to 325 degrees Fahrenheit. Season your short ribs generously with salt. Peel and cut your onion & carrot into large chunks. In a large Dutch oven, sear your short ribs over medium-high heat in 2 tbsp neutral oil until nicely browned. 3. Remove the short ribs, turn the heat down to medium, and add your carrots & onion. Sauté for 3-5 minutes, or until lightly caramelized. Add your tomato paste and sauté for 1 more minute. Add your Coca Cola to deglaze, and add back in your short ribs. Cover everything with beef stock, and bring to a boil. Once at a gentle simmer, add your fish sauce, thyme, and the stems from your parsley. Cover your pot, and transfer it to the oven. Cook for 2-3 hours, or until the short ribs are fork tender. When finished, let the short ribs rest in the liquid to cool to room temperature. 4. For your polenta, bring your milk & water to a boil in a medium pot. Bit by bit, whisk in your polenta. Cook your polenta, stirring often, for 30 minutes. When it has thickened to the point it can stand up on a plate. Add your cold butter, grated Parmesan, and a pinch of salt to taste. Whisk to combine, and keep warm. 5. Remove the short ribs from the pot and place them in a container for the moment. Strain out all the other solids in the braising liquid, and reduce the braising liquid over medium heat until it has slightly thickened. This will be the glaze for your short ribs. Add your short ribs back into the pan, and warm them through in the glaze. 6. Roughly chop your parsley leaves. Serve your short ribs, garnished with parsley, along with a dollop of polenta. With whatever glaze is left in the pan, thin it out with a little bit of water to get a looser, saucier consistency. Finish each plate with a drizzle of sauce. Enjoy! #thebear #cocacola #shortribs #homecooking #recipe
626K
40.6K
85
3mo ago
thestrongcook
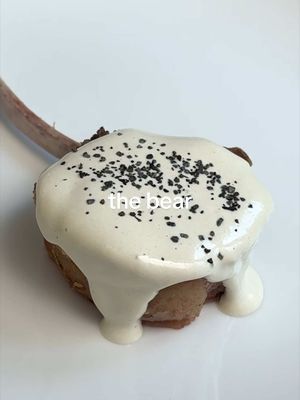
How to Make Lamb w/ Tonnato 🐑🐟 (From the Bear) FULL RECIPE BELOW ⬇️ INGREDIENTS: 1 x 1/2 lamb rack (7 bones) 4 tbsp cold butter, diced 2-3 sprigs each thyme + rosemary 1 x 80g can tuna in olive oil 5 anchovies in oil 1 lemon 2 tsp capers 1 tsp Dijon 2 egg yolks 1 + 3 cloves garlic 1/4 cup cold water 500mL olive oil Salt & black pepper to taste INSTRUCTIONS: 1. Ideally 24 hours before cooking, dry out your rack of lamb in the fridge on a wire rack. I "frenched" my lamb rack myself (i.e. I cleaned the meat off the bones for presentation), but most butchers/supermarkets sell their lamb racks already frenched. I recommend buying your lamb already frenched, because it will save you time + yield a better result! 2. For your tonnato sauce, add your canned tuna, anchovies, capers, garlic, water, Dijon & egg yolks to a blender along with the juice from your lemon. Blend your tonnato "base" until smooth, then slowly start adding your olive oil into the blender, bit by bit, until your sauce has thickened. You want your tonnato to be the consistency of a very thick sauce, but not as thick as a store-bought mayo. You’re looking for a nice middle ground (see video for reference). Alternatively - you can replace the egg yolks, water & olive oil with 500mL good quality mayonnaise. It will yield the same result! Your tonnato will also be more stable. NOTE: This recipe will yield more tonnato sauce than is needed for this quantity of lamb. You can save the extra sauce to use as a dip or salad dressing. ALSO: I recommend serving this tonnato sauce at room temperature so it doesn’t cool down your lamb when cooked. Take the quantity needed out of the fridge 1hr before serving your lamb. 3. For your lamb, take the rack out of the fridge 1 hr before cooking. This will ensure it cooks quickly & evenly. Season your lamb generously with salt. 4. Start a large heavy-bottom pan over medium-high heat with 1 tbsp neutral oil. Add the lamb to the pan while the pan is still cold with the fat cap side down. While the pan heats up, the fat will render more evenly. Once the pan is hot, and the fat has started to render, sear the lamb all around to develop a crust. Once the lamb is nicely browned all around, turn the heat on your pan down to low. Add your butter, thyme, rosemary & 3 cloves of garlic. Baste your lamb chops in the foaming butter, turning/flipping your rack every 2 minutes or so. Continue cooking your lamb rack like this, developing even colour, until the internal temperature at the thickest point reaches 45 degrees Celsius. If your butter starts to blacken/burn during this process, dump out the butter and add more as needed. 5. Once your lamb rack is done, remove it from the pan and transfer it to a tray lined with a wire rack to rest. Allow the lamb to rest for at least 10 minutes before slicing. When ready to serve, slice your lamb rack between each bone & serve each slice with a generous spoonful of your tonnato sauce. Enjoy! #lamb #tonnato #thebear #homecooking #Recipe
Ben Maxwell (@thestrongcook) TikTok Stats & Analytics
Ben Maxwell (@thestrongcook) has 113K TikTok followers with a 6.16% engagement rate over the past 12 months. Across 117 videos, Ben Maxwell received 3.26M total likes and 53.0M views, averaging 27.9K likes per video. This page tracks Ben Maxwell's performance metrics, top content, and engagement trends — updated daily. To benchmark @thestrongcook against other accounts, use Socialpruf's TikTok competitor analysis tool.
Ben Maxwell (@thestrongcook) TikTok Analytics FAQ
How many TikTok followers does Ben Maxwell have?+
Ben Maxwell (@thestrongcook) has 113K TikTok followers as of October 2026.
What is Ben Maxwell's TikTok engagement rate?+
Ben Maxwell's TikTok engagement rate is 6.16% over the last 12 months, based on 117 videos.
How many likes does Ben Maxwell get on TikTok?+
Ben Maxwell received 3.26M total likes across 117 videos in the last 12 months, averaging 27.9K likes per video.
How many TikTok views does Ben Maxwell get?+
Ben Maxwell's TikTok content generated 53.0M total views over the last 12 months.
Can I compare Ben Maxwell with other TikTok accounts?+
Yes. Add @thestrongcook to a competitor set with Socialpruf's TikTok competitor analysis tool and benchmark it side by side with any other public accounts on views, engagement rate and follower growth, with history back to each account's first post.