NewClaim a free social report
tiktok analytics
Similar Accounts:
followers
1.38M
impressions
63.6M
likes
4.34M
comments
14.3K
posts
121
engagement
6.85%
emv
$2.37M
Average per post
525K

Key Metrics

Distributions

Top Content

fudgey & chewy 🤤 if you prefer brownie corners & crinkly tops, you’ll absolutely love these!!  ingredients: 350g powdered sugar (a little less than 3 cups, but you can use 3 cups as well since this recipe is pretty forgiving) 60-65g cocoa powder (about 8-10 tablespoons if using tablespoons however using a scale is the best because tbsp weights may vary) – you can adjust this to 60g of cocoa powder if you prefer a sweeter cookie! 1/2 tsp salt 3 egg whites from 3 large eggs! (about 1/2 cup of liquid egg whites) 1/2 to 1 cup semi sweet chocolate chips (optional but recommended!) – depending how much chocolate you like! you can also use milk but i'm a semi sweet/dark choco girl. 1 tsp instant coffee (use 1/2 tsp if you are caffeine sensitive) 1 tsp vanilla bean paste (optional but adds great flavor) **if you live in a hot climate and the dough is super runny, try putting it in the fridge for 30 mins to an hour before baking**  directions: preheat oven to 350°f (175°c). line a baking sheet with parchment paper and lightly butter it so the cookies do not stick. in a large bowl, add powdered sugar, cocoa powder, salt, egg whites, instant coffee, and vanilla bean paste. stir until a thick glossy batter forms. fold in the chocolate chips if you are using them. scoop 2 to 3 tablespoons of batter per cookie onto the prepared baking sheet. leave at least 4 to 5 inches between each cookie because they spread a lot while baking. four to a cookie sheet will definitely prevent them from touching, but you can fit six if you do not mind if they bake into each other a bit. place the cookie tray directly in the middle of your oven. bake for 8 to 10 minutes. at 8 minutes the cookies will cool into a very fudgy texture. the longer you bake them, the less fudgy they will be. ten minutes should be the maximum baking time. immediately after baking, use a round bowl to gently scoot and round out the cookies. this will help “fluff” up the edges, which can be a bit flat right out of the oven. remove the cookies from the baking sheet right after shaping so they do not continue cooking on the hot tray. transfer to a cooling rack and let them cool completely before eating. enjoy!!! tips: -for the fudgiest texture, stick closer to 8 minutes of baking time.  -bake in the middle of the oven to prevent burning. use good quality cocoa powder for a richer chocolate flavor.  -if you don’t like coffee, you can skip the instant coffee, but it really brings out the chocolate taste.  -make sure to leave plenty of space between cookies because they spread a lot. four to a cookie sheet will keep them from touching, six if you are fine with them touching a little.  -transfer the cookies off the baking sheet right away so they stay soft in the middle.  -immediately after baking, use a round bowl to gently scoot and round out the cookies. this helps “fluff” up the edges, which can be a bit flat straight from the oven. #brownie #cookies #flourless #baking #glutenfree
27.1M
2.02M
4.73K
11mo ago
misojenkitchen
fudgey & chewy 🤤 if you prefer brownie corners & crinkly tops, you’ll absolutely love these!! ingredients: 350g powdered sugar (a little less than 3 cups, but you can use 3 cups as well since this recipe is pretty forgiving) 60-65g cocoa powder (about 8-10 tablespoons if using tablespoons however using a scale is the best because tbsp weights may vary) – you can adjust this to 60g of cocoa powder if you prefer a sweeter cookie! 1/2 tsp salt 3 egg whites from 3 large eggs! (about 1/2 cup of liquid egg whites) 1/2 to 1 cup semi sweet chocolate chips (optional but recommended!) – depending how much chocolate you like! you can also use milk but i'm a semi sweet/dark choco girl. 1 tsp instant coffee (use 1/2 tsp if you are caffeine sensitive) 1 tsp vanilla bean paste (optional but adds great flavor) **if you live in a hot climate and the dough is super runny, try putting it in the fridge for 30 mins to an hour before baking** directions: preheat oven to 350°f (175°c). line a baking sheet with parchment paper and lightly butter it so the cookies do not stick. in a large bowl, add powdered sugar, cocoa powder, salt, egg whites, instant coffee, and vanilla bean paste. stir until a thick glossy batter forms. fold in the chocolate chips if you are using them. scoop 2 to 3 tablespoons of batter per cookie onto the prepared baking sheet. leave at least 4 to 5 inches between each cookie because they spread a lot while baking. four to a cookie sheet will definitely prevent them from touching, but you can fit six if you do not mind if they bake into each other a bit. place the cookie tray directly in the middle of your oven. bake for 8 to 10 minutes. at 8 minutes the cookies will cool into a very fudgy texture. the longer you bake them, the less fudgy they will be. ten minutes should be the maximum baking time. immediately after baking, use a round bowl to gently scoot and round out the cookies. this will help “fluff” up the edges, which can be a bit flat right out of the oven. remove the cookies from the baking sheet right after shaping so they do not continue cooking on the hot tray. transfer to a cooling rack and let them cool completely before eating. enjoy!!! tips: -for the fudgiest texture, stick closer to 8 minutes of baking time. -bake in the middle of the oven to prevent burning. use good quality cocoa powder for a richer chocolate flavor. -if you don’t like coffee, you can skip the instant coffee, but it really brings out the chocolate taste. -make sure to leave plenty of space between cookies because they spread a lot. four to a cookie sheet will keep them from touching, six if you are fine with them touching a little. -transfer the cookies off the baking sheet right away so they stay soft in the middle. -immediately after baking, use a round bowl to gently scoot and round out the cookies. this helps “fluff” up the edges, which can be a bit flat straight from the oven. #brownie #cookies #flourless #baking #glutenfree
dubai choco cookies 🍪 made my flourless chocolate cookies even better with pistachio & crispy kataifi 🤭  #dubaichocolate #brownies #cookies #flourless #baking
9.61M
827K
3.84K
11mo ago
misojenkitchen
dubai choco cookies 🍪 made my flourless chocolate cookies even better with pistachio & crispy kataifi 🤭 #dubaichocolate #brownies #cookies #flourless #baking
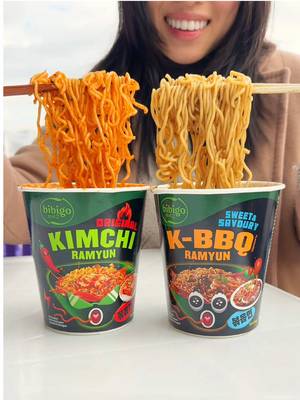
a morning in my life in seoul 🇰🇷 #bibigopartner  whenever i travel, i always pack ramyun with me. it’s my go to comfort snack and you can make it so easily in your hotel room with just hot water ◡̈ bibigo’s ramyun cups highlight the korean flavors i love and always bring me right back to seoul. it made me so happy eating a cup (actually two 🤭) after walking around the city all morning.  i brought bibigo’s ramyun to a korean convenience store and ate it by the han river while it snowed. nothing is better than hot ramyun on a cold, snowy day ❄️🍜 usually i love adding an egg or cheese to my ramyun, but i kept it simple today. how do you usually enjoy your ramyun? you can find bibigo ramyun online or at your local asian market 🤍 @bibigo USA  #bibigoforit #koreanfood #koreanramen #instantramen
6.65M
76.8K
32
6mo ago
misojenkitchen
a morning in my life in seoul 🇰🇷 #bibigopartner whenever i travel, i always pack ramyun with me. it’s my go to comfort snack and you can make it so easily in your hotel room with just hot water ◡̈ bibigo’s ramyun cups highlight the korean flavors i love and always bring me right back to seoul. it made me so happy eating a cup (actually two 🤭) after walking around the city all morning. i brought bibigo’s ramyun to a korean convenience store and ate it by the han river while it snowed. nothing is better than hot ramyun on a cold, snowy day ❄️🍜 usually i love adding an egg or cheese to my ramyun, but i kept it simple today. how do you usually enjoy your ramyun? you can find bibigo ramyun online or at your local asian market 🤍 @bibigo USA #bibigoforit #koreanfood #koreanramen #instantramen
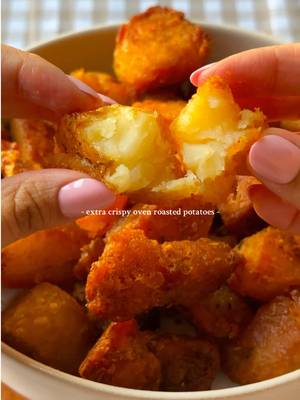
the BEST crunchiest crispiest oven roasted potatoes ever!!  this is a fool proof recipe for the best potatoes you’ll ever have!!  #potato #crispypotato #potatorecipes #ovenpotatoes #crispy
4.83M
277K
167
7mo ago
misojenkitchen
the BEST crunchiest crispiest oven roasted potatoes ever!! this is a fool proof recipe for the best potatoes you’ll ever have!! #potato #crispypotato #potatorecipes #ovenpotatoes #crispy
Replying to @Gavino𓍼 all the best parts of a brownie in cookie form 🍫 crinkly top + chewy + fudgy = the most delicious cross between a brownie and a cookie!  ingredients: 350g powdered sugar (a little less than 3 cups, but you can use 3 cups as well since this recipe is pretty forgiving) 60-65g cocoa powder (about 8-10 tablespoons if using tablespoons however using a scale is the best because tbsp weights may vary)– you can adjust this to 60g of cocoa powder if you prefer a sweeter cookie! 1/2 tsp salt 3 egg whites from 3 large eggs! (about 1/2 cup of liquid egg whites) 1/2 to 1 cup semi sweet chocolate chips (optional but recommended!) – depending how much chocolate you like! you can also use milk but i'm a semi sweet/dark choco girl. 1 tsp instant coffee (use 1/2 tsp if you are caffeine sensitive) 1 tsp vanilla bean paste (optional but adds great flavor) **if you live in a warm climate and your dough is super runny, try putting it in the fridge for 30-60 mins before scooping and baking** directions: preheat oven to 350°f (175°c). line a baking sheet with parchment paper and lightly butter it so the cookies do not stick. in a large bowl, add powdered sugar, cocoa powder, salt, egg whites, instant coffee, and vanilla bean paste. stir until a thick glossy batter forms. fold in the chocolate chips if you are using them. scoop 2 to 3 tablespoons of batter per cookie onto the prepared baking sheet. leave at least 4 to 5 inches between each cookie because they spread a lot while baking. four to a cookie sheet will definitely prevent them from touching, but you can fit six if you do not mind if they bake into each other a bit. place the cookie tray directly in the middle of your oven. bake for 8 to 10 minutes. at 8 minutes the cookies will cool into a very fudgy texture. the longer you bake them, the less fudgy they will be. ten minutes should be the maximum baking time. immediately after baking, use a round bowl to gently scoot and round out the cookies. this will help “fluff” up the edges, which can be a bit flat right out of the oven. remove the cookies from the baking sheet right after shaping so they do not continue cooking on the hot tray. transfer to a cooling rack and let them cool completely before eating. enjoy!!! tips: -for the fudgiest texture, stick closer to 8 minutes of baking time.  -bake in the middle of the oven to prevent burning. use good quality cocoa powder for a richer chocolate flavor.  -if you don’t like coffee, you can skip the instant coffee, but it really brings out the chocolate taste.  -make sure to leave plenty of space between cookies because they spread a lot. four to a cookie sheet will keep them from touching, six if you are fine with them touching a little.  -transfer the cookies off the baking sheet right away so they stay soft in the middle.  -immediately after baking, use a round bowl to gently scoot and round out the cookies. this helps “fluff” up the edges, which can be a bit flat straight from the oven. #brownie #cookies #flourless #baking #glutenfree
2.99M
200K
1.01K
11mo ago
misojenkitchen
Replying to @Gavino𓍼 all the best parts of a brownie in cookie form 🍫 crinkly top + chewy + fudgy = the most delicious cross between a brownie and a cookie! ingredients: 350g powdered sugar (a little less than 3 cups, but you can use 3 cups as well since this recipe is pretty forgiving) 60-65g cocoa powder (about 8-10 tablespoons if using tablespoons however using a scale is the best because tbsp weights may vary)– you can adjust this to 60g of cocoa powder if you prefer a sweeter cookie! 1/2 tsp salt 3 egg whites from 3 large eggs! (about 1/2 cup of liquid egg whites) 1/2 to 1 cup semi sweet chocolate chips (optional but recommended!) – depending how much chocolate you like! you can also use milk but i'm a semi sweet/dark choco girl. 1 tsp instant coffee (use 1/2 tsp if you are caffeine sensitive) 1 tsp vanilla bean paste (optional but adds great flavor) **if you live in a warm climate and your dough is super runny, try putting it in the fridge for 30-60 mins before scooping and baking** directions: preheat oven to 350°f (175°c). line a baking sheet with parchment paper and lightly butter it so the cookies do not stick. in a large bowl, add powdered sugar, cocoa powder, salt, egg whites, instant coffee, and vanilla bean paste. stir until a thick glossy batter forms. fold in the chocolate chips if you are using them. scoop 2 to 3 tablespoons of batter per cookie onto the prepared baking sheet. leave at least 4 to 5 inches between each cookie because they spread a lot while baking. four to a cookie sheet will definitely prevent them from touching, but you can fit six if you do not mind if they bake into each other a bit. place the cookie tray directly in the middle of your oven. bake for 8 to 10 minutes. at 8 minutes the cookies will cool into a very fudgy texture. the longer you bake them, the less fudgy they will be. ten minutes should be the maximum baking time. immediately after baking, use a round bowl to gently scoot and round out the cookies. this will help “fluff” up the edges, which can be a bit flat right out of the oven. remove the cookies from the baking sheet right after shaping so they do not continue cooking on the hot tray. transfer to a cooling rack and let them cool completely before eating. enjoy!!! tips: -for the fudgiest texture, stick closer to 8 minutes of baking time. -bake in the middle of the oven to prevent burning. use good quality cocoa powder for a richer chocolate flavor. -if you don’t like coffee, you can skip the instant coffee, but it really brings out the chocolate taste. -make sure to leave plenty of space between cookies because they spread a lot. four to a cookie sheet will keep them from touching, six if you are fine with them touching a little. -transfer the cookies off the baking sheet right away so they stay soft in the middle. -immediately after baking, use a round bowl to gently scoot and round out the cookies. this helps “fluff” up the edges, which can be a bit flat straight from the oven. #brownie #cookies #flourless #baking #glutenfree
Replying to @Toni Z dubai chocolate brownie cookie sandwiches 🍪 ingredients:
350g powdered sugar
60–65g cocoa powder
1/2 tsp salt
3 egg whites from 3 large eggs! (about 1/2 cup of liquid egg whites)
1/2 to 1 cup semi-sweet chocolate chips (optional but recommended!) – depending how much chocolate you like. you can also use milk, but i’m a semi-sweet/dark choco girl.
1 tsp instant coffee
1 tsp vanilla bean paste
2 tbsp pistachio crème (optional for the cookie)  filling:
4 oz crispy kataifi (brown uncooked kataifi in butter until golden)
2-3 oz pistachio crème (you can totally eyeball this)
30g tahini (again, you can eyeball this) directions:
in a big bowl, mix together powdered sugar, cocoa powder, salt, egg whites, instant coffee, and vanilla bean paste until you’ve got a thick, glossy batter.
fold in chocolate chips if you’re using them.
swirl in the pistachio crème (optional- the pistachio crème gets lost when baked into the cookie but the flavor is there!) 
refrigerate the batter for 30–60 minutes.
preheat your oven to 350°f (175°c). line a baking sheet with parchment paper and butter it so the cookies don’t stick.
scoop 2–3 tablespoons of batter per cookie onto the tray. leave at least 4–5 inches between each cookie because they spread a lot. four per sheet is the safest bet! 
bake in the middle rack of the oven for 8–10 minutes, until crinkly. if you pull them at 8 minutes, they’ll set into a super fudgy texture. if you bake longer, they’ll be less fudgy so 10 minutes max but this also depends on your oven. you can tell the cookies are done when the edges are set and the tops are crinkly. 
right after baking, use a round bowl to scoot the edges in so the cookies look nice and round (and fluff up the edges a bit).
transfer off the tray right away so they don’t keep cooking on the hot pan. let them cool completely.
for the filling, mix the crispy kataifi with pistachio crème and tahini until it comes together. spread between two cooled cookies and sandwich it up.
enjoy!!! #dubaichocolate #brownies #cookies #baking #chocolatecookies
2.95M
312K
1.69K
11mo ago
misojenkitchen
Replying to @Toni Z dubai chocolate brownie cookie sandwiches 🍪 ingredients:
350g powdered sugar
60–65g cocoa powder
1/2 tsp salt
3 egg whites from 3 large eggs! (about 1/2 cup of liquid egg whites)
1/2 to 1 cup semi-sweet chocolate chips (optional but recommended!) – depending how much chocolate you like. you can also use milk, but i’m a semi-sweet/dark choco girl.
1 tsp instant coffee
1 tsp vanilla bean paste
2 tbsp pistachio crème (optional for the cookie) filling:
4 oz crispy kataifi (brown uncooked kataifi in butter until golden)
2-3 oz pistachio crème (you can totally eyeball this)
30g tahini (again, you can eyeball this) directions:
in a big bowl, mix together powdered sugar, cocoa powder, salt, egg whites, instant coffee, and vanilla bean paste until you’ve got a thick, glossy batter.
fold in chocolate chips if you’re using them.
swirl in the pistachio crème (optional- the pistachio crème gets lost when baked into the cookie but the flavor is there!) 
refrigerate the batter for 30–60 minutes.
preheat your oven to 350°f (175°c). line a baking sheet with parchment paper and butter it so the cookies don’t stick.
scoop 2–3 tablespoons of batter per cookie onto the tray. leave at least 4–5 inches between each cookie because they spread a lot. four per sheet is the safest bet! 
bake in the middle rack of the oven for 8–10 minutes, until crinkly. if you pull them at 8 minutes, they’ll set into a super fudgy texture. if you bake longer, they’ll be less fudgy so 10 minutes max but this also depends on your oven. you can tell the cookies are done when the edges are set and the tops are crinkly. 
right after baking, use a round bowl to scoot the edges in so the cookies look nice and round (and fluff up the edges a bit).
transfer off the tray right away so they don’t keep cooking on the hot pan. let them cool completely.
for the filling, mix the crispy kataifi with pistachio crème and tahini until it comes together. spread between two cooled cookies and sandwich it up.
enjoy!!! #dubaichocolate #brownies #cookies #baking #chocolatecookies
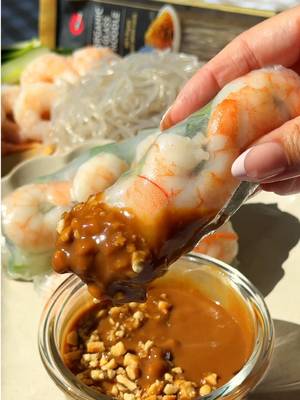
one of my all time favs~  recipe: rice paper ofood glass noodles carrots cucumbers lettuce thai basil shrimp, cooked and sliced peanut hoisin sauce: 3 tbsp peanut butter 2 tbsp hoisin sauce a splash of rice vinegar 1–2 tbsp hot water (to thin to your liking) optional: a pinch of sugar for balance and a bit of chili crisp or sriracha if you want heat instructions: cook the glass noodles according to the package, then rinse under cold water so they stay springy. prep all your veggies into thin strips to make rolling easier. quickly dip the rice paper in warm water until just softened, then layer on lettuce, noodles, herbs, veggies, and shrimp. roll tightly. for the sauce, whisk everything together until smooth. adjust thickness with hot water and flavor with extra vinegar or sweetness if needed. clean ingredients, chewy texture, and effortless versatility are what make @ofoodusa glass noodles such a staple in my kitchen. they’re made 100% from sweet potato starch, which means they’re vegan, gluten-free, sugar-free, and sodium-free. super clean, super versatile, and they soak up flavor beautifully in any dish. i used them to make these fresh vietnamese spring rolls today, and they turned out so good. whether it’s stir-fries, soups, japchae, or salads, these noodles work with literally everything.  if you haven’t tried them yet, definitely check them out on amazon. just search “o’food glass noodles.” #springrolls #vietnamesefood #EasyRecipe #healthyrecipe #asianfood

1.78M
70.6K
243
8mo ago
misojenkitchen
one of my all time favs~ recipe: rice paper ofood glass noodles carrots cucumbers lettuce thai basil shrimp, cooked and sliced peanut hoisin sauce: 3 tbsp peanut butter 2 tbsp hoisin sauce a splash of rice vinegar 1–2 tbsp hot water (to thin to your liking) optional: a pinch of sugar for balance and a bit of chili crisp or sriracha if you want heat instructions: cook the glass noodles according to the package, then rinse under cold water so they stay springy. prep all your veggies into thin strips to make rolling easier. quickly dip the rice paper in warm water until just softened, then layer on lettuce, noodles, herbs, veggies, and shrimp. roll tightly. for the sauce, whisk everything together until smooth. adjust thickness with hot water and flavor with extra vinegar or sweetness if needed. clean ingredients, chewy texture, and effortless versatility are what make @ofoodusa glass noodles such a staple in my kitchen. they’re made 100% from sweet potato starch, which means they’re vegan, gluten-free, sugar-free, and sodium-free. super clean, super versatile, and they soak up flavor beautifully in any dish. i used them to make these fresh vietnamese spring rolls today, and they turned out so good. whether it’s stir-fries, soups, japchae, or salads, these noodles work with literally everything. if you haven’t tried them yet, definitely check them out on amazon. just search “o’food glass noodles.” #springrolls #vietnamesefood #EasyRecipe #healthyrecipe #asianfood
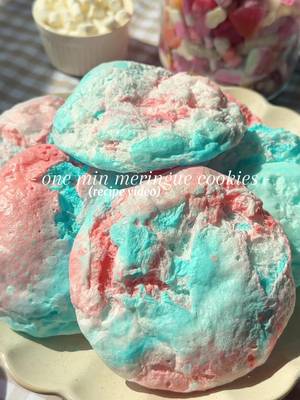
did you know you can make meringue in the microwave?  mix 300g powdered sugar with 1 egg white until it comes together into a thick, smooth dough. roll into small balls (about 1 tablespoon each) and place one ball at a time on a piece of parchment paper. microwave for 30-45 seconds, or until it puffs up and looks set on the outside (every microwave is different). let it cool completely so it can firm up, then enjoy. you can color the dough with food coloring if you’d like as well 🥰 the perfect lil sweet treat 🙂‍↕️  #meringues #dessert #easydessert #pavlova
1.56M
172K
591
5mo ago
misojenkitchen
did you know you can make meringue in the microwave? mix 300g powdered sugar with 1 egg white until it comes together into a thick, smooth dough. roll into small balls (about 1 tablespoon each) and place one ball at a time on a piece of parchment paper. microwave for 30-45 seconds, or until it puffs up and looks set on the outside (every microwave is different). let it cool completely so it can firm up, then enjoy. you can color the dough with food coloring if you’d like as well 🥰 the perfect lil sweet treat 🙂‍↕️ #meringues #dessert #easydessert #pavlova
microwaveable meringue in 30 secs! the perfect sweet treat for Valentine’s day ♥️♥️ microwaveable meringue cookies recipe:  300g powdered sugar 1 egg white splash of vanilla extract (optional) food coloring (optional) mix the powdered sugar, egg white, and vanilla together until it forms a thick, smooth dough. it should feel like playdoh. soft, moldable, and not super sticky. if it’s too wet or sticking to your hands, add a little more powdered sugar until it gets to that texture. i like adding the food coloring after it turns into a dough since this recipe makes a pretty big batch. it’s more fun that way because you can split the dough and make a few different shades 🥰 roll into small balls, about 1 tablespoon each. place one ball at a time on a piece of parchment paper and microwave for 30 to 45 seconds, or until it puffs up and looks set on the outside. every microwave is different. once it puffs up and stops rising, stop the microwave right away or they’ll burn. let them cool completely so they can firm up, then enjoy~ #meringues #dessert #easydessert #pavlova
1.05M
52.7K
572
5mo ago
misojenkitchen
microwaveable meringue in 30 secs! the perfect sweet treat for Valentine’s day ♥️♥️ microwaveable meringue cookies recipe: 300g powdered sugar 1 egg white splash of vanilla extract (optional) food coloring (optional) mix the powdered sugar, egg white, and vanilla together until it forms a thick, smooth dough. it should feel like playdoh. soft, moldable, and not super sticky. if it’s too wet or sticking to your hands, add a little more powdered sugar until it gets to that texture. i like adding the food coloring after it turns into a dough since this recipe makes a pretty big batch. it’s more fun that way because you can split the dough and make a few different shades 🥰 roll into small balls, about 1 tablespoon each. place one ball at a time on a piece of parchment paper and microwave for 30 to 45 seconds, or until it puffs up and looks set on the outside. every microwave is different. once it puffs up and stops rising, stop the microwave right away or they’ll burn. let them cool completely so they can firm up, then enjoy~ #meringues #dessert #easydessert #pavlova
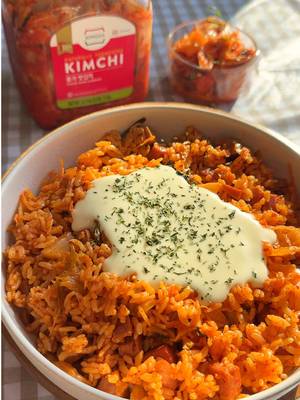
happy national kimchi day 🇰🇷 creamy kimchi fried rice:  ingredients 6 oz diced luncheon meat 3/4 cup @Jongga USA kimchi, chopped 1/2 tbsp sweetener of your choice 1/2 tbsp soy sauce drizzle of gochujang 420g cooked rice cream sauce 1/2 cup heavy cream 1/2 cup mozzarella cheese, shredded -heat a pan over medium and add the diced luncheon meat. cook until the edges are golden and crispy. -add the chopped kimchi, sweetener, soy sauce, and a drizzle of gochujang. sauté for 2–3 minutes until the kimchi softens and everything is coated in the sauce. -add the cooked rice and mix well, letting it fry for another 2–3 minutes. -in a separate small saucepan, heat the heavy cream over low. once warm, add the mozzarella and stir until smooth and creamy. -spoon the rice into bowls and pour the cream sauce over the top. serve hot and enjoy! today we’re celebrating one of korea’s most beloved and iconic foods, kimchi! more than just a side dish, kimchi represents the heart of korean cuisine, full of spice, tang, and soul. it’s a food that brings people together, passed down through generations and made with care, patience, and love ❤️ to celebrate national kimchi day on 11/22, i made one of my favorite comfort dishes, creamy kimchi fried rice. it’s rich, cozy, and full of flavor, and the creamy texture perfectly complements the bold, tangy taste of jongga kimchi. every bite feels like home — warm, flavorful, and so satisfying. my go-to is always jongga kimchi from costco, which captures that truly authentic korean flavor. if you’ve never tried real korean kimchi before, this is the perfect time to experience it! with jongga, you can taste the deep, authentic flavor that makes korean kimchi so special. it’s spicy, refreshing, and packed with probiotics that make you feel good inside and out. here’s to celebrating national kimchi day with something warm, flavorful, and made with love. pick up jongga kimchi at your nearest costco today! #koreanfood #kimchifriedrice #kfood #asiancooking #EasyRecipe
517K
36.7K
39
8mo ago
misojenkitchen
happy national kimchi day 🇰🇷 creamy kimchi fried rice: ingredients 6 oz diced luncheon meat 3/4 cup @Jongga USA kimchi, chopped 1/2 tbsp sweetener of your choice 1/2 tbsp soy sauce drizzle of gochujang 420g cooked rice cream sauce 1/2 cup heavy cream 1/2 cup mozzarella cheese, shredded -heat a pan over medium and add the diced luncheon meat. cook until the edges are golden and crispy. -add the chopped kimchi, sweetener, soy sauce, and a drizzle of gochujang. sauté for 2–3 minutes until the kimchi softens and everything is coated in the sauce. -add the cooked rice and mix well, letting it fry for another 2–3 minutes. -in a separate small saucepan, heat the heavy cream over low. once warm, add the mozzarella and stir until smooth and creamy. -spoon the rice into bowls and pour the cream sauce over the top. serve hot and enjoy! today we’re celebrating one of korea’s most beloved and iconic foods, kimchi! more than just a side dish, kimchi represents the heart of korean cuisine, full of spice, tang, and soul. it’s a food that brings people together, passed down through generations and made with care, patience, and love ❤️ to celebrate national kimchi day on 11/22, i made one of my favorite comfort dishes, creamy kimchi fried rice. it’s rich, cozy, and full of flavor, and the creamy texture perfectly complements the bold, tangy taste of jongga kimchi. every bite feels like home — warm, flavorful, and so satisfying. my go-to is always jongga kimchi from costco, which captures that truly authentic korean flavor. if you’ve never tried real korean kimchi before, this is the perfect time to experience it! with jongga, you can taste the deep, authentic flavor that makes korean kimchi so special. it’s spicy, refreshing, and packed with probiotics that make you feel good inside and out. here’s to celebrating national kimchi day with something warm, flavorful, and made with love. pick up jongga kimchi at your nearest costco today! #koreanfood #kimchifriedrice #kfood #asiancooking #EasyRecipe
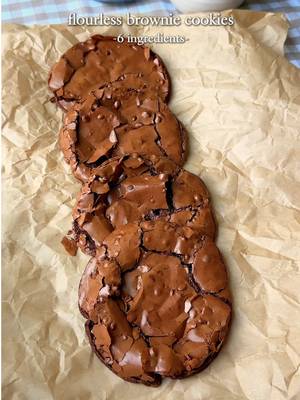
choco brownie cookies ~  if a brownie and a cookie had a love child, it would be these flourless chocolate brownie cookies 🤎 this recipe only needs 6 key ingredients for a deliciously chewy and fudgy cookie!  for everyone asking, the app link for Osta is in my bio, or search “Osta Recipes” in the app store or google play store!!  comment “brownie cookie” for a direct link to the recipe!  ingredients -350 g powdered sugar -65 g cocoa powder (about 10 tablespoons; using a scale is best since cocoa powders vary in weight) -1/2 tsp salt -3 egg whites (about 1/2 cup liquid egg whites) -1/2 cup semi-sweet chocolate chips (optional but recommended) -1 tsp instant coffee -1 tsp vanilla bean paste (optional, but recommended) instructions: preheat oven to 350°f (175°c). line a baking sheet with parchment paper and lightly butter it to prevent sticking. in a large bowl, combine powdered sugar, cocoa powder, salt, egg whites, instant coffee, and vanilla bean paste. stir until a thick, glossy batter forms. fold in the chocolate chips, if using. if your dough is super runny, refrigerate for 30-60 mins before baking!  scoop 2–3 tablespoons of batter per cookie onto the prepared baking sheet. leave 4–5 inches between each cookie, as they spread quite a bit. four cookies per sheet will prevent spreading into each other, but you can fit six if you don’t mind some overlap. place the baking sheet on the middle rack of the oven. bake for 8–10 minutes, or until the tops begin to crack. -8 minutes = very fudgy centers -closer to 10 minutes = less fudgy -ovens vary, so bake in 1-minute increments if needed. do not exceed 10 minutes. immediately after baking, use a round bowl to gently swirl around each cookie to shape and round them. this helps “fluff” the edges, which can look flat straight from the oven. remove cookies from the baking sheet right after shaping so they don’t continue cooking on the hot tray. transfer to a cooling rack and let cool completely before eating. enjoy 🤎
428K
19.3K
100
5mo ago
misojenkitchen
choco brownie cookies ~ if a brownie and a cookie had a love child, it would be these flourless chocolate brownie cookies 🤎 this recipe only needs 6 key ingredients for a deliciously chewy and fudgy cookie! for everyone asking, the app link for Osta is in my bio, or search “Osta Recipes” in the app store or google play store!! comment “brownie cookie” for a direct link to the recipe! ingredients -350 g powdered sugar -65 g cocoa powder (about 10 tablespoons; using a scale is best since cocoa powders vary in weight) -1/2 tsp salt -3 egg whites (about 1/2 cup liquid egg whites) -1/2 cup semi-sweet chocolate chips (optional but recommended) -1 tsp instant coffee -1 tsp vanilla bean paste (optional, but recommended) instructions: preheat oven to 350°f (175°c). line a baking sheet with parchment paper and lightly butter it to prevent sticking. in a large bowl, combine powdered sugar, cocoa powder, salt, egg whites, instant coffee, and vanilla bean paste. stir until a thick, glossy batter forms. fold in the chocolate chips, if using. if your dough is super runny, refrigerate for 30-60 mins before baking! scoop 2–3 tablespoons of batter per cookie onto the prepared baking sheet. leave 4–5 inches between each cookie, as they spread quite a bit. four cookies per sheet will prevent spreading into each other, but you can fit six if you don’t mind some overlap. place the baking sheet on the middle rack of the oven. bake for 8–10 minutes, or until the tops begin to crack. -8 minutes = very fudgy centers -closer to 10 minutes = less fudgy -ovens vary, so bake in 1-minute increments if needed. do not exceed 10 minutes. immediately after baking, use a round bowl to gently swirl around each cookie to shape and round them. this helps “fluff” the edges, which can look flat straight from the oven. remove cookies from the baking sheet right after shaping so they don’t continue cooking on the hot tray. transfer to a cooling rack and let cool completely before eating. enjoy 🤎
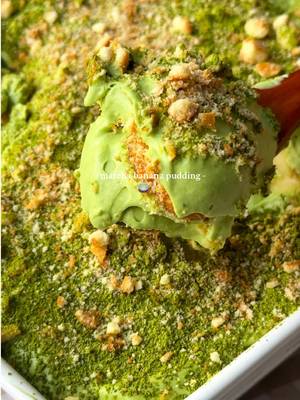
love you so matchaaaaa 🍵 banana pudding x matcha = a match made in heaven 🤤 #matcha #bananapudding #easydessert #asiandesserts #asiandessert
418K
38.8K
118
7mo ago
misojenkitchen
love you so matchaaaaa 🍵 banana pudding x matcha = a match made in heaven 🤤 #matcha #bananapudding #easydessert #asiandesserts #asiandessert
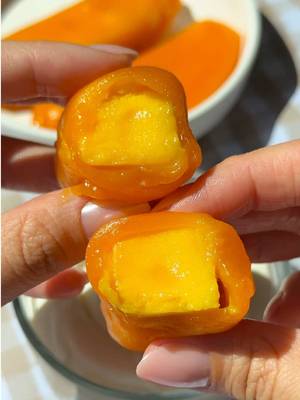
coconut mango mochiiiiii 🥥🥭🍡 recipe video will be up tomorrow! 🥭 #mochi #mangomochi #vegan #asiandessert
407K
50.9K
65
4mo ago
misojenkitchen
coconut mango mochiiiiii 🥥🥭🍡 recipe video will be up tomorrow! 🥭 #mochi #mangomochi #vegan #asiandessert
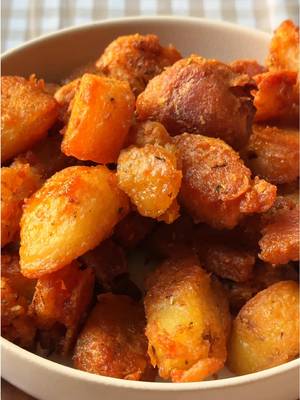
Replying to @ออย ลงรูปไม่ได้ the crunchiest potatoes you’ll ever make!!! this is so much better than a deep fried potato and uses way less oil! ingredients potatoes & boiling: 2.5 lbs russet potatoes, peeled and cut into large chunks water, for boiling 2 tsp chicken bouillon 1/2 tsp baking soda seasonings: 3/4 tsp salt 1/2 tsp black pepper 1/2 tsp garlic powder 1/2 tsp onion powder 1/2 tsp dried thyme 1/2 tsp dried rosemary oil: 1/2 cup avocado oil instructions preheat oven with oil: pour 1/4–1/2 cup avocado oil into a roasting pan or baking sheet. place the pan in the oven and preheat to 400f (200c) for 8–10 minutes until the oil is hot. boil the potatoes: peel the russet potatoes and cut them into large chunks. large chunks are important because when you shake them later, they’ll break slightly and create rough edges for extra crispiness. in a large pot, add 1 tsp chicken bouillon and 1/2 tsp baking soda. add the potato chunks and boil for 8–10 minutes until the edges just start to soften. they should still hold their shape. drain and roughen: drain the potatoes in a colander and shake them gently to roughen the edges. this creates extra crispiness. season the potatoes: in a large bowl, toss the drained potatoes with salt, black pepper, garlic powder, onion powder, thyme, and rosemary until evenly coated. roast: carefully remove the hot pan from the oven. add the seasoned potatoes to the hot oil and spread them in a single layer. roast for about 1 hour, flipping every 15–20 minutes, until golden brown and crunchy. serve: remove from the oven and serve immediately alongside roast meats, gravy, or your favorite meal. tips for extra crispy roasties: don’t overcrowd the pan! give the potatoes space to crisp. shaking the potatoes after boiling roughens the edges for that signature crunch. using baking soda in the boiling water helps break down the potato surface for maximum crispiness. #potato #crispypotato #potatorecipes #ovenpotatoes #EasyRecipe
385K
19.1K
66
7mo ago
misojenkitchen
Replying to @ออย ลงรูปไม่ได้ the crunchiest potatoes you’ll ever make!!! this is so much better than a deep fried potato and uses way less oil! ingredients potatoes & boiling: 2.5 lbs russet potatoes, peeled and cut into large chunks water, for boiling 2 tsp chicken bouillon 1/2 tsp baking soda seasonings: 3/4 tsp salt 1/2 tsp black pepper 1/2 tsp garlic powder 1/2 tsp onion powder 1/2 tsp dried thyme 1/2 tsp dried rosemary oil: 1/2 cup avocado oil instructions preheat oven with oil: pour 1/4–1/2 cup avocado oil into a roasting pan or baking sheet. place the pan in the oven and preheat to 400f (200c) for 8–10 minutes until the oil is hot. boil the potatoes: peel the russet potatoes and cut them into large chunks. large chunks are important because when you shake them later, they’ll break slightly and create rough edges for extra crispiness. in a large pot, add 1 tsp chicken bouillon and 1/2 tsp baking soda. add the potato chunks and boil for 8–10 minutes until the edges just start to soften. they should still hold their shape. drain and roughen: drain the potatoes in a colander and shake them gently to roughen the edges. this creates extra crispiness. season the potatoes: in a large bowl, toss the drained potatoes with salt, black pepper, garlic powder, onion powder, thyme, and rosemary until evenly coated. roast: carefully remove the hot pan from the oven. add the seasoned potatoes to the hot oil and spread them in a single layer. roast for about 1 hour, flipping every 15–20 minutes, until golden brown and crunchy. serve: remove from the oven and serve immediately alongside roast meats, gravy, or your favorite meal. tips for extra crispy roasties: don’t overcrowd the pan! give the potatoes space to crisp. shaking the potatoes after boiling roughens the edges for that signature crunch. using baking soda in the boiling water helps break down the potato surface for maximum crispiness. #potato #crispypotato #potatorecipes #ovenpotatoes #EasyRecipe
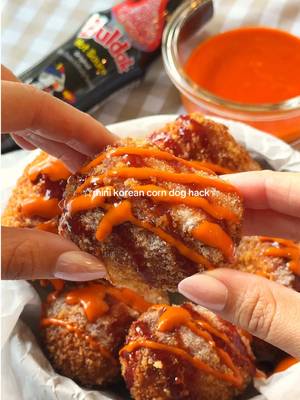
mini korean corn dog hack~ 🌭🧀 for this hack, use store bought crescent dough to make the easiest mini korean corn dogs at home ✨ you’ll need: -chunks of mozzarella cheese -mini sausages -crescent dough -2 eggs, beaten -panko breadcrumbs -frying oil toppings: -samyang @buldak global original hot sauce -mayo -sugar optional: make a buldak spicy mayo by mixing together mayo + samyang buldak original hot sauce 🌶️ directions:  1.wrap a piece of crescent dough tightly around your mozzarella or sausage + cheese combo, making sure there are no openings so the cheese doesn’t leak out while frying. 2.coat in egg wash, then cover in panko breadcrumbs. 3.deep fry over medium low heat for a few minutes (about 6-7 mins) until golden brown and crispy. keep the heat lower so the crescent dough has enough time to fully cook while the cheese gets melty 🫶🏼 4.finish with samyang buldak original hot sauce, spicy buldak mayo, and a sprinkle of sugar for that classic korean corn dog combo ✨ #BuldakApproved #BuldakOriginal #koreanfood
259K
36.2K
77
2mo ago
misojenkitchen
mini korean corn dog hack~ 🌭🧀 for this hack, use store bought crescent dough to make the easiest mini korean corn dogs at home ✨ you’ll need: -chunks of mozzarella cheese -mini sausages -crescent dough -2 eggs, beaten -panko breadcrumbs -frying oil toppings: -samyang @buldak global original hot sauce -mayo -sugar optional: make a buldak spicy mayo by mixing together mayo + samyang buldak original hot sauce 🌶️ directions: 1.wrap a piece of crescent dough tightly around your mozzarella or sausage + cheese combo, making sure there are no openings so the cheese doesn’t leak out while frying. 2.coat in egg wash, then cover in panko breadcrumbs. 3.deep fry over medium low heat for a few minutes (about 6-7 mins) until golden brown and crispy. keep the heat lower so the crescent dough has enough time to fully cook while the cheese gets melty 🫶🏼 4.finish with samyang buldak original hot sauce, spicy buldak mayo, and a sprinkle of sugar for that classic korean corn dog combo ✨ #BuldakApproved #BuldakOriginal #koreanfood
sweet & spicy vietnamese style chicken tenders 🤤 ingredients chicken & marinade: 
18 oz chicken tenders (about 8 tenders)
1 tbsp @@Chinsu_Hot_Sauce fish sauce
1/2 tbsp garlic powder
1/2 tbsp onion powder
1/2 tsp chicken bouillon
1/2 tsp black pepper dry mix:
1 cup all-purpose flour
1/2 cup cornstarch
1 tsp baking powder
1 tsp onion powder
1 tsp garlic powder
1/2 tsp salt
1/2 tsp black pepper batter:
3/4 cup all-purpose flour
1/4 cup cornstarch
1 tsp garlic powder
1/2 tsp onion powder
1/2 tsp salt
1/2 tsp black pepper
3/4 cup water (enough for thin pancake batter consistency)
1 egg sauce:
2 tbsp CHIN-SU fish sauce
3 tbsp water
5 tbsp sugar
4 garlic cloves, minced
2 tbsp CHIN-SU chili sauce
2–3 tbsp lemon juice (stirred in at the end) topping:
fried garlic
chopped green onions instructions:  -marinate the chicken tenders with fish sauce, garlic powder, onion powder, bouillon, and black pepper for at least 30 minutes. -mix together the dry coating in one bowl and the batter in another. set up the coating station with one bowl of dry mix and one bowl of batter. dredge the tenders in the dry mix first, then dip into the batter, then coat again in the dry mix. for extra crisp, repeat the batter and dry mix one more time before frying (optional). -heat oil to 350°f and fry tenders in batches until golden brown and cooked through, about 7-8 minutes. drain on a wire rack. -to make the sauce, sauté the minced garlic in a little oil until fragrant. add fish sauce, water, sugar, and chinsu hot chili sauce, then simmer until slightly thickened. remove from the heat and stir in the lemon juice. -toss the fried tenders in the sauce until glossy.  -finish with fried garlic and green onions before serving. #chinsu #friedchicken #chickentenders #koreanfriedchicken #nuocmam
234K
17.1K
16
10mo ago
misojenkitchen
sweet & spicy vietnamese style chicken tenders 🤤 ingredients chicken & marinade: 
18 oz chicken tenders (about 8 tenders)
1 tbsp @@Chinsu_Hot_Sauce fish sauce
1/2 tbsp garlic powder
1/2 tbsp onion powder
1/2 tsp chicken bouillon
1/2 tsp black pepper dry mix:
1 cup all-purpose flour
1/2 cup cornstarch
1 tsp baking powder
1 tsp onion powder
1 tsp garlic powder
1/2 tsp salt
1/2 tsp black pepper batter:
3/4 cup all-purpose flour
1/4 cup cornstarch
1 tsp garlic powder
1/2 tsp onion powder
1/2 tsp salt
1/2 tsp black pepper
3/4 cup water (enough for thin pancake batter consistency)
1 egg sauce:
2 tbsp CHIN-SU fish sauce
3 tbsp water
5 tbsp sugar
4 garlic cloves, minced
2 tbsp CHIN-SU chili sauce
2–3 tbsp lemon juice (stirred in at the end) topping:
fried garlic
chopped green onions instructions: -marinate the chicken tenders with fish sauce, garlic powder, onion powder, bouillon, and black pepper for at least 30 minutes. -mix together the dry coating in one bowl and the batter in another. set up the coating station with one bowl of dry mix and one bowl of batter. dredge the tenders in the dry mix first, then dip into the batter, then coat again in the dry mix. for extra crisp, repeat the batter and dry mix one more time before frying (optional). -heat oil to 350°f and fry tenders in batches until golden brown and cooked through, about 7-8 minutes. drain on a wire rack. -to make the sauce, sauté the minced garlic in a little oil until fragrant. add fish sauce, water, sugar, and chinsu hot chili sauce, then simmer until slightly thickened. remove from the heat and stir in the lemon juice. -toss the fried tenders in the sauce until glossy. -finish with fried garlic and green onions before serving. #chinsu #friedchicken #chickentenders #koreanfriedchicken #nuocmam
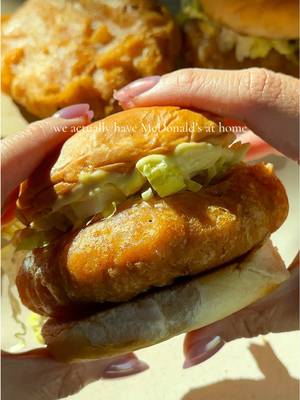
homemade mcchickens!!  recipe video will be up on Friday!!! #mcdonalds #chickensandwich #fastfoodathome #homecooking #sandwich
173K
5.91K
27
4mo ago
misojenkitchen
homemade mcchickens!! recipe video will be up on Friday!!! #mcdonalds #chickensandwich #fastfoodathome #homecooking #sandwich
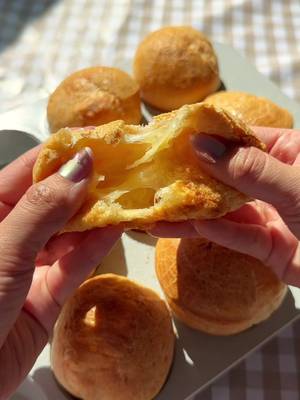
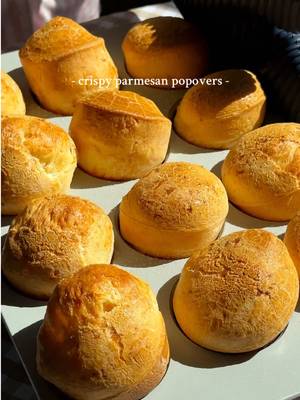
brazilian cheese bread x yorkshire pudding 🤭 these popovers are like brazilian cheese bread, but lighter and crispier! puffed up like a yorkshire pudding with a golden crust and a cheesy, chewy center 🤤 for the full recipe, comment “cheese bread” and i’ll send it to you!  #cheesebread #breadrecipe #yorkshirepudding #breadmaking #EasyRecipes
132K
5.66K
221
5mo ago
misojenkitchen
brazilian cheese bread x yorkshire pudding 🤭 these popovers are like brazilian cheese bread, but lighter and crispier! puffed up like a yorkshire pudding with a golden crust and a cheesy, chewy center 🤤 for the full recipe, comment “cheese bread” and i’ll send it to you! #cheesebread #breadrecipe #yorkshirepudding #breadmaking #EasyRecipes
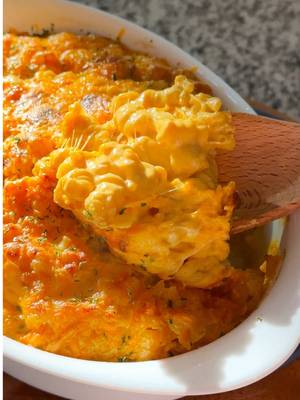
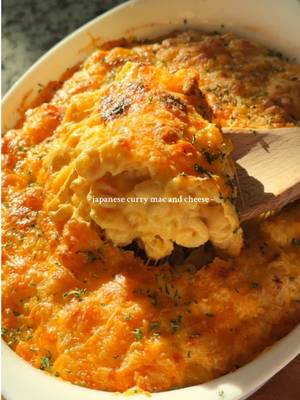
japanese curry mac and cheese 🧀  recipe coming tomorrow!! #macandcheese #japanesefood #thanksgivingfood #cheesy
123K
11.4K
69
7mo ago
misojenkitchen
japanese curry mac and cheese 🧀 recipe coming tomorrow!! #macandcheese #japanesefood #thanksgivingfood #cheesy
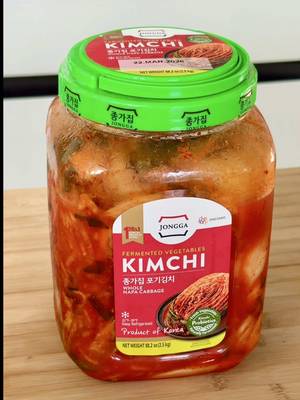
happy kimjang szn 🥬 enjoy kimjang season the easy way with jongga pogi kimchi!  while it is the time when people in korea spend hours salting cabbage, mixing seasoning, and preparing big batches for winter, i decided to try making my own at home.  a few minutes in i realized kimjang is no small task and it takes way more steps than i imagined 😅 instead of spending the entire day making kimchi, i reached for @Jongga USA pogi kimchi—fresh, crisp, and full of that homemade flavor without any of the work. it has the balanced taste you expect from traditional kimjang kimchi and you can enjoy it right away. you can find it at nearby asian and korean markets like hmart. for an easy kimchi bibim guksu, toss 5 oz cooked noodles with 1/3–1/2 cup jongga pogi kimchi, 1–2 tbsp kimchi juice, 1/2–1 tbsp gochujang, 1/2–1 tsp soy sauce, 1 minced garlic clove, 1–2 tsp sesame oil, 1–2 tsp sugar, and 1/2–1 tsp rice vinegar. top with sesame seeds and enjoy immediately. this is an easy eyeballed recipe perfect for a quick kimchi fix! #koreanfood #bibimguksu #kimchi #koreanrecipes #kfood
116K
4.04K
11
7mo ago
misojenkitchen
happy kimjang szn 🥬 enjoy kimjang season the easy way with jongga pogi kimchi! while it is the time when people in korea spend hours salting cabbage, mixing seasoning, and preparing big batches for winter, i decided to try making my own at home. a few minutes in i realized kimjang is no small task and it takes way more steps than i imagined 😅 instead of spending the entire day making kimchi, i reached for @Jongga USA pogi kimchi—fresh, crisp, and full of that homemade flavor without any of the work. it has the balanced taste you expect from traditional kimjang kimchi and you can enjoy it right away. you can find it at nearby asian and korean markets like hmart. for an easy kimchi bibim guksu, toss 5 oz cooked noodles with 1/3–1/2 cup jongga pogi kimchi, 1–2 tbsp kimchi juice, 1/2–1 tbsp gochujang, 1/2–1 tsp soy sauce, 1 minced garlic clove, 1–2 tsp sesame oil, 1–2 tsp sugar, and 1/2–1 tsp rice vinegar. top with sesame seeds and enjoy immediately. this is an easy eyeballed recipe perfect for a quick kimchi fix! #koreanfood #bibimguksu #kimchi #koreanrecipes #kfood

misojenkitchen (@misojenkitchen) Tiktok Stats & Analytics

misojenkitchen (@misojenkitchen) has 1.38M Tiktok followers with a 6.85% engagement rate over the past 12 months. Across 121 videos, misojenkitchen received 4.34M total likes and 63.6M views, averaging 35.9K likes per video. This page tracks misojenkitchen's performance metrics, top content, and engagement trends — updated daily.

misojenkitchen (@misojenkitchen) Tiktok Analytics FAQ

How many TikTok followers does misojenkitchen have?+
misojenkitchen (@misojenkitchen) has 1.38M TikTok followers as of July 2026.
What is misojenkitchen's TikTok engagement rate?+
misojenkitchen's TikTok engagement rate is 6.85% over the last 12 months, based on 121 videos.
How many likes does misojenkitchen get on TikTok?+
misojenkitchen received 4.34M total likes across 121 videos in the last 12 months, averaging 35.9K likes per video.
How many TikTok views does misojenkitchen get?+
misojenkitchen's TikTok content generated 63.6M total views over the last 12 months.