NewGet @misojenkitchen's full report

instagram analytics
Similar Accounts:
instagram analytics
Similar Accounts:
followers
438K
impressions
58.0M
likes
2.77M
comments
35.9K
posts
147
engagement
4.84%
emv
$1.90M
Average per post
394K
Key Metrics
Impressions
monthly
Distributions
Content
15.5M
774K
5.00K
6mo ago

misojenkitchen
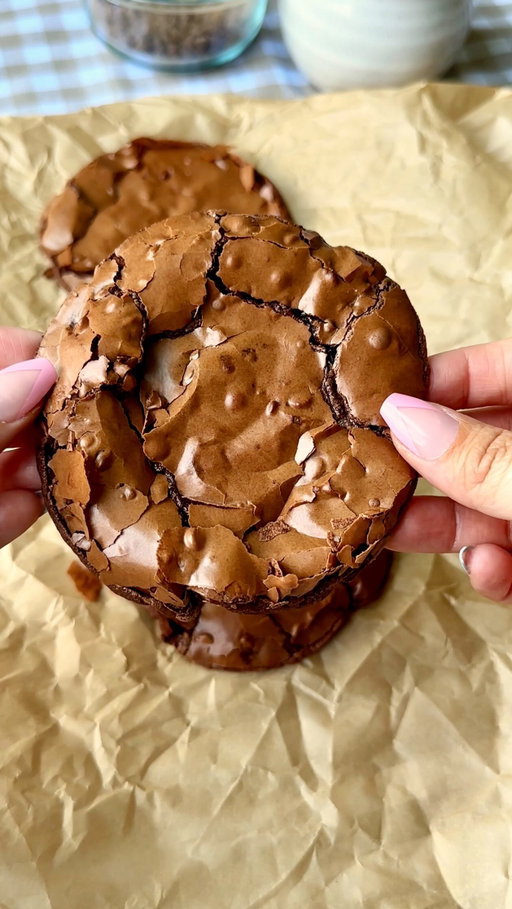
choco brownie cookies ~
this recipe only needs 6 key ingredients for a deliciously chewy and fudgy cookie 🍪
for everyone asking, the app link for Osta is in my bio, or search “Osta Recipes” in the app store or google play store!!
comment “brownie cookie” for a direct link to the recipe!
ingredients
-350 g powdered sugar
-65 g cocoa powder (about 10 tablespoons; using a scale is best since cocoa powders vary in weight)
-1/2 tsp salt
-3 egg whites (about 1/2 cup liquid egg whites)
-1/2 cup semi-sweet chocolate chips (optional but recommended)
-1 tsp instant coffee
-1 tsp vanilla bean paste (optional, but recommended)
instructions:
preheat oven to 350°f (175°c). line a baking sheet with parchment paper and lightly butter it to prevent sticking.
in a large bowl, combine powdered sugar, cocoa powder, salt, egg whites, instant coffee, and vanilla bean paste. stir until a thick, glossy batter forms.
fold in the chocolate chips, if using. if your dough is super runny, refrigerate for 30-60 mins before baking!
scoop 2–3 tablespoons of batter per cookie onto the prepared baking sheet. leave 4–5 inches between each cookie, as they spread quite a bit. four cookies per sheet will prevent spreading into each other, but you can fit six if you don’t mind some overlap.
place the baking sheet on the middle rack of the oven.
bake for 8–10 minutes, or until the tops begin to crack.
-8 minutes = very fudgy centers
-closer to 10 minutes = less fudgy
-ovens vary, so bake in 1-minute increments if needed. do not exceed 10 minutes.
immediately after baking, use a round bowl to gently swirl around each cookie to shape and round them. this helps “fluff” the edges, which can look flat straight from the oven.
remove cookies from the baking sheet right after shaping so they don’t continue cooking on the hot tray. transfer to a cooling rack and let cool completely before eating.
enjoy 🤎
8.73M
287K
3.65K
7mo ago
misojenkitchen
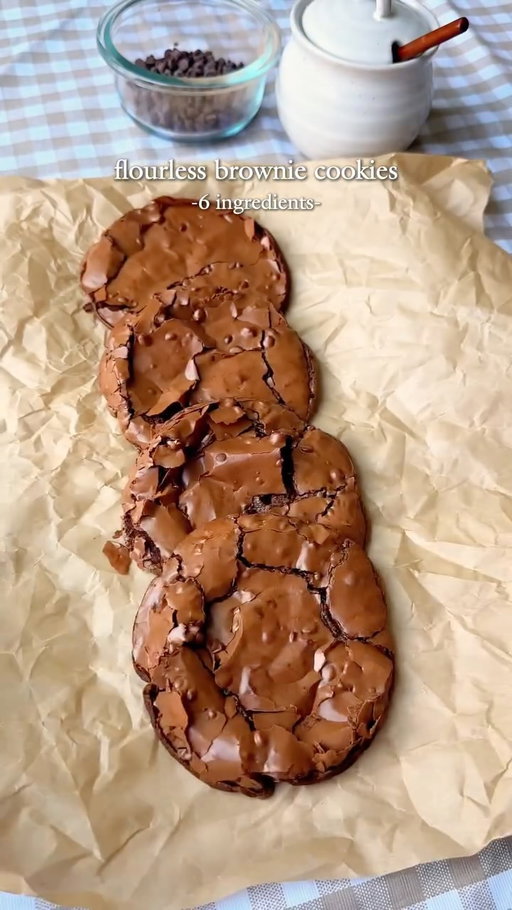
choco brownie cookies ~
if a brownie and a cookie had a love child, it would be these flourless chocolate brownie cookies 🤎 this recipe only needs 6 key ingredients for a deliciously chewy and fudgy cookie!
for everyone asking, the app link for Osta is in my bio, or search “Osta Recipes” in the app store or google play store!!
comment “brownie cookie” for a direct link to the recipe!
ingredients
-350 g powdered sugar
-65 g cocoa powder (about 10 tablespoons; using a scale is best since cocoa powders vary in weight)
-1/2 tsp salt
-3 egg whites (about 1/2 cup liquid egg whites)
-1/2 cup semi-sweet chocolate chips (optional but recommended)
-1 tsp instant coffee
-1 tsp vanilla bean paste (optional, but recommended)
instructions:
preheat oven to 350°f (175°c). line a baking sheet with parchment paper and lightly butter it to prevent sticking.
in a large bowl, combine powdered sugar, cocoa powder, salt, egg whites, instant coffee, and vanilla bean paste. stir until a thick, glossy batter forms.
fold in the chocolate chips, if using. if your dough is super runny, refrigerate for 30-60 mins before baking!
scoop 2–3 tablespoons of batter per cookie onto the prepared baking sheet. leave 4–5 inches between each cookie, as they spread quite a bit. four cookies per sheet will prevent spreading into each other, but you can fit six if you don’t mind some overlap.
place the baking sheet on the middle rack of the oven.
bake for 8–10 minutes, or until the tops begin to crack.
-8 minutes = very fudgy centers
-closer to 10 minutes = less fudgy
-ovens vary, so bake in 1-minute increments if needed. do not exceed 10 minutes.
immediately after baking, use a round bowl to gently swirl around each cookie to shape and round them. this helps “fluff” the edges, which can look flat straight from the oven.
remove cookies from the baking sheet right after shaping so they don’t continue cooking on the hot tray. transfer to a cooling rack and let cool completely before eating.
enjoy 🤎
5.02M
301K
341
8mo ago
misojenkitchen
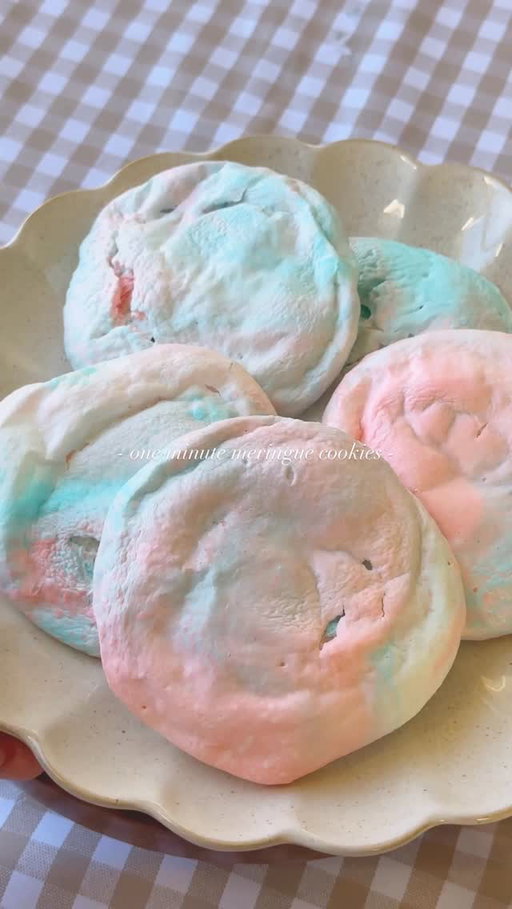
did you know you can make meringue in the microwave?
mix 300g powdered sugar with 1 egg white until it comes together into a thick, smooth dough. roll into small balls (about 1 tablespoon each) and place one ball at a time on a piece of parchment paper. microwave for 30-45 seconds, or until it puffs up and looks set on the outside (every microwave is different). don’t let it burn! stop the microwave when the cookies no longer puff up.
let it cool completely so it can firm up, then enjoy. you can color the dough with food coloring if you’d like as well 🥰
the perfect lil sweet treat 🙂↕️
#meringues #dessert #easydessert #pavlova
3.05M
204K
885
6mo ago
misojenkitchen
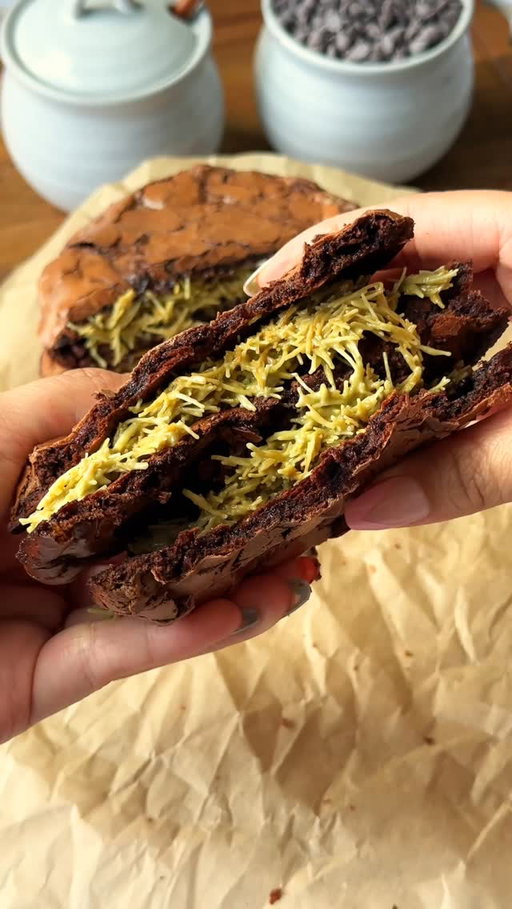
dubai chocolate cookie sandwiches~
chewy brownie cookies stuffed with nutty pistachio kataifi 🤎
for everyone asking, the app link for Osta is in my bio, or you can search “Osta Recipes” in the app store or google play store!
comment “dubai cookie” for a direct link to the recipe!
recipe:
ingredients:
350g powdered sugar
60–65g cocoa powder (i like 65g) 1/2 tsp salt
3 egg whites from 3 large eggs! (about 1/2 cup of liquid egg whites)
1/2 to 1 cup semi-sweet chocolate chips (optional but recommended!) – depending how much chocolate you like. you can also use milk, but i’m a semi-sweet/dark choco girl.
1 tsp instant coffee
1 tsp vanilla bean paste
3 tbsp pistachio crème
filling:
4 oz crispy kataifi (brown uncooked kataifi in butter until golden)
2 oz pistachio crème (you can totally eyeball this)
30g tahini (again, you can eyeball this)
directions:
in a big bowl, mix together powdered sugar, cocoa powder, salt, egg whites, instant coffee, and vanilla bean paste until you’ve got a thick, glossy batter.
fold in chocolate chips if you’re using them.
swirl in the pistachio crème.
refrigerate the batter for 30–60 minutes.
preheat your oven to 350°f (175°c). line a baking sheet with parchment paper and lightly butter it so the cookies don’t stick.
scoop 2–3 tablespoons of batter per cookie onto the tray. leave at least 4–5 inches between each cookie because they spread a lot. four per sheet is the safest bet, but you can fit six if you don’t mind them touching a little.
bake in the middle of the oven for 8–10 minutes, until crinkly. if you pull them at 8 minutes, they’ll set into a super fudgy texture. if you bake longer, they’ll be less fudgy—10 minutes max but this also depends on your oven. you can tell the cookies are done when the edges are set and the tops are crinkly.
right after baking, use a round bowl to scoot the edges in so the cookies look nice and round (and fluff up the edges a bit).
transfer off the tray right away so they don’t keep cooking on the hot pan. let them cool completely.
for the filling, mix the crispy kataifi with pistachio crème and tahini until it comes together. spread between two cooled cookies and sandwich it up.
enjoy 🤎
2.28M
41.3K
443
7mo ago
misojenkitchen
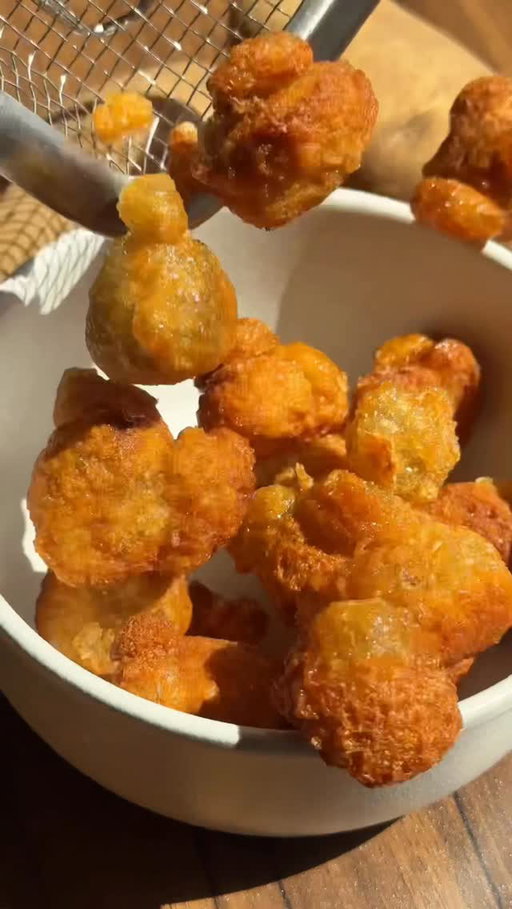
made the viral Korean chewy potato bites!!
they’re pretty addictive but my potatoes turned grey 😭
recipe video coming this weekend 🥹 comment “chewy potato” and i’ll send it to you!
#potato #koreanfood #crispy
1.90M
207K
77
5mo ago
misojenkitchen
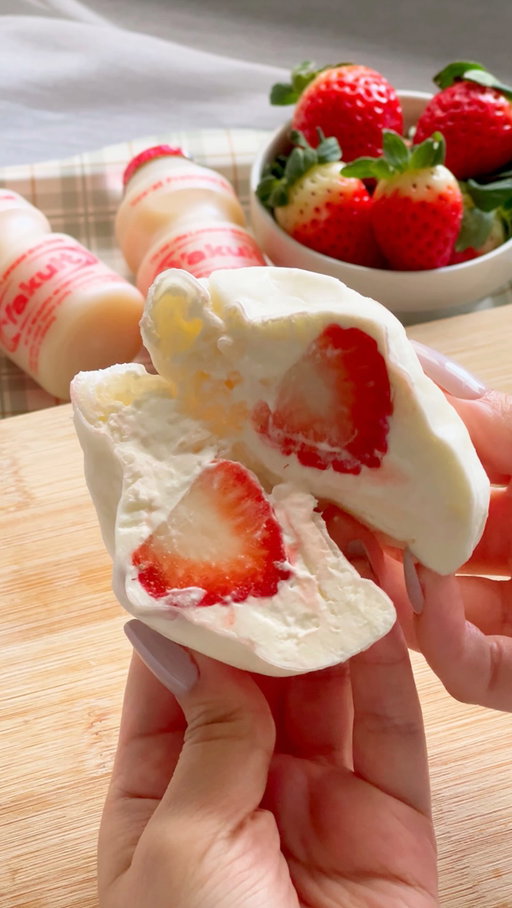
strawberry rice paper mochi with yakult cream 🍓☁️
the healthy mochi trend but replaced the Greek yogurt with @yakult.usa cream 💕
ingredients:
-rice paper
-strawberries
yakult cream:
-80ml yakult
-200ml heavy cream
-optional: powdered sugar for extra sweetness (about 2 tsp)
directions:
wet your rice paper and place it into a small bowl.
whip together the yakult, heavy cream, and powdered sugar until light and fluffy. add a layer of whipped cream, place a strawberry in the center, then top with more whipped cream.
wrap it up and trim off any excess rice paper. freeze for 30 minutes before enjoying! you can eat it right away too, but freezing makes it easier to cut and gives the cream a delicious slightly frozen texture.
#ricepaper #mochi #yakult #asiandessert
#healthymochi
1.22M
106K
97
4mo ago
misojenkitchen
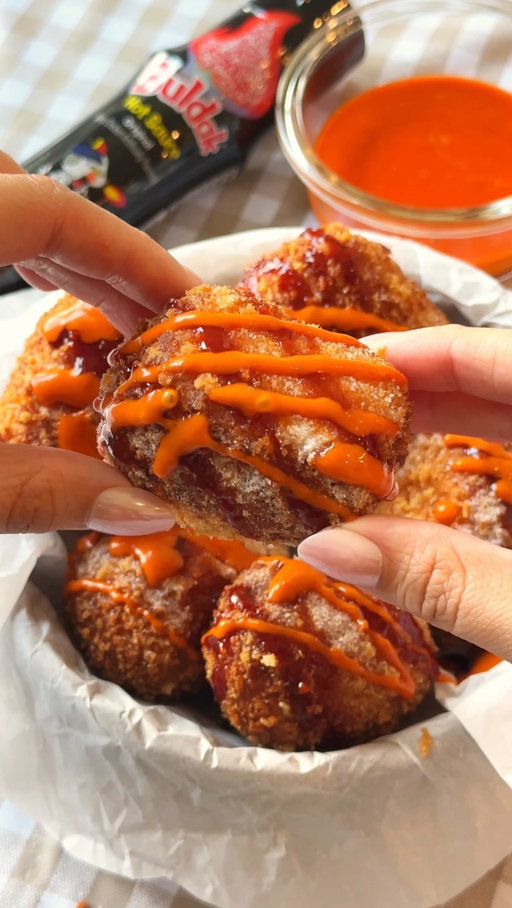
mini korean corn dog hack~ 🌭🧀
for this hack, use store bought crescent dough to make the easiest mini korean corn dogs at home ✨
you’ll need:
-chunks of mozzarella cheese
-mini sausages
-crescent dough
-2 eggs, beaten
-panko breadcrumbs
-frying oil
toppings:
-samyang buldak sauce
-mayo
-sugar
optional: make a buldak spicy mayo by mixing together mayo + samyang buldak original hot sauce 🌶️
directions:
1.wrap a piece of crescent dough tightly around your mozzarella or sausage + cheese combo, making sure there are no openings so the cheese doesn’t leak out while frying.
2.coat in egg wash, then cover in panko breadcrumbs.
3.deep fry over medium low heat for a few minutes (about 6-7 mins) until golden brown and crispy. keep the heat lower so the crescent dough has enough time to fully cook while the cheese gets melty 🫶🏼
4.finish with buldak sauce, spicy buldak mayo, and a sprinkle of sugar for that classic korean corn dog combo ✨
#buldak #koreanfood #cheesy #asianfood #easyrecipe
1.06M
57.4K
784
7mo ago
misojenkitchen
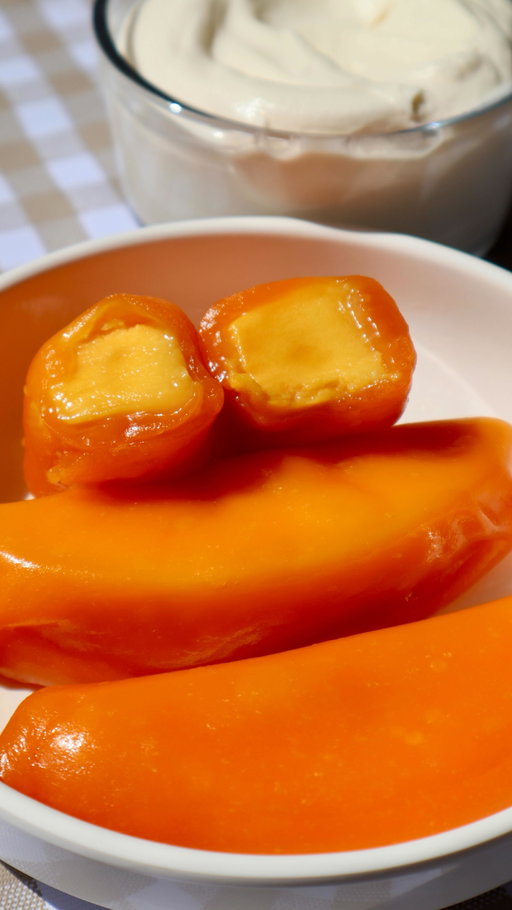
coconut mango mochiiiiii 🥥🥭🍡
recipe video will be up tomorrow! for the recipe, comment “mango mochi” and i’ll send it to you 🥭
#mochi #mangomochi #vegan #asiandessert
947K
53.6K
35
4mo ago
misojenkitchen
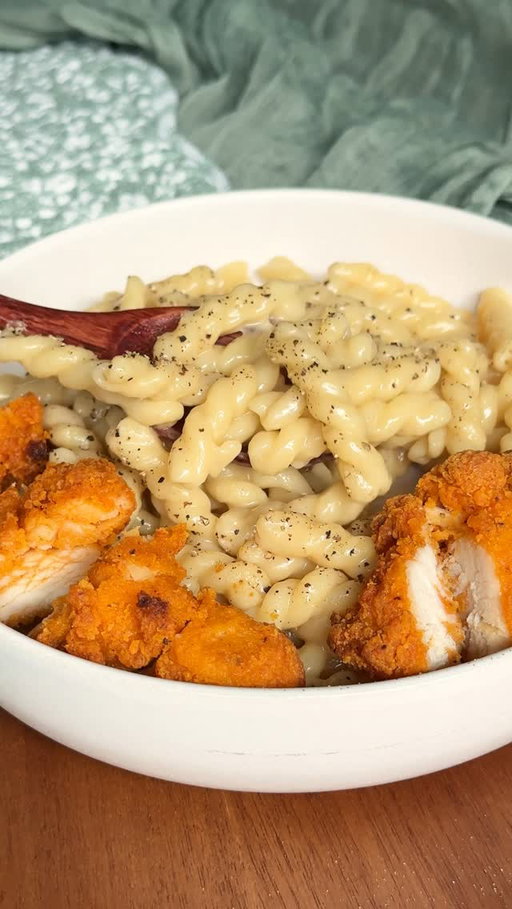
i heard we’re putting miso & soy sauce in our butter noodlessssss~ 🍜
finally tried it and omg it’s actually so yum!!!
just add a little miso + soy sauce to your butter noodles. i also added some parmesan because i cannot help myself 🙈
so simple but sooo savory and good 🫶🏼
#butternoodles #pasta #asianfood #easyrecipe #easydinners
926K
31.7K
7.73K
10mo ago
misojenkitchen
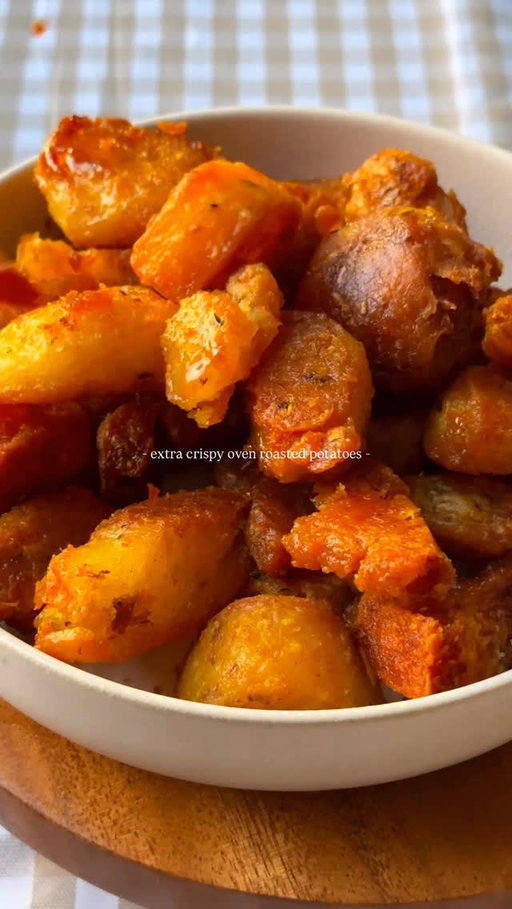
the BEST crunchiest crispiest oven roasted potatoes ever!!
this is a fool proof recipe for the best potatoes you’ll ever have!!
comment “roasted potatoes” and i’ll send you the recipe!!
#potato #crispypotato #potatorecipes #ovenpotatoes #easyrecipe #easysides #appetizer #easybaking #roasties #easydinners #crispy
922K
62.5K
220
7mo ago
misojenkitchen
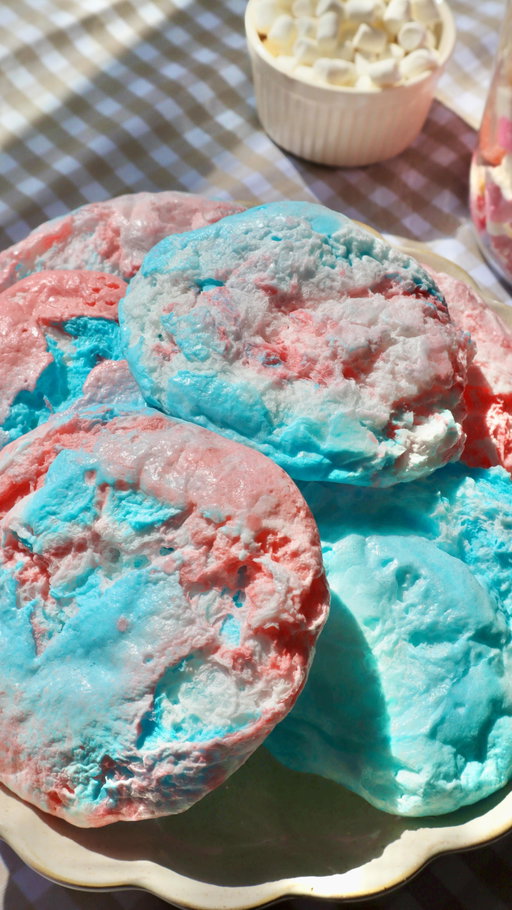
microwaveable meringue in 30 secs!
the perfect sweet treat for Valentine’s day ♥️♥️
microwaveable meringue cookies recipe:
300g powdered sugar
1 egg white
splash of vanilla extract (optional)
food coloring (optional)
mix the powdered sugar, egg white, and vanilla together until it forms a thick, smooth dough. it should feel like playdoh. soft, moldable, and not super sticky. if it’s too wet or sticking to your hands, add a little more powdered sugar until it gets to that texture.
i like adding the food coloring after it turns into a dough since this recipe makes a pretty big batch. it’s more fun that way because you can split the dough and make a few different shades 🥰
roll into small balls, about 1 tablespoon each. place one ball at a time on a piece of parchment paper and microwave for 30 to 45 seconds, or until it puffs up and looks set on the outside. every microwave is different.
once it puffs up and stops rising, stop the microwave right away or they’ll burn.
let them cool completely so they can firm up, then enjoy~
#meringues #dessert #easydessert #pavlova
894K
45.5K
1.12K
10mo ago
misojenkitchen
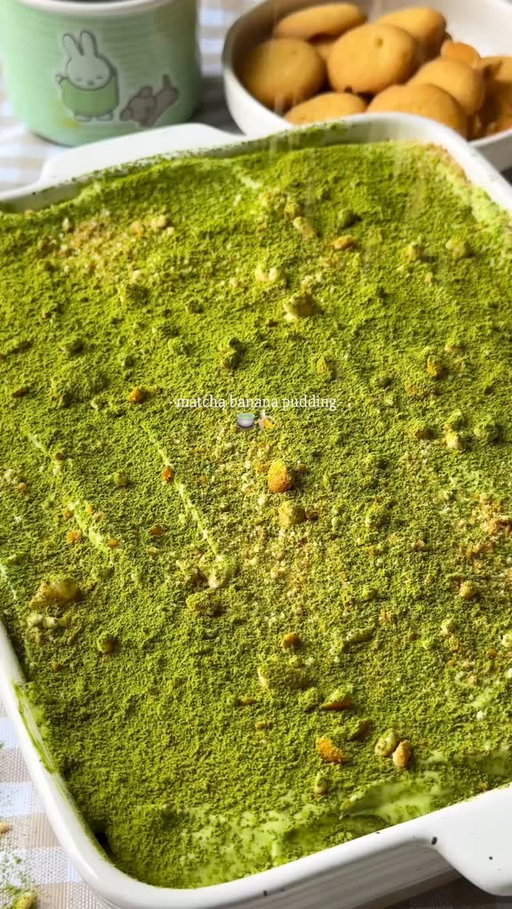
love you so matchaaaaa 🍵
banana pudding x matcha = a match made in heaven 🤤
#matcha #bananapudding #easydessert #asiandesserts #asiandessert #matchadessert
892K
25.9K
744
10mo ago
misojenkitchen
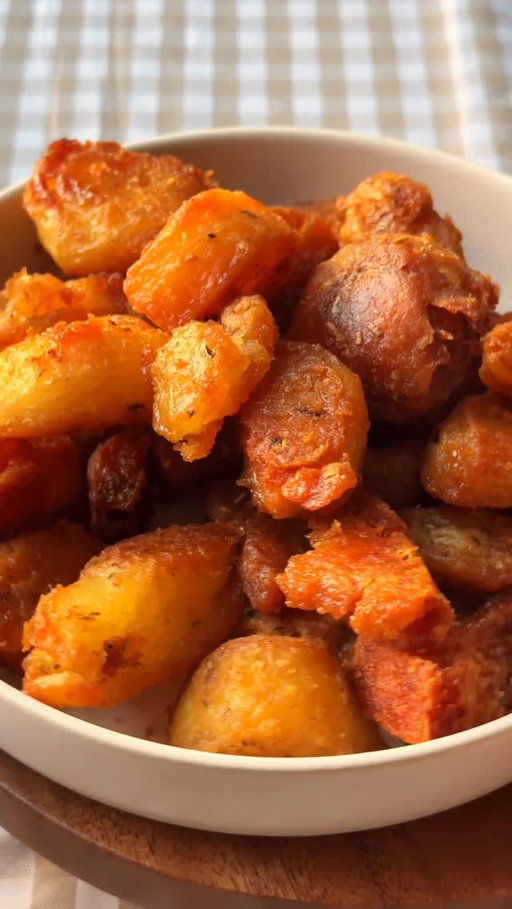
the crunchiest potatoes you’ll ever make!!!
this is so much better than a deep fried potato and uses way less oil!
for more detailed instructions, comment “crispy potatoes” and i’ll send it to you!!
ingredients
russet potatoes, peeled and cut into large chunks
water for boiling
chicken bouillon
baking soda
avocado oil
seasonings:
salt
black pepper
garlic powder
onion powder
dried thyme
dried rosemary
instructions
pour some oil onto a baking sheet and place it in the oven. preheat the oven to 400°F so the oil gets hot.
boil the potato chunks with a little chicken bouillon and baking soda until the edges start to soften.
drain the potatoes, then shake them in the colander to rough up the edges.
season the potatoes with salt, pepper, garlic powder, onion powder, thyme, and rosemary.
take the hot pan out of the oven and carefully add the potatoes. spread them out in a single layer.
roast for about 1 hour, flipping every 15–20 minutes, until golden brown and crunchy.
enjoy hot with your favorite meal!
#potato #crispypotato #potatorecipes #ovenpotatoes #easyrecipe #easysides #appetizer #easybaking #roasties #easydinners #crispy
698K
16.2K
92
10mo ago
misojenkitchen
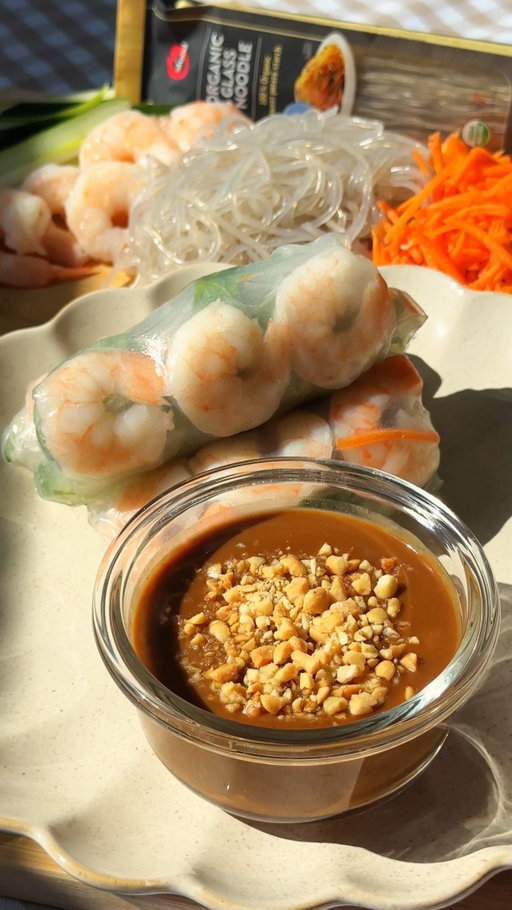
one of my all time favs~
recipe:
rice paper
ofood glass noodles
carrots
cucumbers
lettuce
thai basil
shrimp, cooked and sliced
peanut hoisin sauce:
3 tbsp peanut butter
2 tbsp hoisin sauce
a splash of rice vinegar
1–2 tbsp hot water (to thin to your liking)
optional: a pinch of sugar for balance and a bit of chili crisp or sriracha if you want heat
instructions:
cook the glass noodles according to the package, then rinse under cold water so they stay springy. prep all your veggies into thin strips to make rolling easier. quickly dip the rice paper in warm water until just softened, then layer on lettuce, noodles, herbs, veggies, and shrimp. roll tightly.
for the sauce, whisk everything together until smooth. adjust thickness with hot water and flavor with extra vinegar or sweetness if needed.
clean ingredients, chewy texture, and effortless versatility are what make @ofoodusa glass noodles such a staple in my kitchen. they’re made 100% from sweet potato starch, which means they’re vegan, gluten-free, sugar-free, and sodium-free. super clean, super versatile, and they soak up flavor beautifully in any dish. i used them to make these fresh vietnamese spring rolls today, and they turned out so good. whether it’s stir-fries, soups, japchae, or salads, these noodles work with literally everything.
if you have not tried them yet, definitely check them out on amazon. just search ‘O'food glass noodles,’ or find them at select Costco locations as well!
#springrolls #vietnamesefood #easyrecipe #healthyrecipe #asianfood #peanutsauce #asiancooking
658K
21.3K
1.12K
7mo ago
misojenkitchen
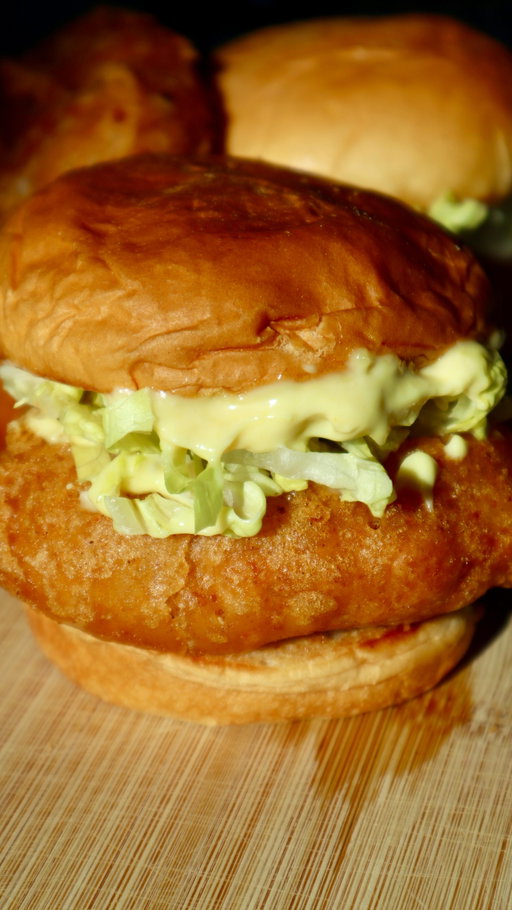
homemade mcchickens!!
recipe video will be up on Friday!! comment “chicken sandwich” for the full recipe!
#mcdonalds #chickensandwich #fastfoodathome #homecooking #sandwich
625K
29.9K
181
7mo ago
misojenkitchen
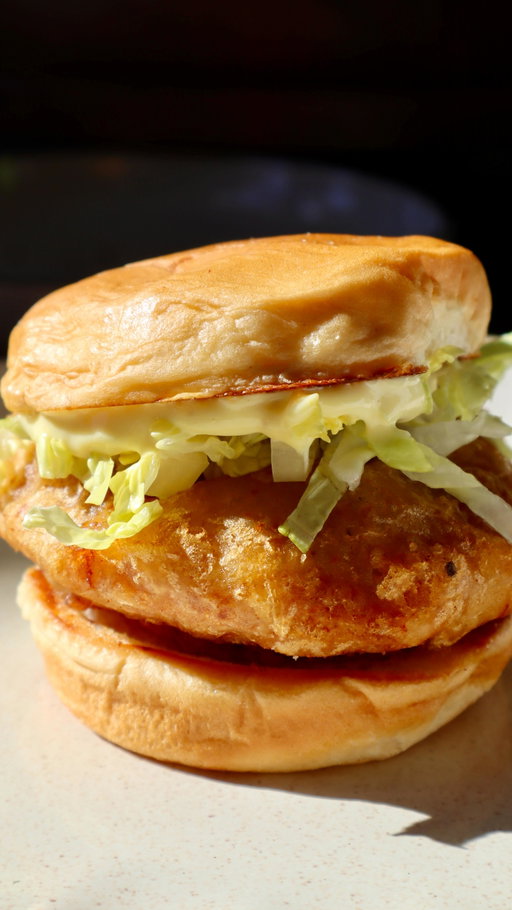
we got mcdonalds at homeeeee~
super crispy on the outside, juicy in the middle, and piled onto a soft toasted bun with lettuce and mayo 🤤
classic crispy mcchicken sandwiches recipe:
servings: 4
prep time: 25 minutes (+1 hour freezing)
cook time: 10–12 minutes per batch
ingredients:
chicken patties:
- ½ lb chicken breast
- ½ lb chicken thighs
- 1 tsp salt
- ½ tsp white pepper
- ½ tsp onion powder
- ½ tsp garlic powder
- 1 tsp paprika
breading & wet batter:
- 1 cup all-purpose flour
- 1 cup cornstarch
- 2 tsp baking powder
- 1 tsp paprika
- 1.5 tsp garlic powder
- 1.5 tsp onion powder
- ½ tsp black pepper
- 2 tsp salt
- 2 cups extra cold club soda (or beer)
sandwich assembly:
4 burger buns, toasted
lettuce
sauce:
½ cup mayo
1–2 tsp mustard
½ tsp onion powder
instructions:
- in a food processor, combine chicken breast, chicken thighs, salt, white pepper, onion powder, garlic powder, and paprika. pulse until smooth but still slightly textured—do not over-process.
- divide the chicken mixture into 3–4 oz portions and shape each into a thin patty. place patties on a parchment-lined tray.
- in a bowl, mix the dry breading ingredients: flour, cornstarch, paprika, garlic powder, onion powder, black pepper, and salt.
- coat each frozen patty evenly in the dry mixture, shaking off excess. freeze for 60 minutes.
- in a separate bowl, whisk together the remaining dry mixture with extra cold club soda (or beer) and baking powder until the batter reaches a thin syrupy consistency (thin enough to coat the chicken evenly, but not so runny that it completely slides off). add a little more club soda if needed.
- heat oil in a deep pan or fryer to 350°f (175°c). dip each patty in the wet batter, letting excess drip off, then fry in batches until golden brown and cooked through, about 4–5 minutes per side. drain on paper towels or a wire rack.
- to make the sauce, simply mix together mayo, mustard, and onion powder. taste and adjust to your liking.
- toast buns lightly (use the mayo method!). assemble sandwiches with bun, fried chicken patty, lettuce, mayo, and top bun. serve and enjoy!
#mcdonalds #chickensandwich #fastfoodathome #homecooking #sandwich
617K
45.3K
25
2mo ago
misojenkitchen
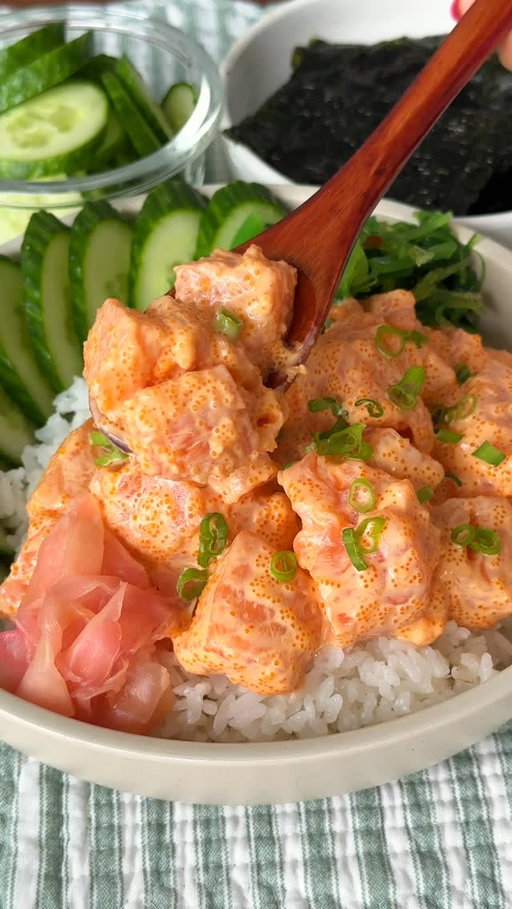
my current hyper-fixation meal 🍣
creamy salmon sashimi with lots and lots of masagooooo!
i seriously can’t stop making this!! it’s creamy, spicy, and comes together in just a few minutes.
all you have to do is mix sushi-grade salmon with japanese mayo, masago, and sriracha to your taste. i love serving it over a bowl of hot rice and topping it with extra masago and green onions 🤤
i might have made it 4x this week 😭
#creamysalmon #sushi #asianfood #homecooking #salmon
588K
31.3K
31
4mo ago
misojenkitchen
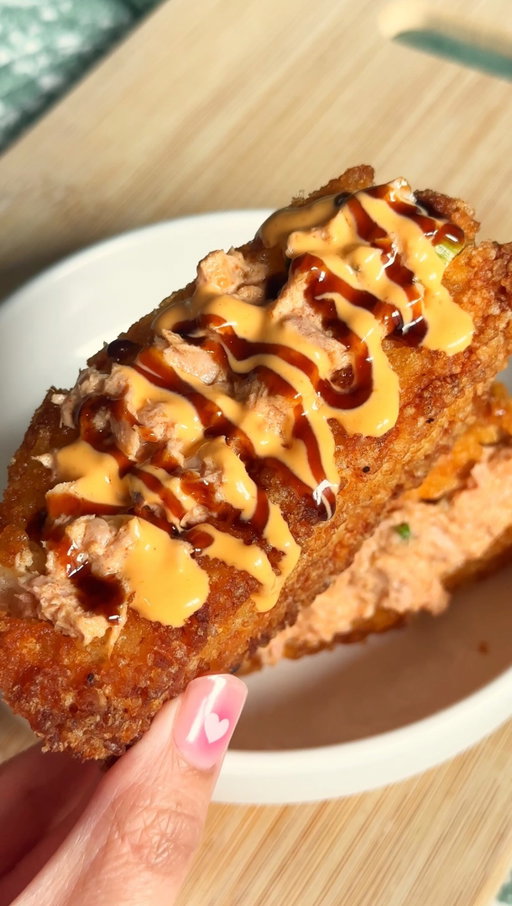
spicy tuna crispy rice sando 🍙🔥
basically a budget version of nobu’s spicy tuna crispy rice 😋
i made my spicy tuna with canned tuna, green onions, japanese mayo, gochujang, and a little sesame oil.
to make it easy, i used instant rice (from @ofoodusa) ! just fry the rice until golden and crispy, cut a slit to make a sandwich, and fill with the spicy tuna mixture.
finished with spicy mayo and eel sauce on top 🤤
recipe inspired by the amazing @hubbybap!! i’ve been drooling over all of her videos lately 🥰
#crispyrice #spicytuna #easyrecipes #cheapeats #homecooking
514K
20.6K
1.34K
10mo ago
misojenkitchen
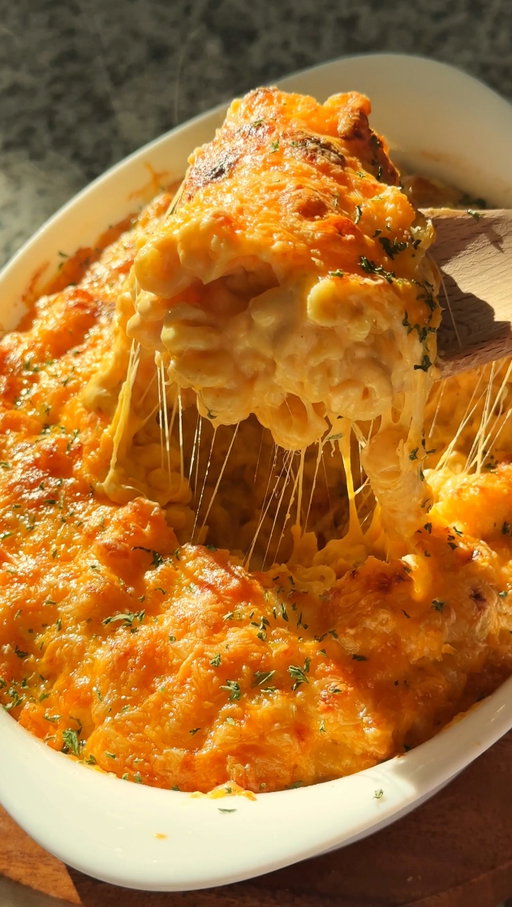
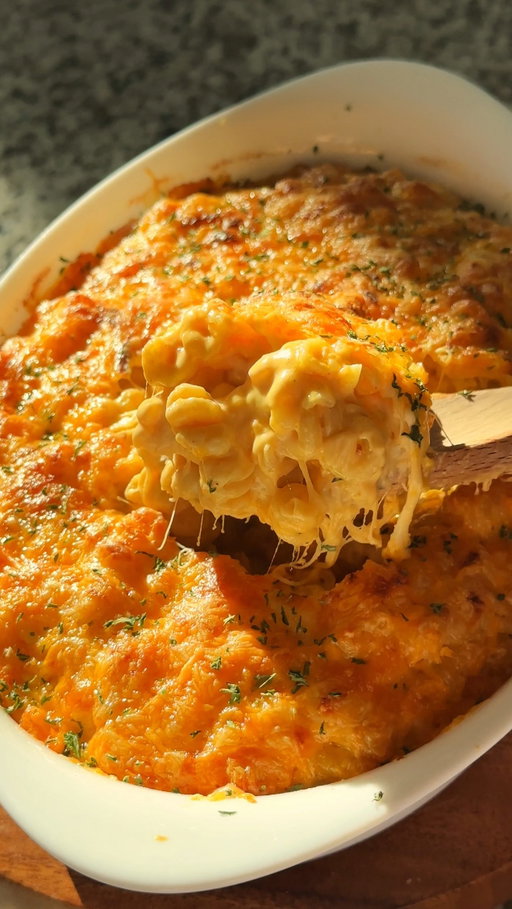
japanese curry mac & cheese 🧀🍛
bring this to your thanksgiving dinner 🍂 it’s creamy, extra cheesy, and perfectly spiced with curry flavor! add as much or as little curry as you like. i think 2 blocks of s&b curry give it the perfect balance without being too overwhelming!
for the full written recipe, comment “mac and cheese” and i’ll send it to you!!
ingredients:
butter
shallot, finely diced
garlic, minced
flour
pasta (any shape but cavatappi or fusilli are great)
mozzarella, shredded fresh
gruyere, shredded fresh
sharp cheddar, shredded fresh
chicken bouillon
garlic powder
ground mustard
smoked paprika
evaporated milk
heavy cream
S&B japanese curry blocks
tips:
-cook the pasta about 2 minutes before al dente since it will finish cooking in the oven. cavatappi or fusilli are ideal, but any shape works. reserve a little pasta water in case you need to loosen the sauce.
-always shred your own cheese for the best melt and creaminess, and toss all the cheeses together in a bowl before adding to the sauce.
-use 2–3 S&B curry blocks depending on your taste: 2 for subtle, 3 for stronger, or even 4 for a bold curry punch.
-the curry blocks naturally thicken the sauce, so if it’s too thick, loosen it with evaporated milk, regular milk, or reserved pasta water.
#japanesefood #thanksgiving #macandcheese #macaroniandcheese #thanksgivingfood #asianfood #asiancooking #cheesy
497K
24.7K
2.98K
10mo ago
misojenkitchen
japanese curry mac 🧀
recipe coming tomorrow!! comment “curry mac” and i’ll send it to you!!
#japanesefood #thanksgiving #macandcheese #macaroniandcheese #thanksgivingfood #asianfood #asiancooking #cheesy
Miso Jen Kitchen (@misojenkitchen) Instagram Stats & Analytics
Miso Jen Kitchen (@misojenkitchen) has 438K Instagram followers with a 4.84% engagement rate over the past 12 months. Across 147 posts, Miso Jen Kitchen received 2.77M total likes and 58.0M impressions, averaging 18.8K likes per post. This page tracks Miso Jen Kitchen's performance metrics, top content, and engagement trends — updated daily. To benchmark @misojenkitchen against other accounts, use Socialpruf's Instagram competitor analysis tool.
Miso Jen Kitchen (@misojenkitchen) Instagram Analytics FAQ
How many Instagram followers does Miso Jen Kitchen have?+
Miso Jen Kitchen (@misojenkitchen) has 438K Instagram followers as of October 2026.
What is Miso Jen Kitchen's Instagram engagement rate?+
Miso Jen Kitchen's Instagram engagement rate is 4.84% over the last 12 months, based on 147 posts.
How many likes does Miso Jen Kitchen get on Instagram?+
Miso Jen Kitchen received 2.77M total likes across 147 posts in the last 12 months, averaging 18.8K likes per post.
How many Instagram impressions does Miso Jen Kitchen get?+
Miso Jen Kitchen's Instagram content generated 58.0M total impressions over the last 12 months.
Can I compare Miso Jen Kitchen with other Instagram accounts?+
Yes. Add @misojenkitchen to a competitor set with Socialpruf's Instagram competitor analysis tool and benchmark it side by side with any other public accounts on views, engagement rate and follower growth, with history back to each account's first post.