NewClaim a free social report
instagram analytics
Similar Accounts:
followers
526K
impressions
47.5M
likes
1.30M
comments
11.3K
posts
33
engagement
2.77%
emv
$1.29M
Average per post
1.44M

Key Metrics

Distributions

Top Content

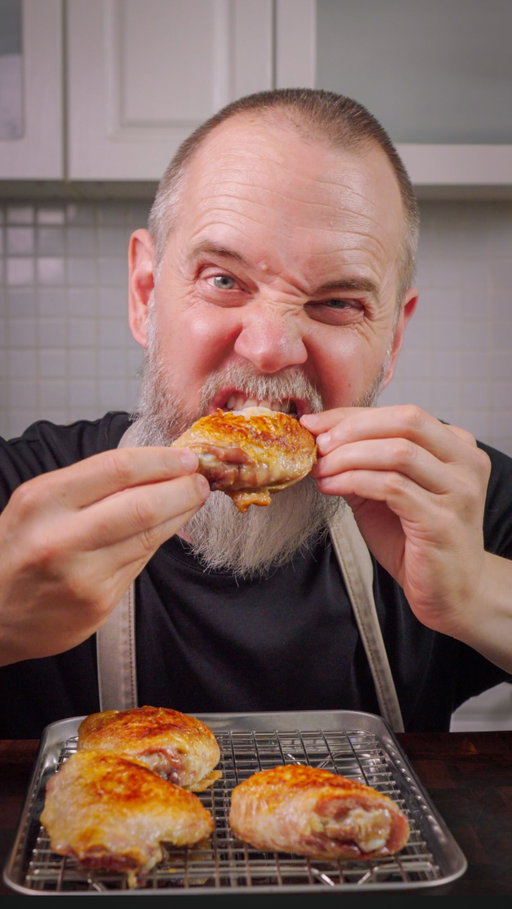
Chicken legs cost a fraction of what breasts do, yet they’re so much more flavourful.

These sausage-stuffed chicken legs are perfect for a weeknight dinner or your next Sunday roast.

The key to deboning? A sharp knife. I’m using the @wusthof Classic Santoku—I’ve always loved the santoku shape, and their classic range has brilliant options whether you need an all-rounder or something more specialised.

Here’s the recipe

For the chicken

2 chicken legs
2 sausages
2 tsp Italian seasoning
1 tsp chilli flakes
Salt & pepper
2 sprigs rosemary
½ bulb garlic
4 shallots
1 tbsp black peppercorns

	1.	Debone the chicken and save the trim and bones.
	2.	Lay them out flat, skin side down, and season with salt, Italian seasoning, chilli flakes and pepper.
	3.	Cut open the sausages and roll the meat into two balls.
	4.	Place in the middle of the chicken and roll around to form balls.
	5.	Tie with butcher’s twine and set aside.
	6.	Brown the bones and trim in oil on medium heat in an oven-safe pan.
	7.	Add rosemary, garlic, shallots (in skins) and peppercorns.
	8.	Place stuffed chicken legs on top, brush with butter, season, and roast at 240°C for 20 mins, then 180°C for 20 more.
	9.	Rest covered in the warm oven.

For the gravy

1 tbsp plain flour
150ml dry white wine
200ml chicken stock
2 tsp red wine vinegar

	1.	Sprinkle flour over roasted bits in the pan and cook until golden.
	2.	Deglaze with wine and reduce for 2–3 mins.
	3.	Add stock and simmer 10 mins to thicken.
	4.	Strain and finish with red wine vinegar and salt to taste.
	5.	Serve with roast or mash potatoes and braised red cabbage.

#wusthof #mywusthof #wusthofpartner

AD
4.80M
102K
1.45K
9mo ago
eatlikeanadult
Chicken legs cost a fraction of what breasts do, yet they’re so much more flavourful. These sausage-stuffed chicken legs are perfect for a weeknight dinner or your next Sunday roast. The key to deboning? A sharp knife. I’m using the @wusthof Classic Santoku—I’ve always loved the santoku shape, and their classic range has brilliant options whether you need an all-rounder or something more specialised. Here’s the recipe For the chicken 2 chicken legs 2 sausages 2 tsp Italian seasoning 1 tsp chilli flakes Salt & pepper 2 sprigs rosemary ½ bulb garlic 4 shallots 1 tbsp black peppercorns 1. Debone the chicken and save the trim and bones. 2. Lay them out flat, skin side down, and season with salt, Italian seasoning, chilli flakes and pepper. 3. Cut open the sausages and roll the meat into two balls. 4. Place in the middle of the chicken and roll around to form balls. 5. Tie with butcher’s twine and set aside. 6. Brown the bones and trim in oil on medium heat in an oven-safe pan. 7. Add rosemary, garlic, shallots (in skins) and peppercorns. 8. Place stuffed chicken legs on top, brush with butter, season, and roast at 240°C for 20 mins, then 180°C for 20 more. 9. Rest covered in the warm oven. For the gravy 1 tbsp plain flour 150ml dry white wine 200ml chicken stock 2 tsp red wine vinegar 1. Sprinkle flour over roasted bits in the pan and cook until golden. 2. Deglaze with wine and reduce for 2–3 mins. 3. Add stock and simmer 10 mins to thicken. 4. Strain and finish with red wine vinegar and salt to taste. 5. Serve with roast or mash potatoes and braised red cabbage. #wusthof #mywusthof #wusthofpartner AD
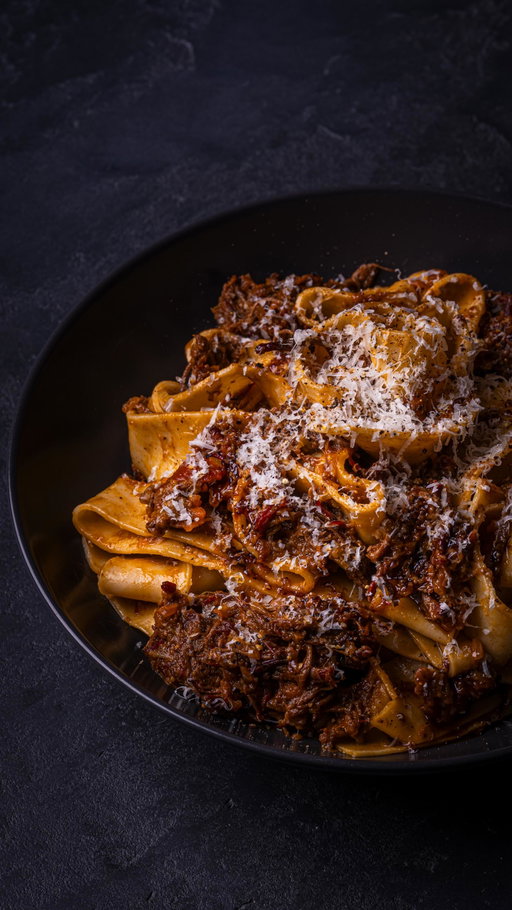
The longer version with ragu & pasta process.

Recipe

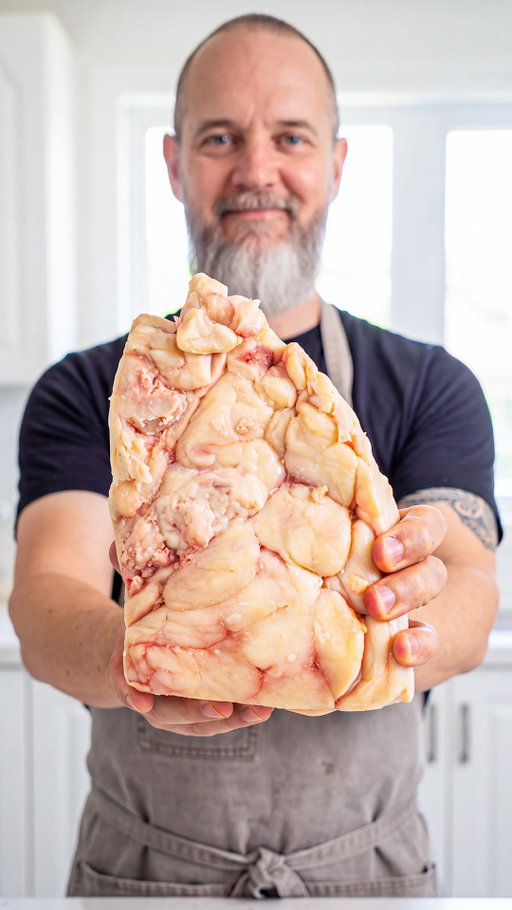
1 Thor’s hammer beef shin joint (I used a 4kg joint)
20g Mediterranean rub
250g beef stock

1. cut away any excess fat and sinew from the beef, tying up the joint with butcher’s twine so it holds its shape.
2. Render down the fat you just cut off and brush that tallow on to the joint. Follow that up with a good covering of the rub you’re using. I do all this in a baking tray which I’ll also smoke the joint in.
3. Smoke at 225°F (107°C) until it hits 170°F (76°C) internal. This will take around 4 to 5 hours.
4. Pour the beef stock into the baking tray and cover the whole thing with foil. Continue to cook in the smoker/grill or transfer to the oven at the same temperature until it hits 205°F (96°C).
5. Open up the foil to allow the steam to escape then loosely close and allow to rest for 1 hour.

Smoked Beef Shin Ragu

700g smoked beef shin
800g tinned tomatoes
250g passata 
250g beef stock
185g tomato Paste
2 medium carrots
3 stalk celery
1 large onion
3/4 bottle Chianti red wine
Extra Virgin Olive Oil
Salt
Corn Starch (Optional)
Rosemary
Sage
Black Pepper
Bay Leaf

1. Chop or mince your vegetables for the sofrito and put to one side.
2. Bring a heavy bottom pan to a medium heat and cover the base with olive oil.
3. Add the sofrito and cook until most of the moisture is sweated off. Add in the tomato paste and cook until it starts to stick to the bottom of the pan a little.
4. Go in with the red wine and reduce down by half and add in the meat, crushed tomatoes, passata, beef stock, and a boquet garni of all the fresh herbs.
5. Cook until it’s reduced to a thickness you want for the lasagna. Personally I like it to be very thick to avoid a watery lasagne.

Bechamel Sauce

1l milk
100g unsalted Butter
100g plain flour
Salt
Fresh Nutmeg
White Pepper

Lasagne Sheets

300g 00 flour
3 eggs
1 yolk

500g 00 flour
5 eggs

Assembly

Lasagne Sheets
4 layers
Make sure there’s no pasta sheet showing at the top that would otherwise dry up when cooking.
165°C for 40 minutes to allow the pasta to absorb the ragu and bechamel. First 20 mins is covered with tin foil.
Cover with a cloth and let it rest for up to 10 minutes.
4.77M
268K
900
10mo ago
eatlikeanadult
The longer version with ragu & pasta process. Recipe 1 Thor’s hammer beef shin joint (I used a 4kg joint) 20g Mediterranean rub 250g beef stock 1. cut away any excess fat and sinew from the beef, tying up the joint with butcher’s twine so it holds its shape. 2. Render down the fat you just cut off and brush that tallow on to the joint. Follow that up with a good covering of the rub you’re using. I do all this in a baking tray which I’ll also smoke the joint in. 3. Smoke at 225°F (107°C) until it hits 170°F (76°C) internal. This will take around 4 to 5 hours. 4. Pour the beef stock into the baking tray and cover the whole thing with foil. Continue to cook in the smoker/grill or transfer to the oven at the same temperature until it hits 205°F (96°C). 5. Open up the foil to allow the steam to escape then loosely close and allow to rest for 1 hour. Smoked Beef Shin Ragu 700g smoked beef shin 800g tinned tomatoes 250g passata 250g beef stock 185g tomato Paste 2 medium carrots 3 stalk celery 1 large onion 3/4 bottle Chianti red wine Extra Virgin Olive Oil Salt Corn Starch (Optional) Rosemary Sage Black Pepper Bay Leaf 1. Chop or mince your vegetables for the sofrito and put to one side. 2. Bring a heavy bottom pan to a medium heat and cover the base with olive oil. 3. Add the sofrito and cook until most of the moisture is sweated off. Add in the tomato paste and cook until it starts to stick to the bottom of the pan a little. 4. Go in with the red wine and reduce down by half and add in the meat, crushed tomatoes, passata, beef stock, and a boquet garni of all the fresh herbs. 5. Cook until it’s reduced to a thickness you want for the lasagna. Personally I like it to be very thick to avoid a watery lasagne. Bechamel Sauce 1l milk 100g unsalted Butter 100g plain flour Salt Fresh Nutmeg White Pepper Lasagne Sheets 300g 00 flour 3 eggs 1 yolk 500g 00 flour 5 eggs Assembly Lasagne Sheets 4 layers Make sure there’s no pasta sheet showing at the top that would otherwise dry up when cooking. 165°C for 40 minutes to allow the pasta to absorb the ragu and bechamel. First 20 mins is covered with tin foil. Cover with a cloth and let it rest for up to 10 minutes.
The Chef JosĂŠ AndrĂŠs olive oil fried eggs are unrivalled. Cooked so they become puffy and light, almost like a poached egg, but fried in olive oil - with all the texture and flavour that brings.

Ideally you’ll want a pan with a high side for this, because the oil’s going to be really hot.

You’re also going to be moving the oil around, basting the egg for 30 seconds. 

These fried eggs are absolutely delicious on buttered toast, but for this video I’ve also added seasoned beefsteak tomato, mortadella and chives. Can’t be beaten for a weekend breakfast or lunch. 

Olive oil is perfectly fine to fry with, but if you’re worried you can use a later pressing olive oil which is lighter in colour and has a higher smoke point.

I’m reposting this because so many people loved it. There was some debate the first time around about where frying eggs this way originated. I’m not saying it’s new or that José Andrés invented it. But I learned frying eggs in olive oil this way from him and wanted to share it. He has certainly popularised it. I also realise other cultures - specifically Asian cultures - fry eggs in a similar way in a wok with a different oil. I think it’s worth noting the differences and celebrating them.

Note: NPCs are invited to comment, “it’s just a fried egg”.
4.11M
93.6K
1.04K
10mo ago
eatlikeanadult
The Chef José Andrés olive oil fried eggs are unrivalled. Cooked so they become puffy and light, almost like a poached egg, but fried in olive oil - with all the texture and flavour that brings. Ideally you’ll want a pan with a high side for this, because the oil’s going to be really hot. You’re also going to be moving the oil around, basting the egg for 30 seconds. These fried eggs are absolutely delicious on buttered toast, but for this video I’ve also added seasoned beefsteak tomato, mortadella and chives. Can’t be beaten for a weekend breakfast or lunch. Olive oil is perfectly fine to fry with, but if you’re worried you can use a later pressing olive oil which is lighter in colour and has a higher smoke point. I’m reposting this because so many people loved it. There was some debate the first time around about where frying eggs this way originated. I’m not saying it’s new or that José Andrés invented it. But I learned frying eggs in olive oil this way from him and wanted to share it. He has certainly popularised it. I also realise other cultures - specifically Asian cultures - fry eggs in a similar way in a wok with a different oil. I think it’s worth noting the differences and celebrating them. Note: NPCs are invited to comment, “it’s just a fried egg”.
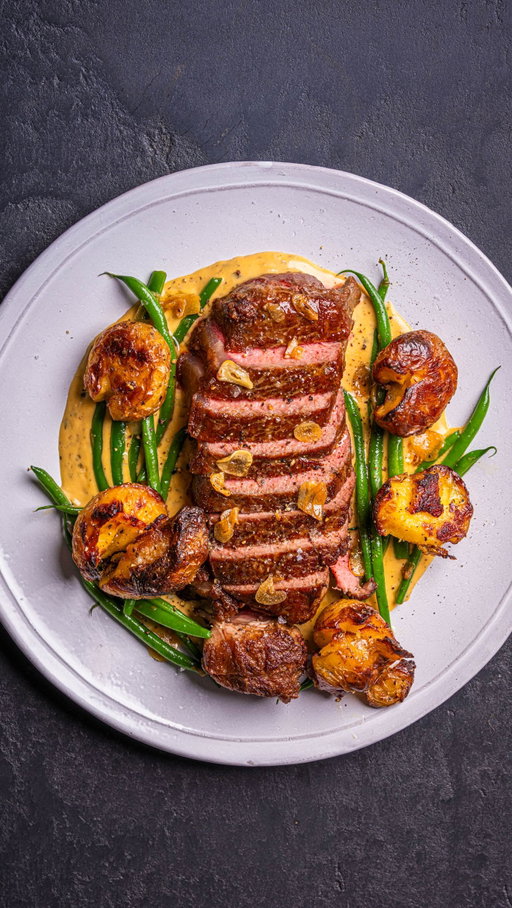
Every time you cook meat, you leave the best part of the dish behind.

It’s called sucs - most people call it fond - and it’s just sitting there in the bottom of your pan.

This series is about turning it into something extraordinary.

Welcome to Pan Sauces!

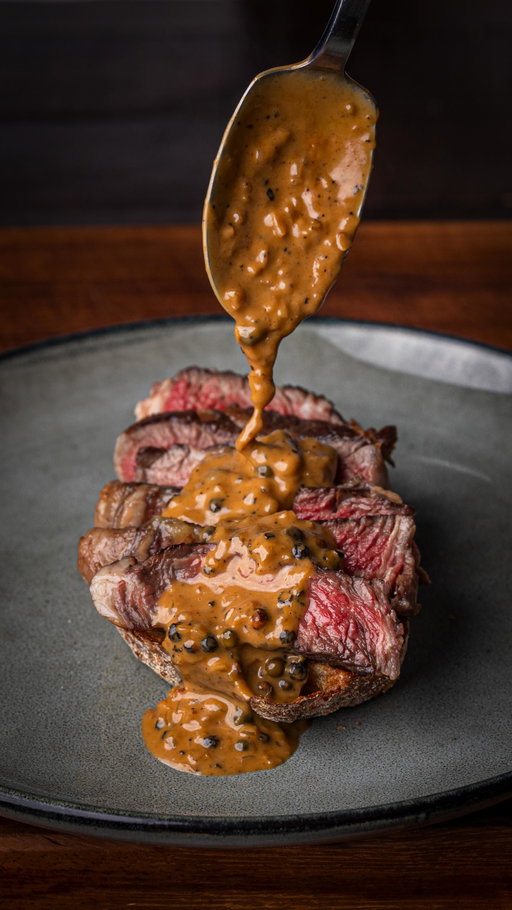
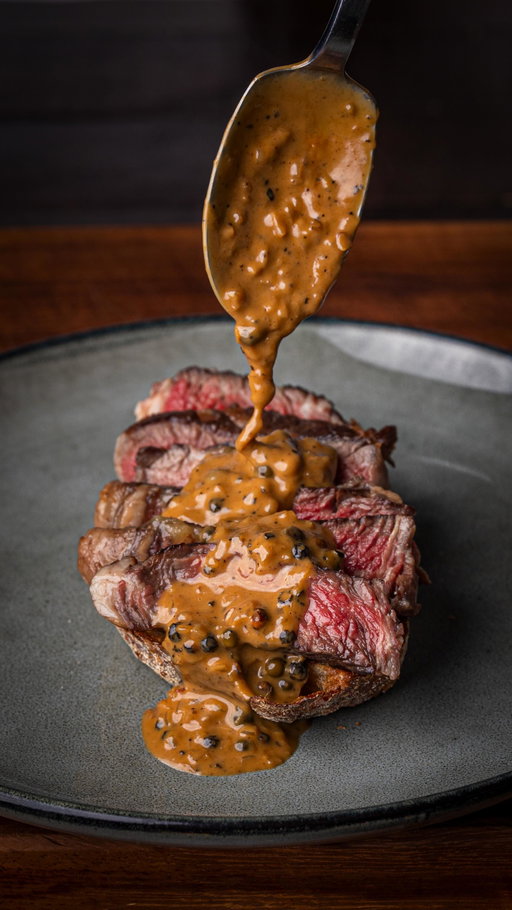
I’ve got classics like peppercorn steak and lemon butter. Underdogs like cider-mustard pork. And every technique you need to build restaurant-quality finishes from your own pan.

And throughout the series I’ll be tackling the big questions — why your pan sauce goes watery, what to do when the pan burns, and how to keep your meat warm while you finish the dish.

Follow me for the full series - every video is a complete recipe you can make the same night.
3.69M
81.7K
438
3mo ago
eatlikeanadult
Every time you cook meat, you leave the best part of the dish behind. It’s called sucs - most people call it fond - and it’s just sitting there in the bottom of your pan. This series is about turning it into something extraordinary. Welcome to Pan Sauces! I’ve got classics like peppercorn steak and lemon butter. Underdogs like cider-mustard pork. And every technique you need to build restaurant-quality finishes from your own pan. And throughout the series I’ll be tackling the big questions — why your pan sauce goes watery, what to do when the pan burns, and how to keep your meat warm while you finish the dish. Follow me for the full series - every video is a complete recipe you can make the same night.
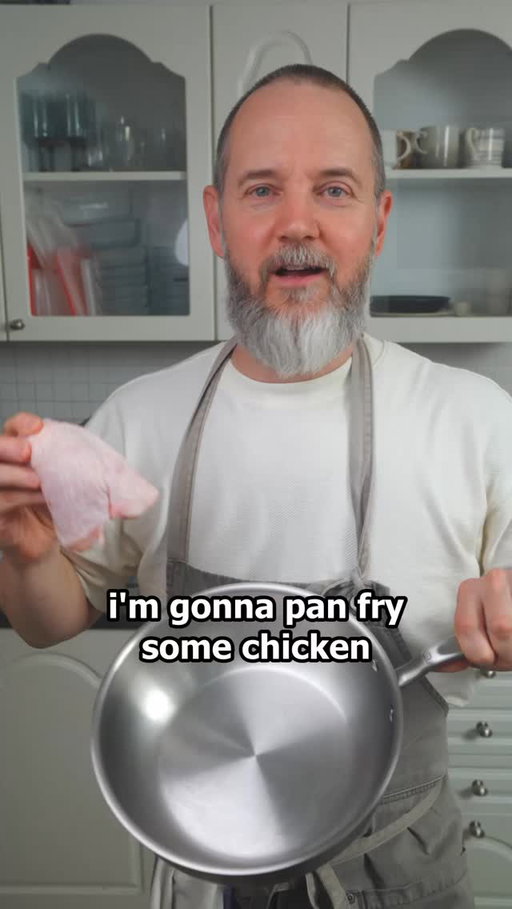
Saucier Roast Chicken. Feels so much easier to make gravy. And the brining will give you the best chicken of your life.

If you want links to the pans comment with the word: pans

Brining

1 whole chicken
2L water
36g salt
2.5g sodium bicarb sodium bicarb
1 lemon
2 bay leaves
2 sprigs rosemary
4 sprigs thyme

Cooking

2 medium carrots
2 stalks celery
1 large onion
2 tbsp butter

Chicken stock
Plain flour
Dry white wine
1 tbsp chicken gravy granules 

1. Bring all the brine ingredients to a simmer for 1 minute and allow to cool completely.
2. Add the chicken and leave in the fridge overnight. Because the salt brine ratio is fairly low you can leave this up to 24 hours without it getting too salty.
3. Thoroughly rinse off the chicken, pat dry and and truss it up with 2.5 metres of butcher’s twine.
4. Brush with some clarified butter and season with salt and pepper.
5. Add the copped onion, carrot, celery, garlic, lemon and herbs from brining to the bottom of the pan with a splash of olive oil and mix.
6. Place the chicken on top of the veggies.
7. Cook at 240°C for 20 mins and then turn down the heat to 180°C until the internal temperature reaches 65°C. When that happens remove from the heat and leave to rest.

**Making the gravy**

8. Put the pan with all of the juices and veggies in on medium heat stove top and add a couple of tablespoons of flour. Mix that in with all the veggies. Cook until you have some colour on the bottom of the pan.
9. Add in the white wine to deglaze and cook it off for a few minutes before adding the chicken stock. Cook for another 5 minutes and strain off into a smaller pan. Alternatively you can clean out the pan you cooked the chicken in and use that again. Add in a couple of tablespoons of chicken gravy granules to thicken or reduce to the desired consistency without the granules.

I use @madein saucier pans. In this video I use 3 quart & 2 quart

https://geni.us/MjASywT

https://geni.us/4N6BC6

https://geni.us/y1ZNBxR

Comment with the word pan and I'll send the links to your DMs
3.66M
95.5K
1.48K
11mo ago
eatlikeanadult
Saucier Roast Chicken. Feels so much easier to make gravy. And the brining will give you the best chicken of your life. If you want links to the pans comment with the word: pans Brining 1 whole chicken 2L water 36g salt 2.5g sodium bicarb sodium bicarb 1 lemon 2 bay leaves 2 sprigs rosemary 4 sprigs thyme Cooking 2 medium carrots 2 stalks celery 1 large onion 2 tbsp butter Chicken stock Plain flour Dry white wine 1 tbsp chicken gravy granules 1. Bring all the brine ingredients to a simmer for 1 minute and allow to cool completely. 2. Add the chicken and leave in the fridge overnight. Because the salt brine ratio is fairly low you can leave this up to 24 hours without it getting too salty. 3. Thoroughly rinse off the chicken, pat dry and and truss it up with 2.5 metres of butcher’s twine. 4. Brush with some clarified butter and season with salt and pepper. 5. Add the copped onion, carrot, celery, garlic, lemon and herbs from brining to the bottom of the pan with a splash of olive oil and mix. 6. Place the chicken on top of the veggies. 7. Cook at 240°C for 20 mins and then turn down the heat to 180°C until the internal temperature reaches 65°C. When that happens remove from the heat and leave to rest. **Making the gravy** 8. Put the pan with all of the juices and veggies in on medium heat stove top and add a couple of tablespoons of flour. Mix that in with all the veggies. Cook until you have some colour on the bottom of the pan. 9. Add in the white wine to deglaze and cook it off for a few minutes before adding the chicken stock. Cook for another 5 minutes and strain off into a smaller pan. Alternatively you can clean out the pan you cooked the chicken in and use that again. Add in a couple of tablespoons of chicken gravy granules to thicken or reduce to the desired consistency without the granules. I use @madein saucier pans. In this video I use 3 quart & 2 quart https://geni.us/MjASywT https://geni.us/4N6BC6 https://geni.us/y1ZNBxR Comment with the word pan and I'll send the links to your DMs
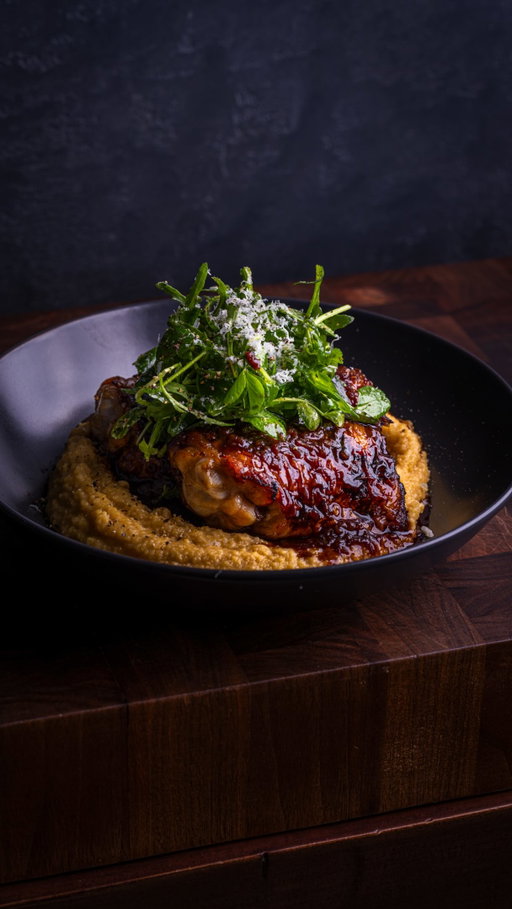
The chicken alone with just oyster sauce and salt are so juicy & flavourful! 

But I couldn’t leave you without a pan sauce too! Let me know in the comments if you want a video on the cabbage and broccoli too.

Chicken

4 skin-on chicken thighs
3 tbsp oyster sauce
Salt to season

1. Season the chicken skin liberally.
2. Start with a cold pan and no oil. I like to use a stainless steel pan as it gives great sucs (all the gubbins left at the bottom of the pan that some people call fond).
3. Start pan frying on medium low. If you’re unsure go lower than you think you need to. You can always turn it up later.
4. As the skin cooks the Maillard reaction will happen (the browning) and it will start to unstick.
5. Once you have the colour you want on the skin brush the it with the oyster sauce and place the whole thing in the oven. Clearly you need an oven-safe pan for this.
6. Cook at 180°C for 5 minutes and you should find the internal temperature is over 75°C. You can rest these under some kitchen foil on the counter top whilst you make the sauce, or you can leave them in the oven with the door ajar until the oven cools to around 40°C. They’ll keep at that temperature for easily 30 minutes.

Pan Sauce

1 medium shallot
1 clove garlic, minced
1cm piece of peeled & minced ginger
80ml dry vermouth
1 tsp light soy sauce
1/2 tsp fish sauce
1 tsp rice vinegar
1 tsp mirin
200ml chicken stock
2 tsp lime juice
3 tbsp butter 

1. Bring the pan to a medium heat and add the shallots. Cook until translucent.
2. Add in the minced garlic and ginger and cook for another minute.
3. Deglaze with some dry vermouth and reduce until ‘jammy’.
4. Add in the soy sauce, fish sauce (I used dark soy in the video which you can also do), rice vinegar and mirin. Cook for another minute.
5. Add in the chicken stock and reduce aggressively until the spatula traces through.
6. Turn the heat off to finish with lime juice and cold butter. Keep the pan moving to emulsify.

**To serve**

Hispi (sweatheart) cabbage with furikake
Garlic & ginger Tenderstem broccoli 
Sticky jasmine rice with spring onion
3.38M
89.0K
623
10mo ago
eatlikeanadult
The chicken alone with just oyster sauce and salt are so juicy & flavourful! But I couldn’t leave you without a pan sauce too! Let me know in the comments if you want a video on the cabbage and broccoli too. Chicken 4 skin-on chicken thighs 3 tbsp oyster sauce Salt to season 1. Season the chicken skin liberally. 2. Start with a cold pan and no oil. I like to use a stainless steel pan as it gives great sucs (all the gubbins left at the bottom of the pan that some people call fond). 3. Start pan frying on medium low. If you’re unsure go lower than you think you need to. You can always turn it up later. 4. As the skin cooks the Maillard reaction will happen (the browning) and it will start to unstick. 5. Once you have the colour you want on the skin brush the it with the oyster sauce and place the whole thing in the oven. Clearly you need an oven-safe pan for this. 6. Cook at 180°C for 5 minutes and you should find the internal temperature is over 75°C. You can rest these under some kitchen foil on the counter top whilst you make the sauce, or you can leave them in the oven with the door ajar until the oven cools to around 40°C. They’ll keep at that temperature for easily 30 minutes. Pan Sauce 1 medium shallot 1 clove garlic, minced 1cm piece of peeled & minced ginger 80ml dry vermouth 1 tsp light soy sauce 1/2 tsp fish sauce 1 tsp rice vinegar 1 tsp mirin 200ml chicken stock 2 tsp lime juice 3 tbsp butter 1. Bring the pan to a medium heat and add the shallots. Cook until translucent. 2. Add in the minced garlic and ginger and cook for another minute. 3. Deglaze with some dry vermouth and reduce until ‘jammy’. 4. Add in the soy sauce, fish sauce (I used dark soy in the video which you can also do), rice vinegar and mirin. Cook for another minute. 5. Add in the chicken stock and reduce aggressively until the spatula traces through. 6. Turn the heat off to finish with lime juice and cold butter. Keep the pan moving to emulsify. **To serve** Hispi (sweatheart) cabbage with furikake Garlic & ginger Tenderstem broccoli Sticky jasmine rice with spring onion
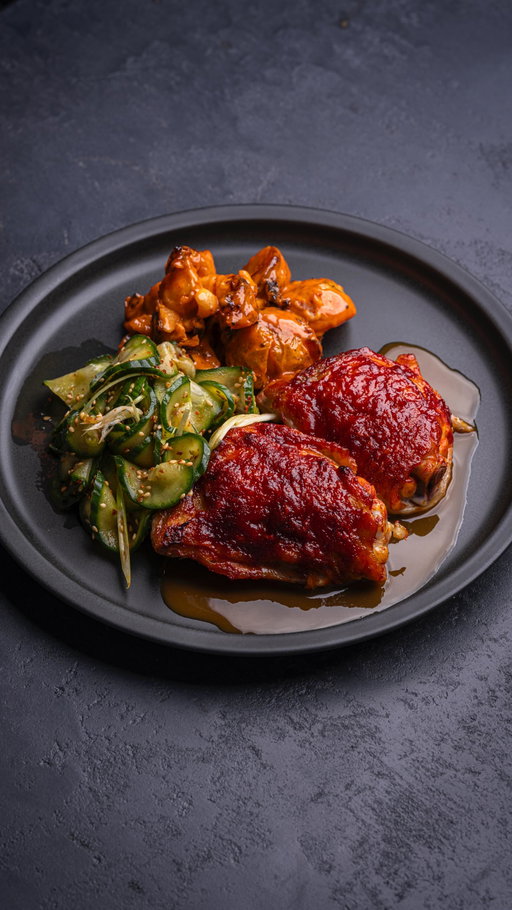
Gochujang chicken thighs with pickled cucumber and gochujang crispy potato salad.

Find the full recipe on eatlikeanadult.com (clickable link in bio)
3.23M
120K
814
5mo ago
eatlikeanadult
Gochujang chicken thighs with pickled cucumber and gochujang crispy potato salad. Find the full recipe on eatlikeanadult.com (clickable link in bio)
Summer sharing plates sorted! 🌞 
This beautiful Mediterranean spread was made with just ONE seasoning – Schwartz’s new The Smoky One All Rounder.
 
Not everyone has time to spend ages in the kitchen coming up with the perfect flavour combinations! If that’s you, these All-Rounder Seasonings are brilliant. Instead of buying 6 different herbs & spices, get one that’s expertly blended by Schwartz and delivers flavour right first time!
 
The Smoky One has incredible depth – smoked paprika, red pepper, tomato – it makes simple ingredients taste like you’ve been cooking all day. I used it on potatoes, veg and chicken. Each dish had its own character but worked beautifully together.
 
The range comes in four flavours: Spicy, Zesty, Smoky and Garlic. Honestly, they work on everything – meat, fish, veg, salads, roasts – perfect for people short on time but still want delicious tasting meals!
 
Recipes below 👇
📍 Available at Tesco, Asda, Morrisons & Ocado.
—
Potatoes (Serves 2)
700g potatoes
2 tsp salt
1.5 tsp bicarb
100ml olive oil
Flat-leaf parsley
Peel/cube potatoes (2cm), boil w/ salt & bicarb 8 mins. Strain, let steam off, season w/ The Smoky One + oil. Toss until edges burr. Roast 220°C 20 mins, flip, roast 20–25 mins.
 
Spicy Salsa
4 tbsp olive oil
1 tbsp flour
3 tsp The Smoky One
180ml hot chicken stock
1 tsp vinegar
Salt & pepper
Make a roux (oil + flour 2 mins). Off heat, add spice. Back on heat, whisk in stock. Off heat, add vinegar + season.
 
Garlic Mayo
150g mayo
1 garlic clove
Mince and mix.
 
To serve
Top potatoes w/ garlic mayo, salsa, parsley.
—
Smoky Veg & Burrata (Serves 2-3)
1 pepper, 1 courgette, 1 onion
1 tbsp The Smoky One
3 tbsp olive oil
1 tbsp lemon juice
2 tsp salt
1 burrata
100g rocket
Optional: chilli flakes, pepper
Slice veg, toss w/ seasoning, oil, lemon, salt. Grill until tender. Tear burrata, top w/ veg & rocket. Add salsa & chicken juices if you like. Garnish.
—
Smoky Roast Chicken Thighs (Serves 2-3)
4 skin-on thighs
2 tbsp olive oil
2 tbsp The Smoky One
2 tsp lemon juice
1 tsp salt
Mix all, coat chicken, roast 240°C 30–40 mins.
 
@schwartz.uk #FlavourUpEveryDish #Allrounders #Schwartz #SchwartzRecipe #AD
2.78M
1.12K
28
11mo ago
eatlikeanadult
Summer sharing plates sorted! 🌞 This beautiful Mediterranean spread was made with just ONE seasoning – Schwartz’s new The Smoky One All Rounder.   Not everyone has time to spend ages in the kitchen coming up with the perfect flavour combinations! If that’s you, these All-Rounder Seasonings are brilliant. Instead of buying 6 different herbs & spices, get one that’s expertly blended by Schwartz and delivers flavour right first time!   The Smoky One has incredible depth – smoked paprika, red pepper, tomato – it makes simple ingredients taste like you’ve been cooking all day. I used it on potatoes, veg and chicken. Each dish had its own character but worked beautifully together.   The range comes in four flavours: Spicy, Zesty, Smoky and Garlic. Honestly, they work on everything – meat, fish, veg, salads, roasts – perfect for people short on time but still want delicious tasting meals!   Recipes below 👇 📍 Available at Tesco, Asda, Morrisons & Ocado. — Potatoes (Serves 2) 700g potatoes 2 tsp salt 1.5 tsp bicarb 100ml olive oil Flat-leaf parsley Peel/cube potatoes (2cm), boil w/ salt & bicarb 8 mins. Strain, let steam off, season w/ The Smoky One + oil. Toss until edges burr. Roast 220°C 20 mins, flip, roast 20–25 mins.   Spicy Salsa 4 tbsp olive oil 1 tbsp flour 3 tsp The Smoky One 180ml hot chicken stock 1 tsp vinegar Salt & pepper Make a roux (oil + flour 2 mins). Off heat, add spice. Back on heat, whisk in stock. Off heat, add vinegar + season.   Garlic Mayo 150g mayo 1 garlic clove Mince and mix.   To serve Top potatoes w/ garlic mayo, salsa, parsley. — Smoky Veg & Burrata (Serves 2-3) 1 pepper, 1 courgette, 1 onion 1 tbsp The Smoky One 3 tbsp olive oil 1 tbsp lemon juice 2 tsp salt 1 burrata 100g rocket Optional: chilli flakes, pepper Slice veg, toss w/ seasoning, oil, lemon, salt. Grill until tender. Tear burrata, top w/ veg & rocket. Add salsa & chicken juices if you like. Garnish. — Smoky Roast Chicken Thighs (Serves 2-3) 4 skin-on thighs 2 tbsp olive oil 2 tbsp The Smoky One 2 tsp lemon juice 1 tsp salt Mix all, coat chicken, roast 240°C 30–40 mins.   @schwartz.uk #FlavourUpEveryDish #Allrounders #Schwartz #SchwartzRecipe #AD
Whisky Double Cream Chocolate Basque Cheesecake

- 750g full-fat cream cheese (at room temperature)
- 240g caster sugar
- 20g cocoa powder
- 150g dark (70%) chocolate
- 3 whole eggs (at room temperature)
- 300ml double cream (at room temperature)
- 1/4 teaspoon fine sea salt
- 2 tbsp whisky (optional)

1. Preheat the oven to 230°C (450°F).
2. In a bowl, beat the cream cheese and caster sugar using an electric hand mixer until smooth.
3. Add the eggs one at a time, mixing well after each addition until fully combined.
4. Gradually pour the melted chocolate into the double cream while mixing. Stir in the whisky at 
this stage.
5. Pour the chocolate-whisky cream mixture into the bowl with the cream cheese mixture and 
blend everything together.
6. Add the salt and cocoa powder, then mix until smooth.
7. Line a 20cm springform pan with parchment paper. Pour the batter into the pan and gently tap 
it on the countertop a few times to release any air bubbles.
8. Bake the cheesecake uncovered for 35 minutes, or until the top is slightly charred. Avoid 
opening the oven door during baking.
9. Once the cheesecake has cooled for 3 to 4 hours, serve or transfer it to the fridge.
2.66M
107K
582
11mo ago
eatlikeanadult
Whisky Double Cream Chocolate Basque Cheesecake - 750g full-fat cream cheese (at room temperature) - 240g caster sugar - 20g cocoa powder - 150g dark (70%) chocolate - 3 whole eggs (at room temperature) - 300ml double cream (at room temperature) - 1/4 teaspoon fine sea salt - 2 tbsp whisky (optional) 1. Preheat the oven to 230°C (450°F). 2. In a bowl, beat the cream cheese and caster sugar using an electric hand mixer until smooth. 3. Add the eggs one at a time, mixing well after each addition until fully combined. 4. Gradually pour the melted chocolate into the double cream while mixing. Stir in the whisky at this stage. 5. Pour the chocolate-whisky cream mixture into the bowl with the cream cheese mixture and blend everything together. 6. Add the salt and cocoa powder, then mix until smooth. 7. Line a 20cm springform pan with parchment paper. Pour the batter into the pan and gently tap it on the countertop a few times to release any air bubbles. 8. Bake the cheesecake uncovered for 35 minutes, or until the top is slightly charred. Avoid opening the oven door during baking. 9. Once the cheesecake has cooled for 3 to 4 hours, serve or transfer it to the fridge.
Recipe

1 Thor’s hammer beef shin joint (I used a 4kg joint)
20g Mediterranean rub
250g beef stock

1. cut away any excess fat and sinew from the beef, tying up the joint with butcher’s twine so it holds its shape.
2. Render down the fat you just cut off and brush that tallow on to the joint. Follow that up with a good covering of the rub you’re using. I do all this in a baking tray which I’ll also smoke the joint in.
3. Smoke at 225°F (107°C) until it hits 170°F (76°C) internal. This will take around 4 to 5 hours.
4. Pour the beef stock into the baking tray and cover the whole thing with foil. Continue to cook in the smoker/grill or transfer to the oven at the same temperature until it hits 205°F (96°C).
5. Open up the foil to allow the steam to escape then loosely close and allow to rest for 1 hour.

Smoked Beef Shin Ragu

700g smoked beef shin
800g tinned tomatoes
250g passata 
250g beef stock
185g tomato Paste
2 medium carrots
3 stalk celery
1 large onion
3/4 bottle Chianti red wine
Extra Virgin Olive Oil
Salt
Corn Starch (Optional)
Rosemary
Sage
Black Pepper
Bay Leaf

1. Chop or mince your vegetables for the sofrito and put to one side.
2. Bring a heavy bottom pan to a medium heat and cover the base with olive oil.
3. Add the sofrito and cook until most of the moisture is sweated off. Add in the tomato paste and cook until it starts to stick to the bottom of the pan a little.
4. Go in with the red wine and reduce down by half and add in the meat, crushed tomatoes, passata, beef stock, and a boquet garni of all the fresh herbs.
5. Cook until it’s reduced to a thickness you want for the lasagna. Personally I like it to be very thick to avoid a watery lasagne.

Bechamel Sauce

1l milk
100g unsalted Butter
100g plain flour
Salt
Fresh Nutmeg
White Pepper

Lasagne Sheets

300g 00 flour
3 eggs
1 yolk

500g 00 flour
5 eggs

Assembly

Lasagne Sheets
4 layers
Make sure there’s no pasta sheet showing at the top that would otherwise dry up when cooking.
165°C for 40 minutes to allow the pasta to absorb the ragu and bechamel. First 20 mins is covered with tin foil.
Cover with a cloth and let it rest for up to 10 minutes.
2.36M
114K
608
12mo ago
eatlikeanadult
Recipe 1 Thor’s hammer beef shin joint (I used a 4kg joint) 20g Mediterranean rub 250g beef stock 1. cut away any excess fat and sinew from the beef, tying up the joint with butcher’s twine so it holds its shape. 2. Render down the fat you just cut off and brush that tallow on to the joint. Follow that up with a good covering of the rub you’re using. I do all this in a baking tray which I’ll also smoke the joint in. 3. Smoke at 225°F (107°C) until it hits 170°F (76°C) internal. This will take around 4 to 5 hours. 4. Pour the beef stock into the baking tray and cover the whole thing with foil. Continue to cook in the smoker/grill or transfer to the oven at the same temperature until it hits 205°F (96°C). 5. Open up the foil to allow the steam to escape then loosely close and allow to rest for 1 hour. Smoked Beef Shin Ragu 700g smoked beef shin 800g tinned tomatoes 250g passata 250g beef stock 185g tomato Paste 2 medium carrots 3 stalk celery 1 large onion 3/4 bottle Chianti red wine Extra Virgin Olive Oil Salt Corn Starch (Optional) Rosemary Sage Black Pepper Bay Leaf 1. Chop or mince your vegetables for the sofrito and put to one side. 2. Bring a heavy bottom pan to a medium heat and cover the base with olive oil. 3. Add the sofrito and cook until most of the moisture is sweated off. Add in the tomato paste and cook until it starts to stick to the bottom of the pan a little. 4. Go in with the red wine and reduce down by half and add in the meat, crushed tomatoes, passata, beef stock, and a boquet garni of all the fresh herbs. 5. Cook until it’s reduced to a thickness you want for the lasagna. Personally I like it to be very thick to avoid a watery lasagne. Bechamel Sauce 1l milk 100g unsalted Butter 100g plain flour Salt Fresh Nutmeg White Pepper Lasagne Sheets 300g 00 flour 3 eggs 1 yolk 500g 00 flour 5 eggs Assembly Lasagne Sheets 4 layers Make sure there’s no pasta sheet showing at the top that would otherwise dry up when cooking. 165°C for 40 minutes to allow the pasta to absorb the ragu and bechamel. First 20 mins is covered with tin foil. Cover with a cloth and let it rest for up to 10 minutes.
AD Friends moving into a new house + their first Christmas there = Friendsmas 🎄
A big milestone… and a lot of hosting pressure.

Cooking is my love language, so I wanted to ease the stress and share the gift of flavour by bringing a few sides that deliver instant wow.

I made three festive classics, all using Schwartz — their super strong, diverse range of quality herbs, spices and recipe mixes make it so easy to put your own delicious twist on familiar dishes.

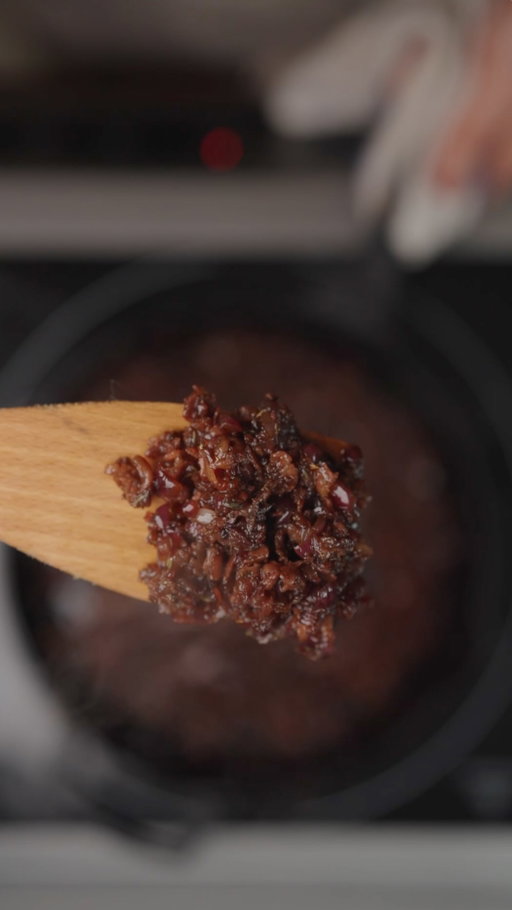
• Sausage rolls with a sweet & smoky bacon jam (that warming depth from Schwartz ground cloves 👌)
• Braised red cabbage where Schwartz cinnamon really shines
• Crispy battered parsnips with Schwartz garlic & thyme

Simple food, big flavour, great company — exactly what Friendsmas should be.

RECIPES (SAVE THIS ⤵️)

Braised Red Cabbage
Red cabbage, onion, apple, vinegar, sugar, splash of wine or water
Schwartz cloves + cinnamon
→ Braise low & slow until soft, glossy and sweet-sharp

Garlic & Thyme Battered Parsnips
Parsnips, flour, cold sparkling water
Schwartz garlic granules + dried thyme
→ Batter, fry hot, season immediately

Bacon Jam Sausage Rolls
Bacon, onion, sugar, vinegar
Schwartz thyme + a pinch of ground cloves
→ Reduce to jam, spread thin, roll, egg wash, bake till deeply golden

When it matters, flavour is the gift.

#ShareTheGiftOfFlavour #SchwartzRecipe
1.65M
421
9
6mo ago
eatlikeanadult
AD Friends moving into a new house + their first Christmas there = Friendsmas 🎄 A big milestone… and a lot of hosting pressure. Cooking is my love language, so I wanted to ease the stress and share the gift of flavour by bringing a few sides that deliver instant wow. I made three festive classics, all using Schwartz — their super strong, diverse range of quality herbs, spices and recipe mixes make it so easy to put your own delicious twist on familiar dishes. • Sausage rolls with a sweet & smoky bacon jam (that warming depth from Schwartz ground cloves 👌) • Braised red cabbage where Schwartz cinnamon really shines • Crispy battered parsnips with Schwartz garlic & thyme Simple food, big flavour, great company — exactly what Friendsmas should be. RECIPES (SAVE THIS ⤵️) Braised Red Cabbage Red cabbage, onion, apple, vinegar, sugar, splash of wine or water Schwartz cloves + cinnamon → Braise low & slow until soft, glossy and sweet-sharp Garlic & Thyme Battered Parsnips Parsnips, flour, cold sparkling water Schwartz garlic granules + dried thyme → Batter, fry hot, season immediately Bacon Jam Sausage Rolls Bacon, onion, sugar, vinegar Schwartz thyme + a pinch of ground cloves → Reduce to jam, spread thin, roll, egg wash, bake till deeply golden When it matters, flavour is the gift. #ShareTheGiftOfFlavour #SchwartzRecipe
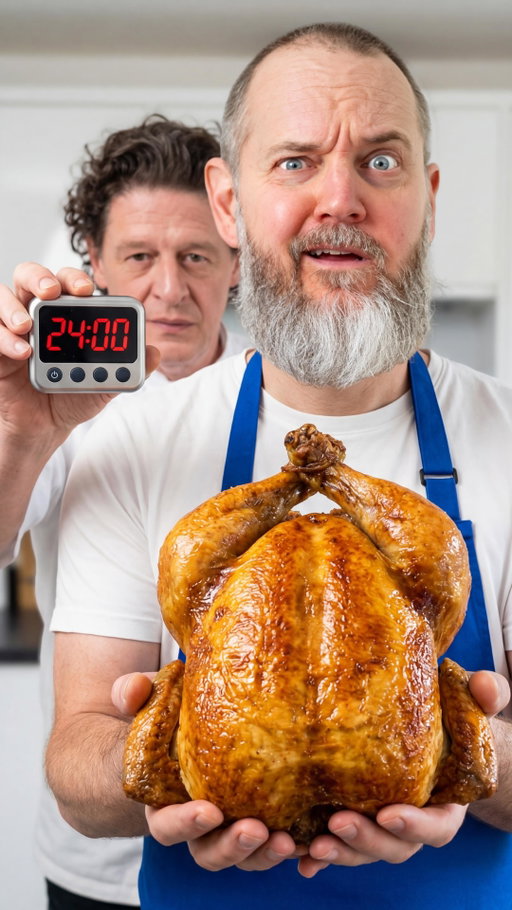
Marco Pierre White’s roast chicken is wild.

I found the technique, which is says they used at Claridges, in his autobiography from 2007.

Hat tip to Gary from BigSpud on YouTube that put me on to this book and technique. He has a full video on his channel.
1.40M
20.8K
790
5mo ago
eatlikeanadult
Marco Pierre White’s roast chicken is wild. I found the technique, which is says they used at Claridges, in his autobiography from 2007. Hat tip to Gary from BigSpud on YouTube that put me on to this book and technique. He has a full video on his channel.
You can find all of my recipes at eatlikeanadult.com
1.34M
46.7K
367
8mo ago
eatlikeanadult
You can find all of my recipes at eatlikeanadult.com
1.25M
26.4K
385
9mo ago
eatlikeanadult
You can find all of my recipes at eatlikeanadult.com
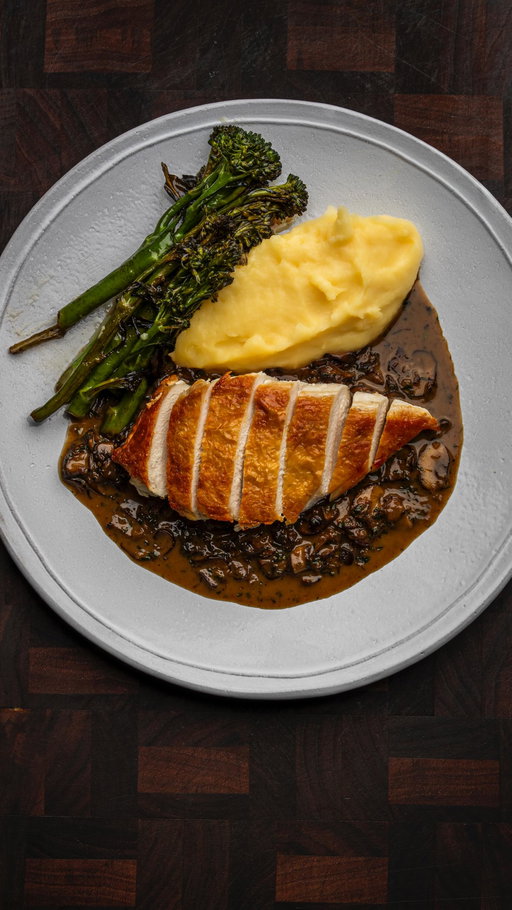
100g diced mushrooms
1 medium shallot
1 clove garlic
250ml dry white wine
150ml chicken stock
Juice of 1/2 a lemon
50g cold butter
Kosher salt
Freshly ground black pepper
5g chives
3g tarragon

1. With the chicken sucs in the pan, add 25g of butter, followed up by the diced mushrooms.
2. Add a little salt and let the water cook off those mushrooms.
3. As they’re starting to brown nicely, add in the shallot and garlic and cook until the onions are translucent.
4. Add in the wine and cook off some of the alcohol for about 5 minutes.
5. Next add in the chicken stock and allow to reduce by about half. Your spoon or spatula should leave a trace in the sauce.
6. Reduce the heat and add in the fresh finely cut herbs and the lemon juice. Cook for about a minute and turn off the heat.
7. Add in the remaining 25g of butter and keep stirring to emulsify.
8. Taste for seasoning and adjust as necessary.

Options for herb combinations

- Thyme + Parsley: A classic and balanced pairing.
- Tarragon + Chive: Elegant and aromatic, great for French-inspired dishes.
- Rosemary + Parsley: Adds warmth and freshness.
1.16M
27.8K
168
8mo ago
eatlikeanadult
100g diced mushrooms 1 medium shallot 1 clove garlic 250ml dry white wine 150ml chicken stock Juice of 1/2 a lemon 50g cold butter Kosher salt Freshly ground black pepper 5g chives 3g tarragon 1. With the chicken sucs in the pan, add 25g of butter, followed up by the diced mushrooms. 2. Add a little salt and let the water cook off those mushrooms. 3. As they’re starting to brown nicely, add in the shallot and garlic and cook until the onions are translucent. 4. Add in the wine and cook off some of the alcohol for about 5 minutes. 5. Next add in the chicken stock and allow to reduce by about half. Your spoon or spatula should leave a trace in the sauce. 6. Reduce the heat and add in the fresh finely cut herbs and the lemon juice. Cook for about a minute and turn off the heat. 7. Add in the remaining 25g of butter and keep stirring to emulsify. 8. Taste for seasoning and adjust as necessary. Options for herb combinations - Thyme + Parsley: A classic and balanced pairing. - Tarragon + Chive: Elegant and aromatic, great for French-inspired dishes. - Rosemary + Parsley: Adds warmth and freshness.
Full recipe just below. Drop your questions (or rib tips!) in the comments

Dry Rub

1.5kg pork ribs

2 tbsp soft dark brown sugar
1 tbsp fine sea salt
1 tbsp smoked paprika
1 tsp freshly ground black pepper
1 tsp garlic powder
½ tsp mustard powder
½ tsp ground cumin
½ tsp chilli powder (mild-hot to taste)

1. Remove the membrane from the back of the pork ribs.
2. Cover the ribs in mustard and then dry rub.
3. Optional step: Wrap in clingfilm and refrigerate for 4-24 hours.
4. In your BBQ, move the coal to bank them to one side; place a foil drip pan on the cool side. Stabilise the temperature at **120-130 °C / 250-265 °F**. Optionally Scatter a handful of soaked wood chips on the hot coals when the ribs go on; feed another handful after 60-90 min.
5. Place the ribs on a grate over the foil tray meat side up for 2 hours.
6. Place each rack on a double layer of foil, add a drizzle of apple juice or splash of beer, seal tightly. Return to BBQ (still indirect) for 1 hour 30 minutes.
7. Unwrap and keep the liquid. Baste generously with warm treacle glaze (recipe below) every 10 min for 30 to 40 minutes total, turning once or twice, until the surface is shiny, tacky and lightly charred at the edges.
8. Internal temperature should be **90-95 °C (195-203 °F)** for tender ribs.

Black-treacle glaze

50 g black treacle (about 3 tbsp)
30 ml bourbon **or** dark rum (optional but tasty)
2 tbsp tomato ketchup
2 tbsp cider vinegar
1 tbsp Worcestershire sauce
1 tbsp dark brown sugar
1 tsp smoked paprika
Pinch dried chilli flakes & a squeeze of lemon

1. Combine all glaze ingredients in a small saucepan.
2. Bring to a gentle simmer and cook 5-7 min until syrupy enough to coat the back of a spoon. (The booze cooks off but leaves flavour.)
3. Keep warm; it will thicken as it cools, so thin with a teaspoon of hot water if needed when brushing.

To serve

Brioche buns
Dill pickles
Pickled red onions
Crisps of your choice
1.06M
17.1K
391
11mo ago
eatlikeanadult
Full recipe just below. Drop your questions (or rib tips!) in the comments Dry Rub 1.5kg pork ribs 2 tbsp soft dark brown sugar 1 tbsp fine sea salt 1 tbsp smoked paprika 1 tsp freshly ground black pepper 1 tsp garlic powder ½ tsp mustard powder ½ tsp ground cumin ½ tsp chilli powder (mild-hot to taste) 1. Remove the membrane from the back of the pork ribs. 2. Cover the ribs in mustard and then dry rub. 3. Optional step: Wrap in clingfilm and refrigerate for 4-24 hours. 4. In your BBQ, move the coal to bank them to one side; place a foil drip pan on the cool side. Stabilise the temperature at **120-130 °C / 250-265 °F**. Optionally Scatter a handful of soaked wood chips on the hot coals when the ribs go on; feed another handful after 60-90 min. 5. Place the ribs on a grate over the foil tray meat side up for 2 hours. 6. Place each rack on a double layer of foil, add a drizzle of apple juice or splash of beer, seal tightly. Return to BBQ (still indirect) for 1 hour 30 minutes. 7. Unwrap and keep the liquid. Baste generously with warm treacle glaze (recipe below) every 10 min for 30 to 40 minutes total, turning once or twice, until the surface is shiny, tacky and lightly charred at the edges. 8. Internal temperature should be **90-95 °C (195-203 °F)** for tender ribs. Black-treacle glaze 50 g black treacle (about 3 tbsp) 30 ml bourbon **or** dark rum (optional but tasty) 2 tbsp tomato ketchup 2 tbsp cider vinegar 1 tbsp Worcestershire sauce 1 tbsp dark brown sugar 1 tsp smoked paprika Pinch dried chilli flakes & a squeeze of lemon 1. Combine all glaze ingredients in a small saucepan. 2. Bring to a gentle simmer and cook 5-7 min until syrupy enough to coat the back of a spoon. (The booze cooks off but leaves flavour.) 3. Keep warm; it will thicken as it cools, so thin with a teaspoon of hot water if needed when brushing. To serve Brioche buns Dill pickles Pickled red onions Crisps of your choice
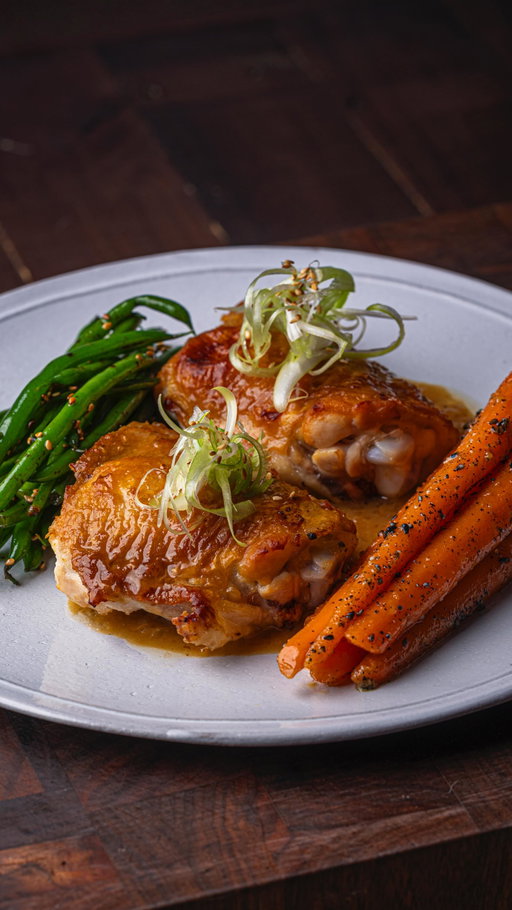
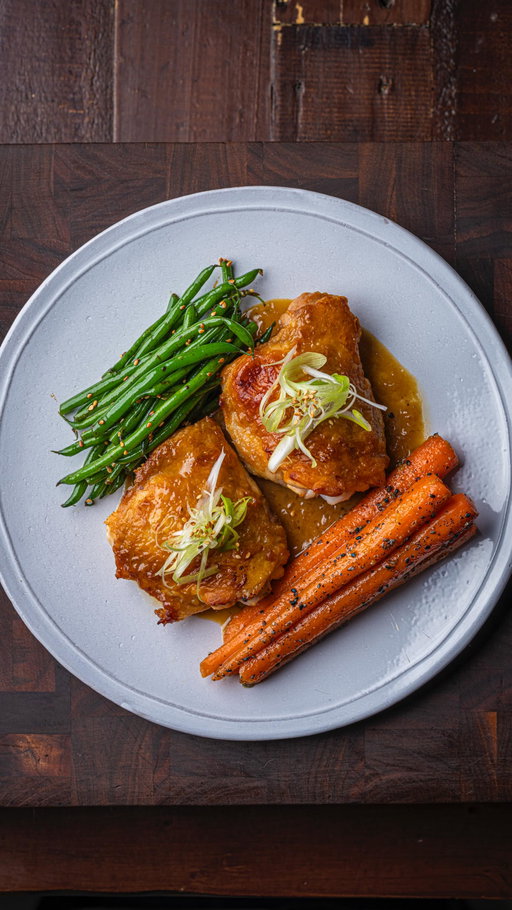
Miso glazed chicken thighs

Find my recipes at eatlikeanadult.com (clickable link in my bio)
605K
11.0K
116
6mo ago
eatlikeanadult
Miso glazed chicken thighs Find my recipes at eatlikeanadult.com (clickable link in my bio)
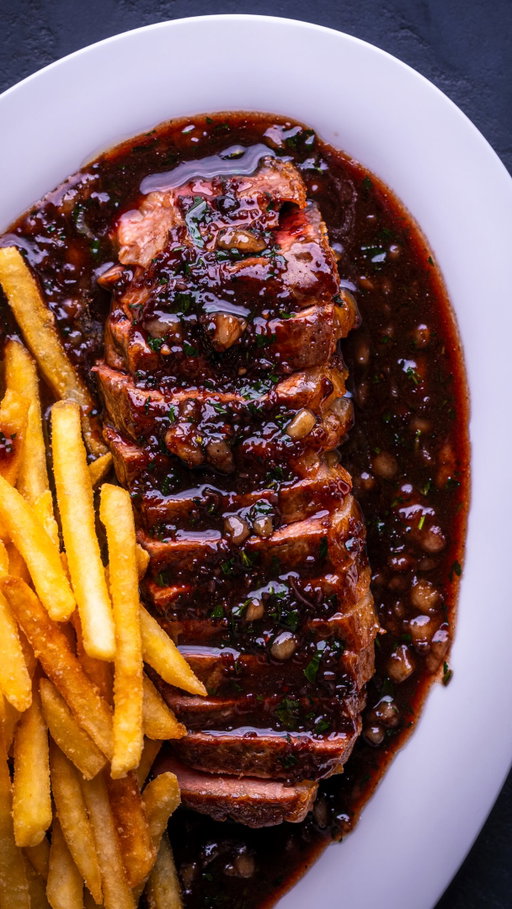
Every time you cook meat, you leave the best part of the dish behind.

It’s called sucs - most people call it fond - and it’s just sitting there in the bottom of your pan.

This series is about turning it into something extraordinary.

Welcome to Pan Sauces!

I’ve got classics like peppercorn steak and lemon butter. Underdogs like cider-mustard pork. And every technique you need to build restaurant-quality finishes from your own pan.

And throughout the series I’ll be tackling the big questions — why your pan sauce goes watery, what to do when the pan burns, and how to keep your meat warm while you finish the dish.

Follow me for the full series - every video is a complete recipe you can make the same night.
474K
17.6K
66
2mo ago
eatlikeanadult
Every time you cook meat, you leave the best part of the dish behind. It’s called sucs - most people call it fond - and it’s just sitting there in the bottom of your pan. This series is about turning it into something extraordinary. Welcome to Pan Sauces! I’ve got classics like peppercorn steak and lemon butter. Underdogs like cider-mustard pork. And every technique you need to build restaurant-quality finishes from your own pan. And throughout the series I’ll be tackling the big questions — why your pan sauce goes watery, what to do when the pan burns, and how to keep your meat warm while you finish the dish. Follow me for the full series - every video is a complete recipe you can make the same night.
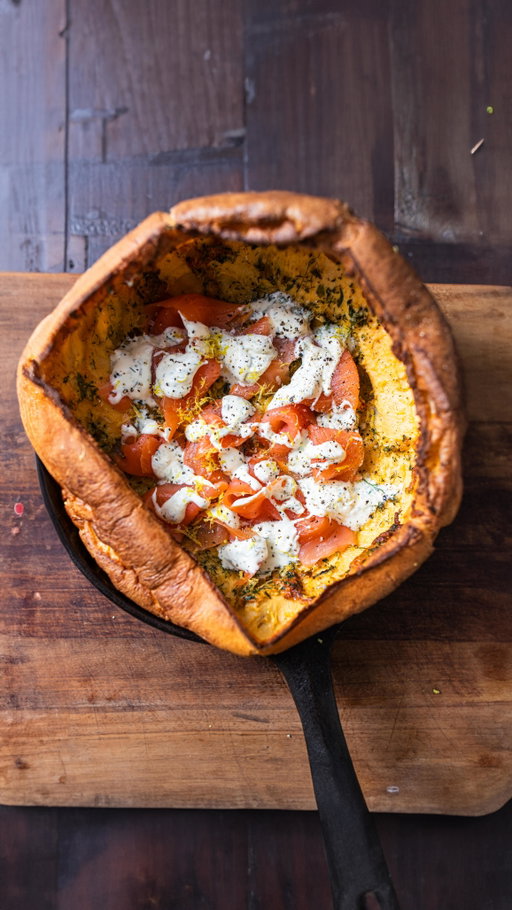
It’s that time of year again! The Smoked Salmon Savoury Dutch Baby.

Great for Christmas morning, Boxing Day or New Year’s Day.

4 eggs
180g milk
90g plain flour
1/4 tsp salt
40g butter
20g parmesan cheese
15g fresh parsley, dill & tarragon
1 garlic clove

To serve

200g smoked salmon
50g crème fraÎche
2 tsp fresh dill
1 tbsp lemon juice
1 tsp lemon zest
1/4 tsp salt

Preheat your oven to 230°C (445°F) and place your cast iron pan on the middle shelf. Make sure there’s enough space above it for your Dutch Baby to expand.
In a stick blender jug add the eggs, flour, milk & salt. Blend until smooth and aerated. This can also be done in a stand up blender.
Leave the mixture to stand whilst the oven comes up to temperature. The closer the mix is to room temp, the better rise you’ll get in the finished product.
Grate the parmesan, chop the herbs fine and mince the garlic. Transfer to a bowl. I like to add a pinch of salt to this mixture also.
When you’re ready to go, remove the pan from the oven and add the butter. Let it bubble and melt down completely. Then pour your batter mix into the pan.
Scatter the cheese and herb mix over the top and return to the oven for 15 to 20 minutes. Do not open the oven during this time.
To serve

In a bowl mix the crème fraÎche, chopped dill, lemon juice, lemon zest and salt.
Arrange the smoked salmon in the bottom of the Dutch Baby and spoon over the dill crème fraÎche.

A few notes:

- Get the batter to room temperature before cooking to get a good rise.
- That is an obscene amount of butter :) You don’t really *need* that much (the recipe on my site is correct) but it’s only Christmas once!
- Yes, it’s one pan because I didn’t include the blender jug.
- Isn’t this just a huge Yorkshire pudding? Call it whatever makes you happy. 
- What’s Dutch about it? Nothing. The name comes from an American misunderstanding of ‘Deutsche’ because it’s based on a German pancake.
- The pan doesn’t have to be cast iron, just one that can go in the oven. That includes similar sized and shape cake tins.
- How does it rise without yeast? Steam!
405K
10.0K
69
6mo ago
eatlikeanadult
It’s that time of year again! The Smoked Salmon Savoury Dutch Baby. Great for Christmas morning, Boxing Day or New Year’s Day. 4 eggs 180g milk 90g plain flour 1/4 tsp salt 40g butter 20g parmesan cheese 15g fresh parsley, dill & tarragon 1 garlic clove To serve 200g smoked salmon 50g crème fraîche 2 tsp fresh dill 1 tbsp lemon juice 1 tsp lemon zest 1/4 tsp salt Preheat your oven to 230°C (445°F) and place your cast iron pan on the middle shelf. Make sure there’s enough space above it for your Dutch Baby to expand. In a stick blender jug add the eggs, flour, milk & salt. Blend until smooth and aerated. This can also be done in a stand up blender. Leave the mixture to stand whilst the oven comes up to temperature. The closer the mix is to room temp, the better rise you’ll get in the finished product. Grate the parmesan, chop the herbs fine and mince the garlic. Transfer to a bowl. I like to add a pinch of salt to this mixture also. When you’re ready to go, remove the pan from the oven and add the butter. Let it bubble and melt down completely. Then pour your batter mix into the pan. Scatter the cheese and herb mix over the top and return to the oven for 15 to 20 minutes. Do not open the oven during this time. To serve In a bowl mix the crème fraîche, chopped dill, lemon juice, lemon zest and salt. Arrange the smoked salmon in the bottom of the Dutch Baby and spoon over the dill crème fraîche. A few notes: - Get the batter to room temperature before cooking to get a good rise. - That is an obscene amount of butter :) You don’t really *need* that much (the recipe on my site is correct) but it’s only Christmas once! - Yes, it’s one pan because I didn’t include the blender jug. - Isn’t this just a huge Yorkshire pudding? Call it whatever makes you happy. - What’s Dutch about it? Nothing. The name comes from an American misunderstanding of ‘Deutsche’ because it’s based on a German pancake. - The pan doesn’t have to be cast iron, just one that can go in the oven. That includes similar sized and shape cake tins. - How does it rise without yeast? Steam!
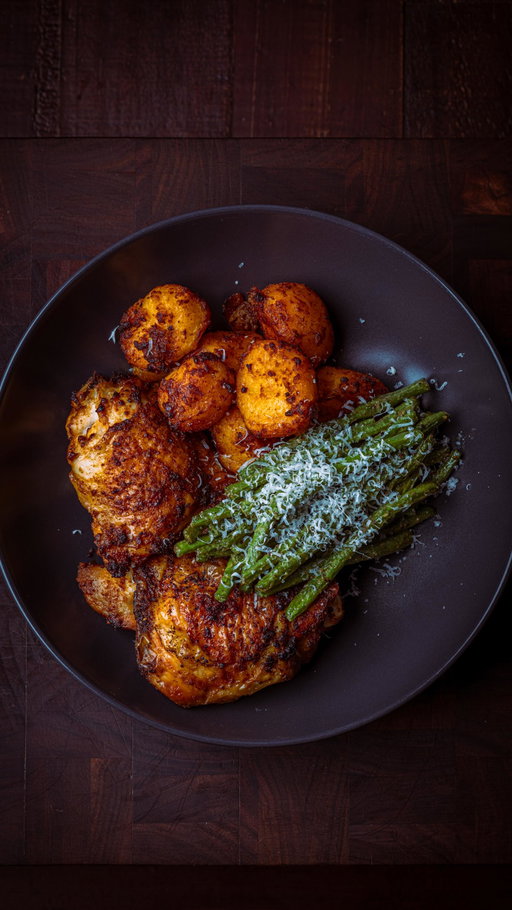
Air fryer vs oven. Same meal, same ingredients. Which one wins? 🍗

I cooked chicken thighs, crispy potatoes and green beans both ways using the @cosori.uk TurboTower Pro Smart and a regular oven.

The results might surprise you.

This air fryer is so great for creating a full meal in a fraction of the time it takes in the oven. And you can do it without compromising on flavour!

Drop your tips in the comments

🍗 AIR FRYER CHICKEN THIGHS

4 bone-in, skin-on chicken thighs
3 tbsp olive oil
1 tsp lemon juice
1 tsp mustard powder
½ tsp garlic powder
2 tsp smoked paprika
1 tsp onion powder
½ tsp salt
½ tsp black pepper

1. Pat the chicken skin dry
2. Mix all other ingredients and coat the chicken
3. Place skin side down and air fry at 193°C for 12 mins
4. Flip and cook for another 12 mins

🍗 AIR FRYER CRISPY POTATOES

500g potatoes
2 tbsp olive oil
1 clove garlic, grated
2 tsp salt

1. Cut into chunks and parboil for 10 mins
2. Drain, add remaining ingredients and toss well
3. Air fry in a single layer at 193°C for 10 mins
4. Shake and return at 204°C for another 10 mins

🍗 AIR FRYER GREEN BEANS

200g green beans
1 tbsp olive oil or Dijon mustard
1 tsp garlic powder
1 tsp onion powder
½ tsp salt

1. Toss everything together
2. Air fry at 188°C for 8 mins, tossing halfway
3. Optional: grate over some parmesan to serve

#cosori #turbotower #turbotowerprosmart 

AD
376K
3.00K
99
2mo ago
eatlikeanadult
Air fryer vs oven. Same meal, same ingredients. Which one wins? 🍗 I cooked chicken thighs, crispy potatoes and green beans both ways using the @cosori.uk TurboTower Pro Smart and a regular oven. The results might surprise you. This air fryer is so great for creating a full meal in a fraction of the time it takes in the oven. And you can do it without compromising on flavour! Drop your tips in the comments 🍗 AIR FRYER CHICKEN THIGHS 4 bone-in, skin-on chicken thighs 3 tbsp olive oil 1 tsp lemon juice 1 tsp mustard powder ½ tsp garlic powder 2 tsp smoked paprika 1 tsp onion powder ½ tsp salt ½ tsp black pepper 1. Pat the chicken skin dry 2. Mix all other ingredients and coat the chicken 3. Place skin side down and air fry at 193°C for 12 mins 4. Flip and cook for another 12 mins 🍗 AIR FRYER CRISPY POTATOES 500g potatoes 2 tbsp olive oil 1 clove garlic, grated 2 tsp salt 1. Cut into chunks and parboil for 10 mins 2. Drain, add remaining ingredients and toss well 3. Air fry in a single layer at 193°C for 10 mins 4. Shake and return at 204°C for another 10 mins 🍗 AIR FRYER GREEN BEANS 200g green beans 1 tbsp olive oil or Dijon mustard 1 tsp garlic powder 1 tsp onion powder ½ tsp salt 1. Toss everything together 2. Air fry at 188°C for 8 mins, tossing halfway 3. Optional: grate over some parmesan to serve #cosori #turbotower #turbotowerprosmart AD

Russell Clamp🍴Healthy Recipes (@eatlikeanadult) Instagram Stats & Analytics

Russell Clamp🍴Healthy Recipes (@eatlikeanadult) has 526K Instagram followers with a 2.77% engagement rate over the past 12 months. Across 33.0 posts, Russell Clamp🍴Healthy Recipes received 1.30M total likes and 47.5M impressions, averaging 39.5K likes per post. This page tracks Russell Clamp🍴Healthy Recipes's performance metrics, top content, and engagement trends — updated daily.

Russell Clamp🍴Healthy Recipes (@eatlikeanadult) Instagram Analytics FAQ

How many Instagram followers does Russell Clamp🍴Healthy Recipes have?+
Russell Clamp🍴Healthy Recipes (@eatlikeanadult) has 526K Instagram followers as of July 2026.
What is Russell Clamp🍴Healthy Recipes's Instagram engagement rate?+
Russell Clamp🍴Healthy Recipes's Instagram engagement rate is 2.77% over the last 12 months, based on 33.0 posts.
How many likes does Russell Clamp🍴Healthy Recipes get on Instagram?+
Russell Clamp🍴Healthy Recipes received 1.30M total likes across 33.0 posts in the last 12 months, averaging 39.5K likes per post.
How many Instagram impressions does Russell Clamp🍴Healthy Recipes get?+
Russell Clamp🍴Healthy Recipes's Instagram content generated 47.5M total impressions over the last 12 months.